

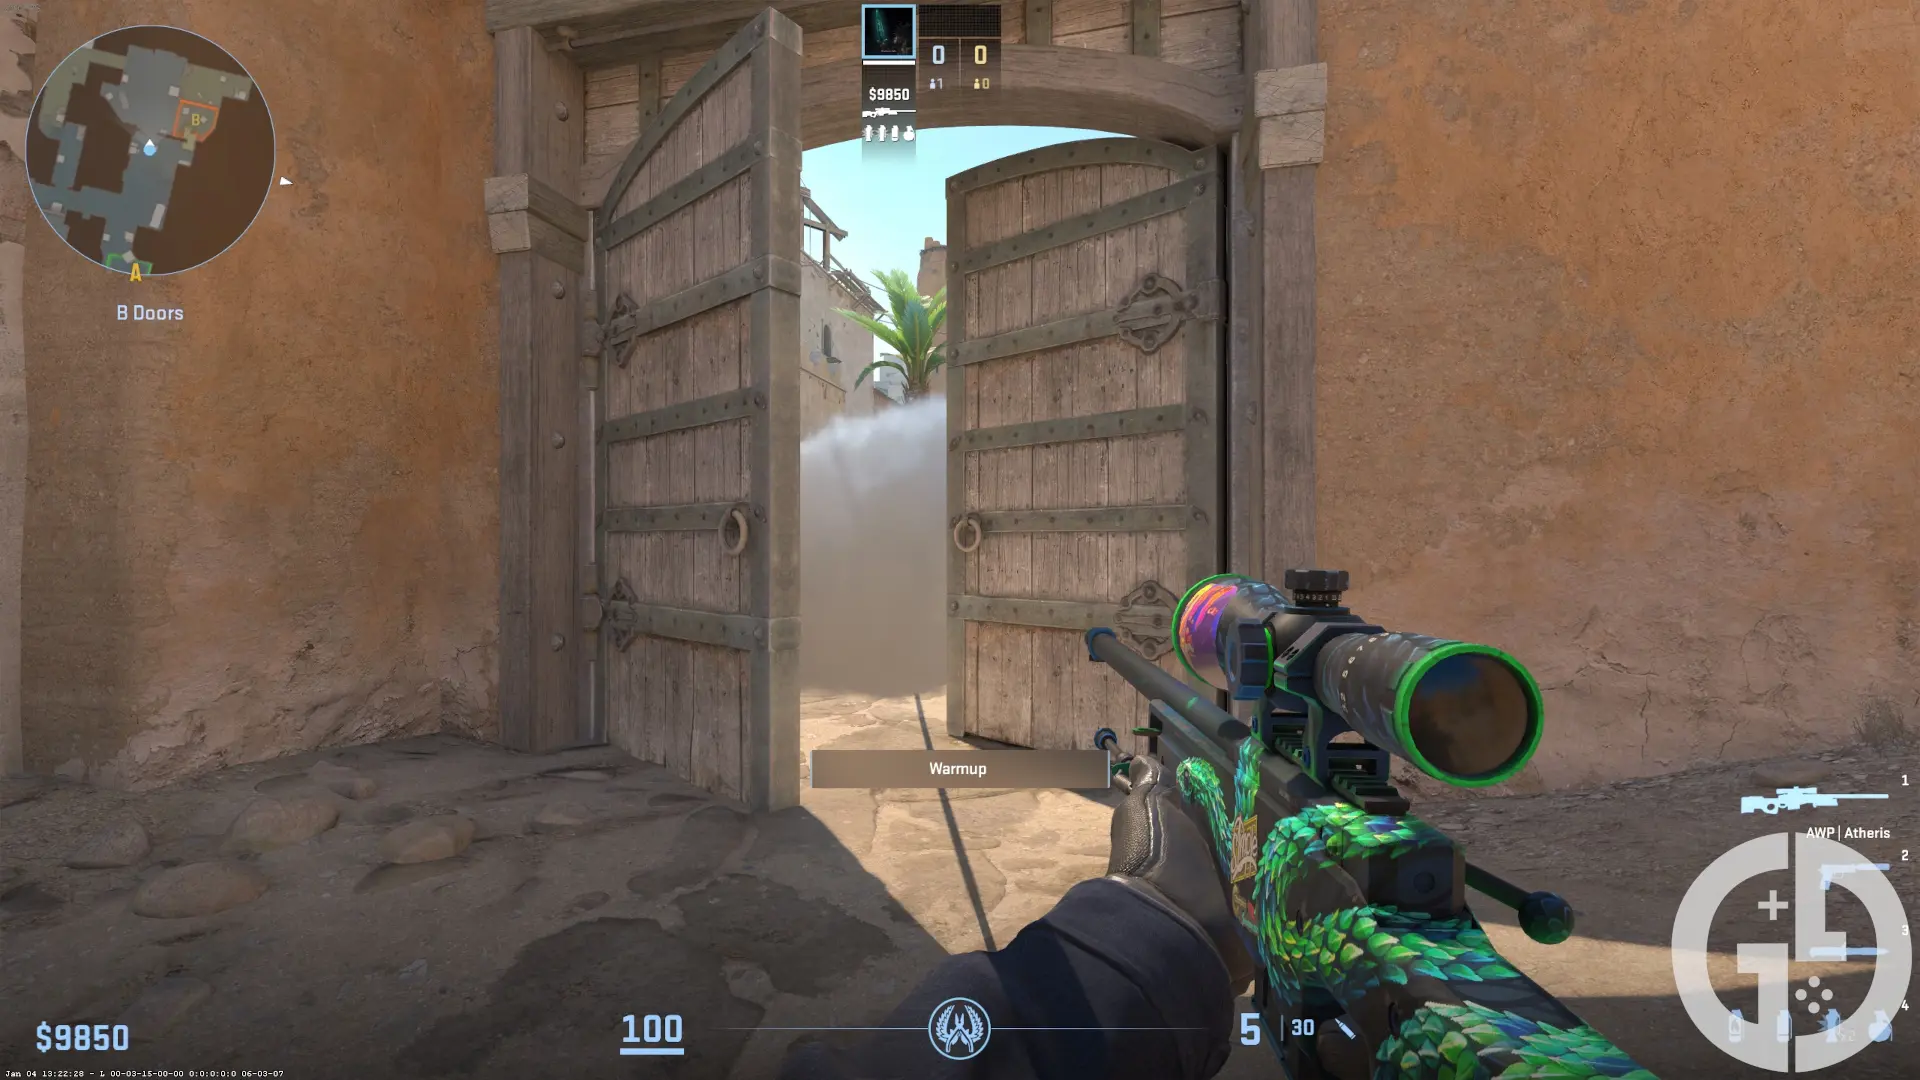
Best Dust2 smokes, flashes, molotov & grenade spots in CS2
Become a master of utility on Dust2 with these grenade lineups, showing you how to throw your smokes, flashes, and molotovs on the iconic desert-themed CS2 map.
This is part of the ‘Counter-Strike’ directory
Directory contents
-
Best Graphics Settings
-
Pro Crosshair Codes
-
Best Launch Options
-
Bob Settings
-
Change Brightness
-
Jumpthrow Bind
-
Left-Hand View
-
Stretched-Res
-
Hide UI
-
VALORANT Sensitivity
-
Show FPS
-
Crosshair Customisation
Dust2 is the most iconic map in Counter-Strike, and arguably one of the most recognisable maps in all of gaming, so having the best grenades memorised will help you dominate and show off on CS2's historic playground.
We'll go over the top smokes, flashes, and molotovs that you can throw to mess up your opposition and block off key sightlines, letting you take map control in-game and climb the ranks all the way to Global Elite.
Best smokes for Dust2 in CS2
X Box
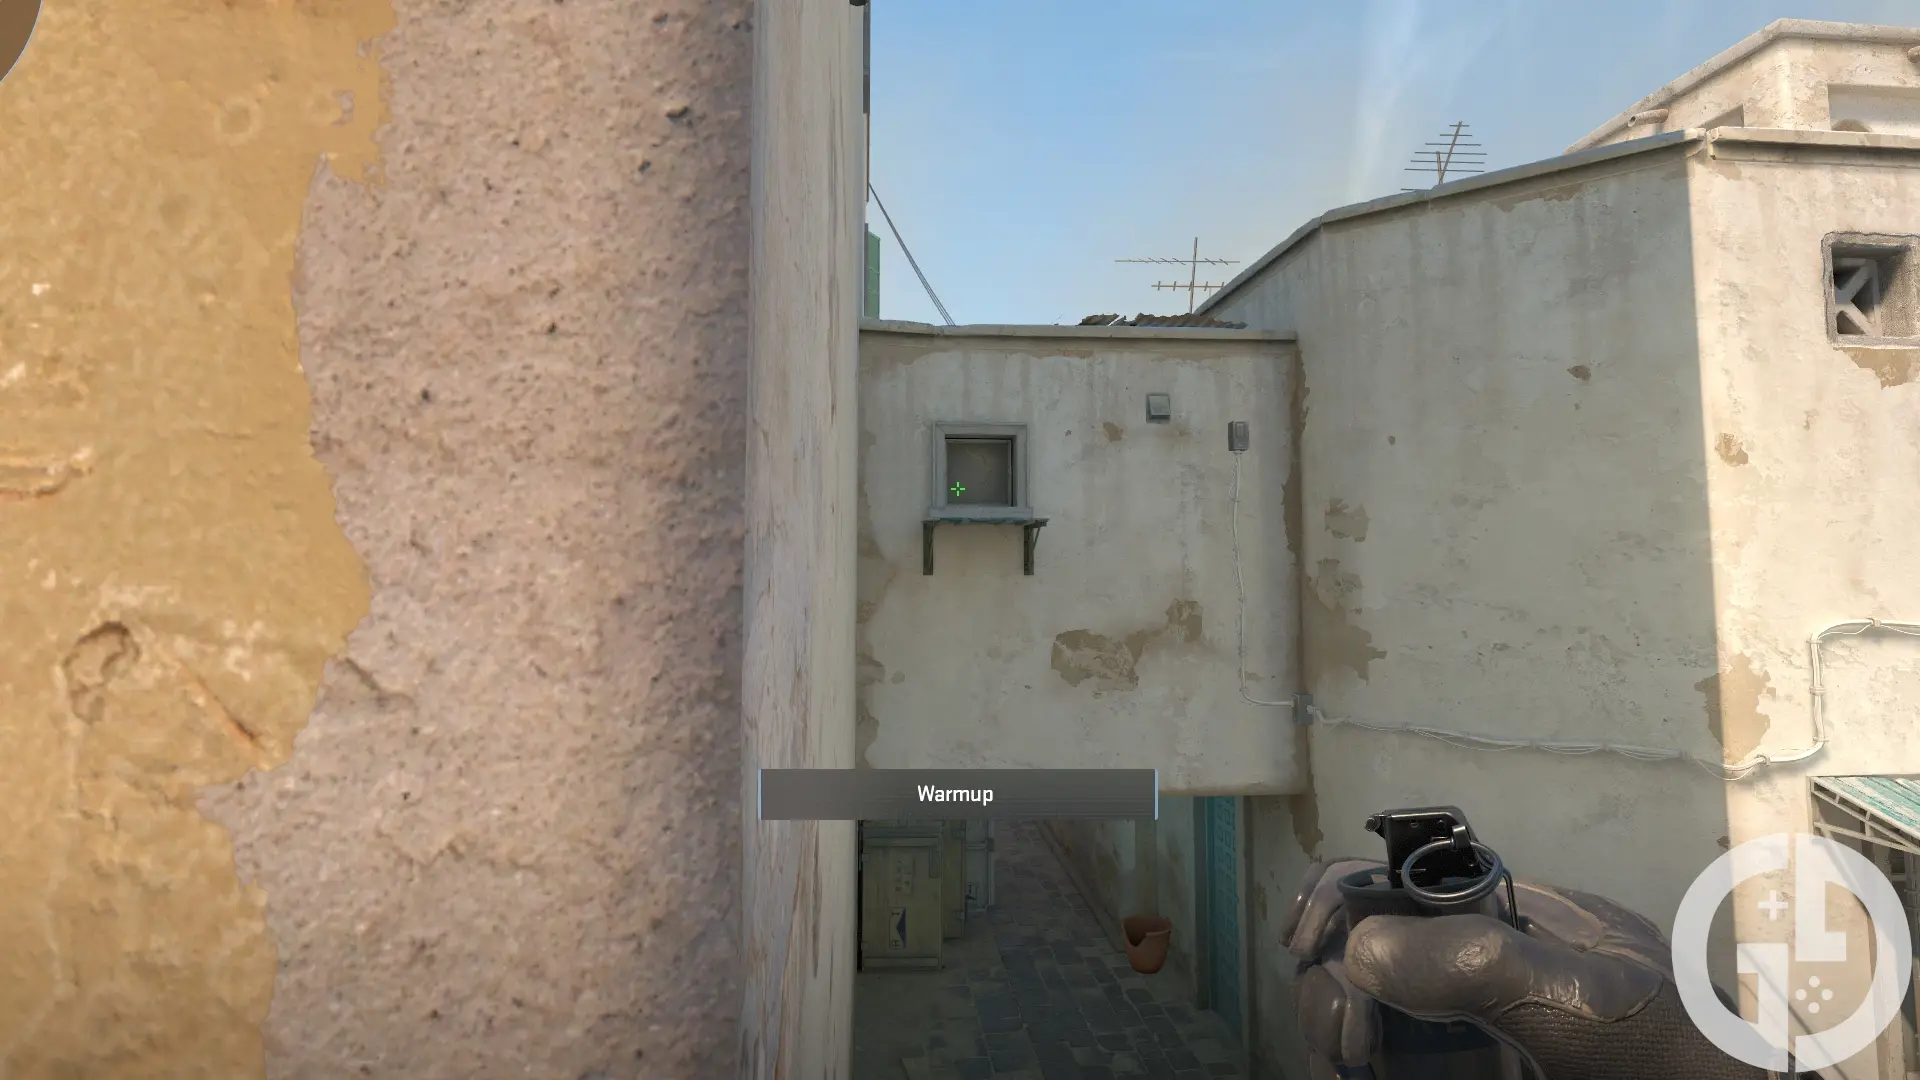
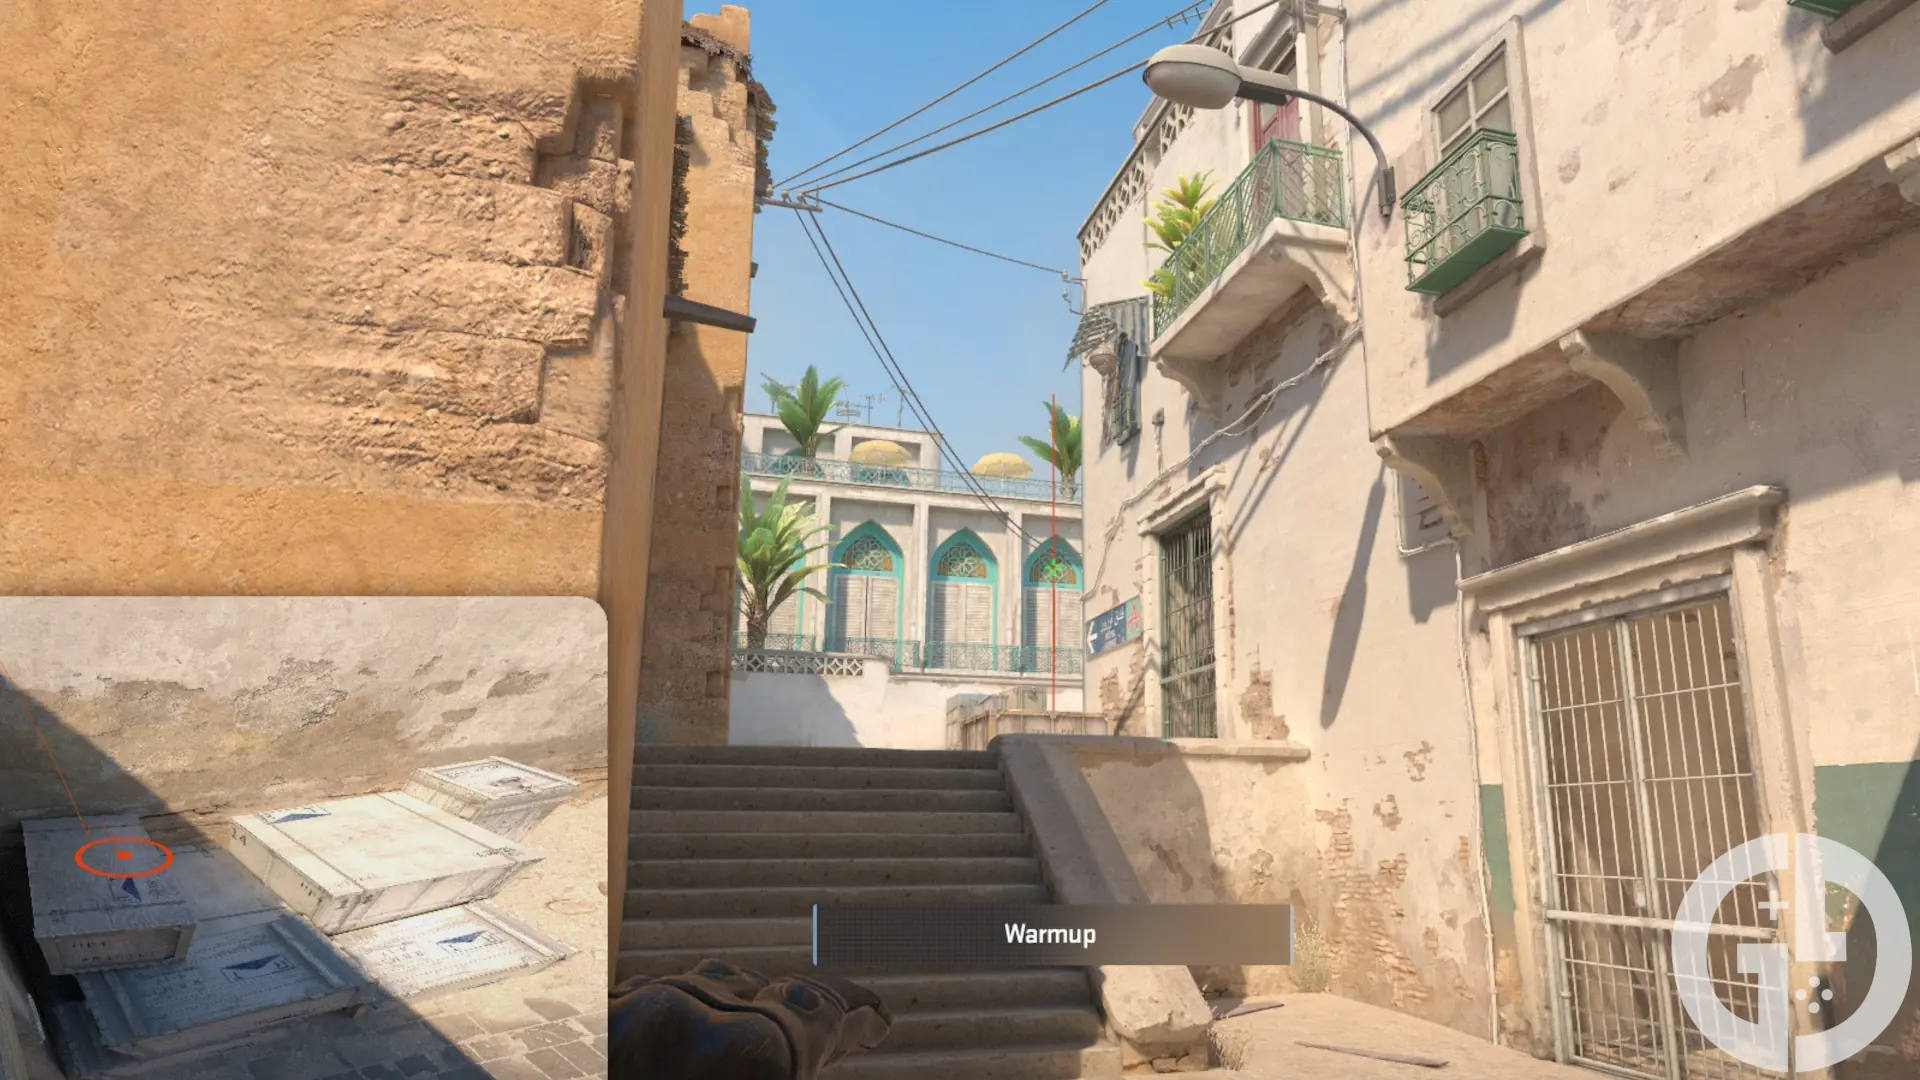
- From T Spawn, walk up to the wall that looks onto mid
- Aim your crosshair at the lower left side of the small window ahead of you
- Do a jump throw
Covering X Box with a smoke is perhaps the most important piece of utility that you can throw on Dust2, as it lets you move up and take T-side mid without being shot through doors.
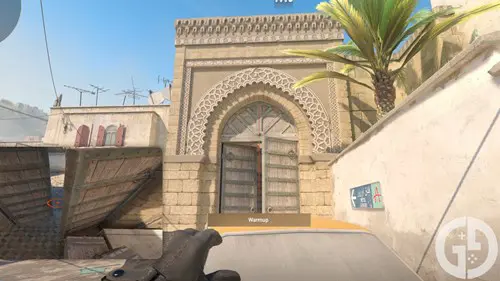
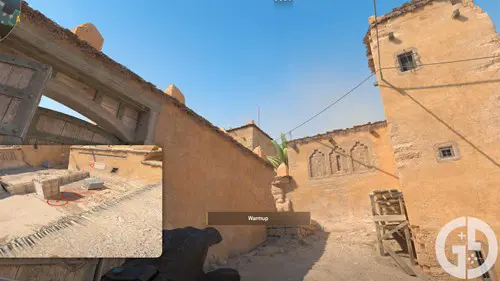
A Long Corner
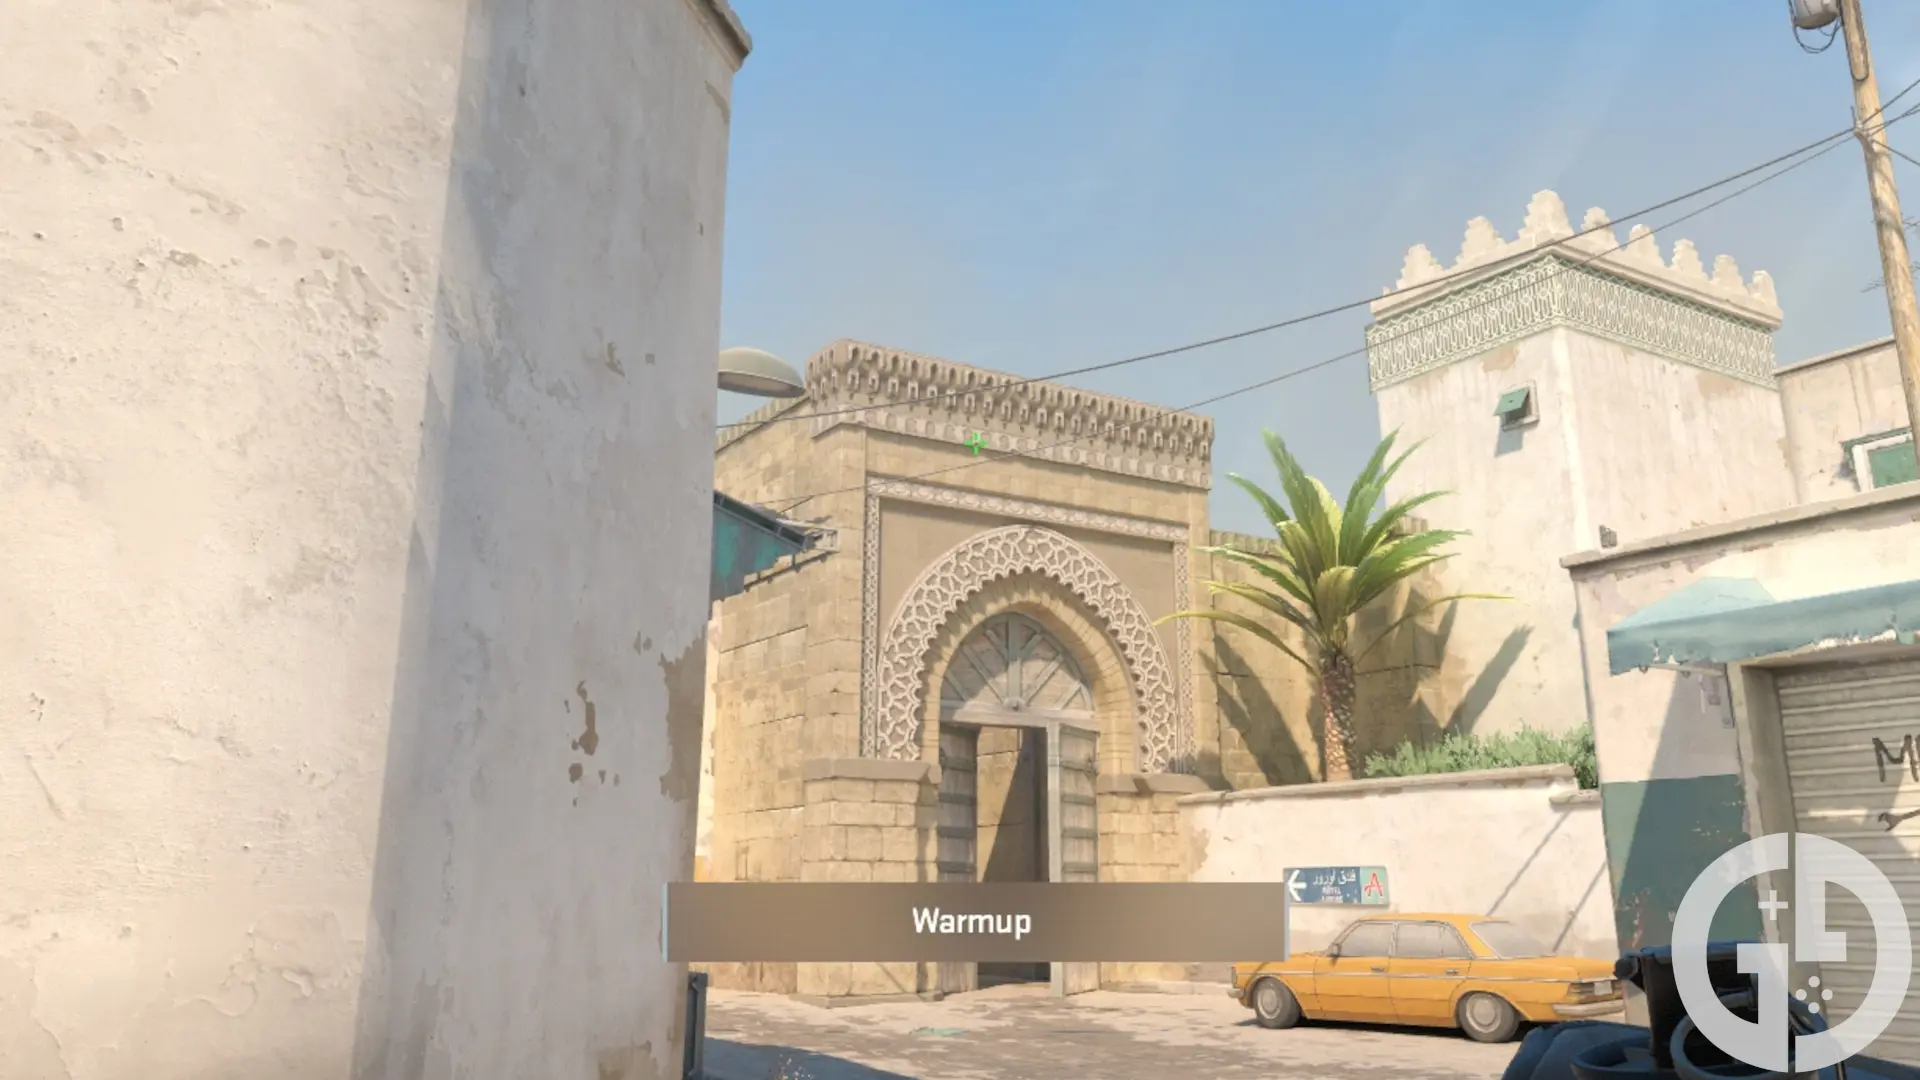
- Walk right from T Spawn until the end of the half-wall
- Stand just behind the half wall and aim at the first dark spot along the top of the door to A's building
- Do a jump throw
This is incredibly useful as it lets you push out from the door onto A Long without fear, or catch an enemy that is being far too aggressive for their own good.
A Cross
- Stand just behind A Long corner and find the satellite on the right above the tooth graffiti
- Aim just to the left of that satellite, between the two on top of the building
- Do a run throw
Another vital smoke for taking control of A Site on T Side is covering the cross. This lets you move across from Long onto the site without being shot from Catwalk or CT Lower/Spawn.
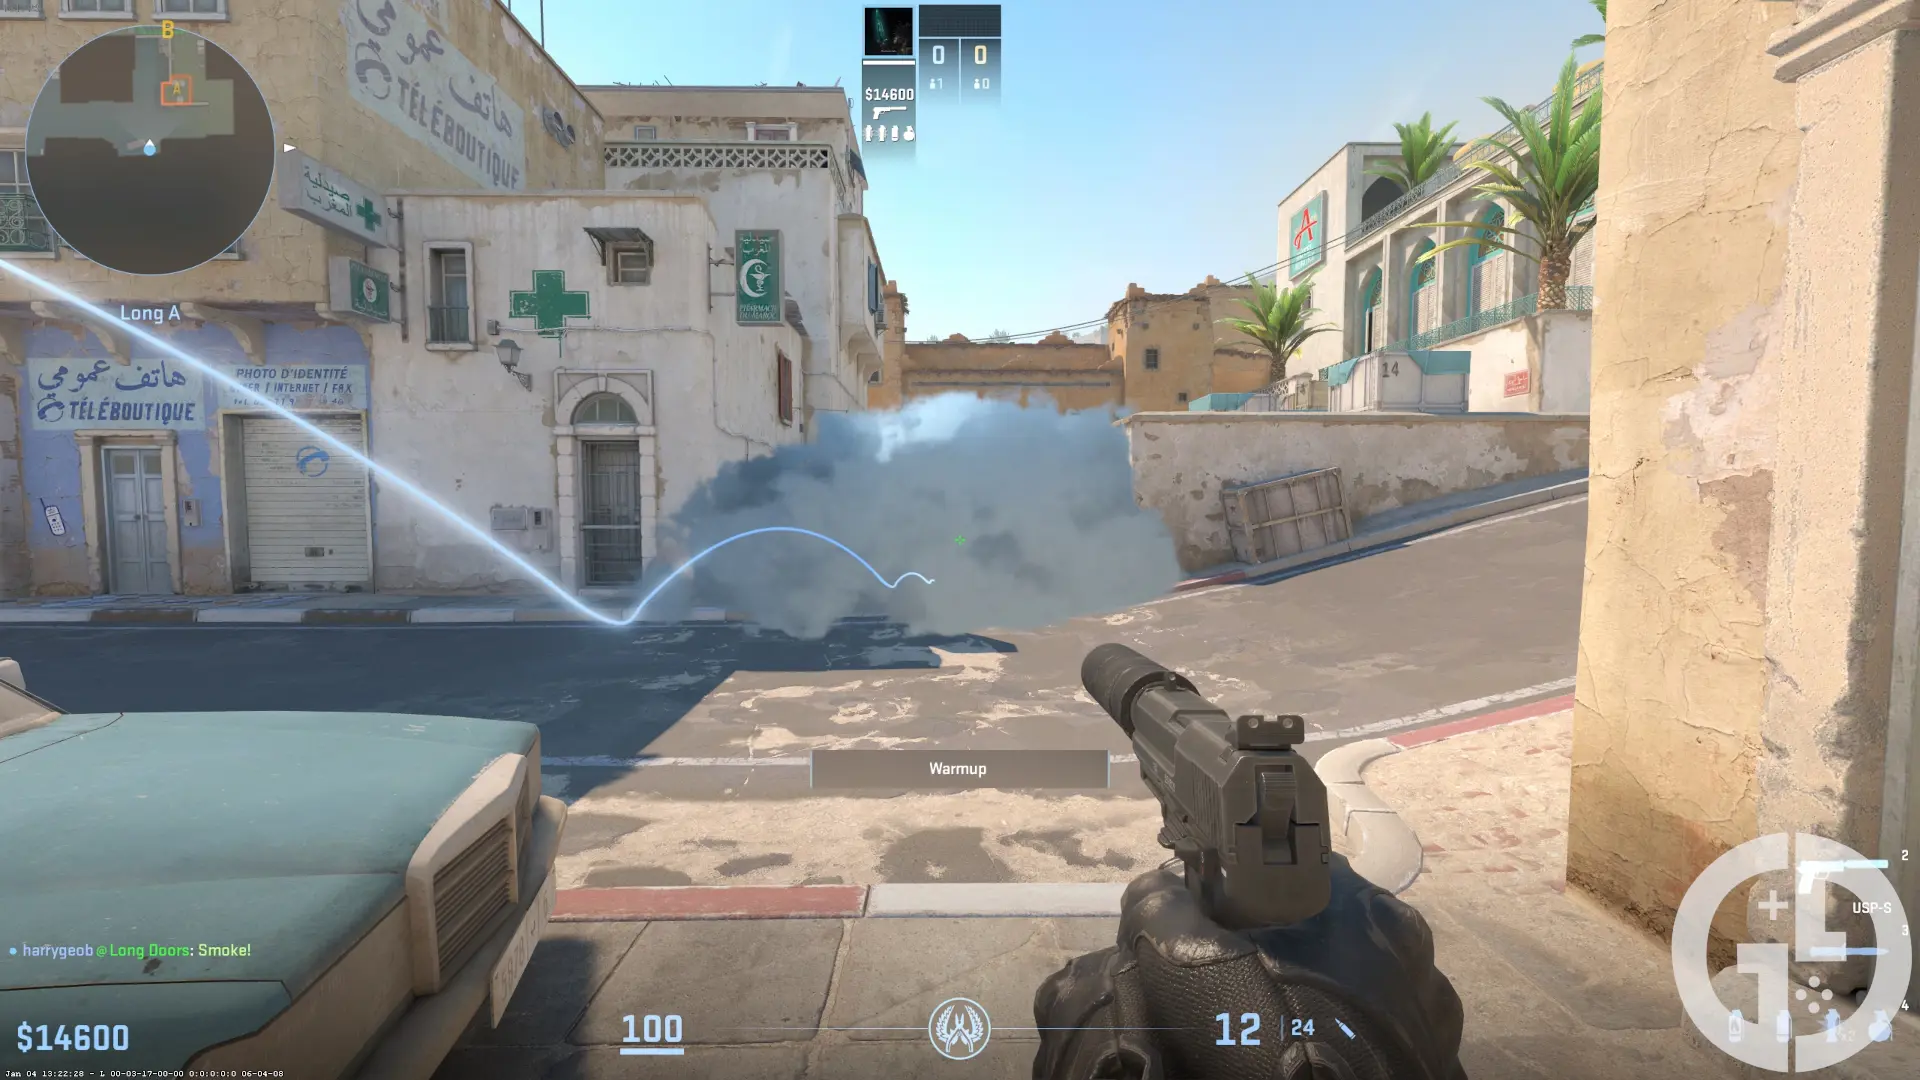
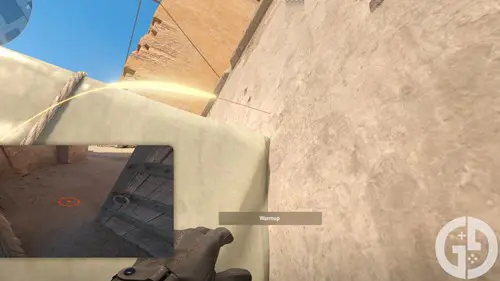
A CT Lower
- Just ahead of the doors onto A Long from T Spawn, there should be a stone lattice on the right before the skip
- Stand so that you're facing the middle of the lattice, then look to the right and up
- Aim just above the small part of the wall that juts out
- Do a standard throw
This is a way to cover the sightline from CT Spawn onto A Site/A Long from the start of A Long, which is useful if you've left a player behind to cover a CT flank.
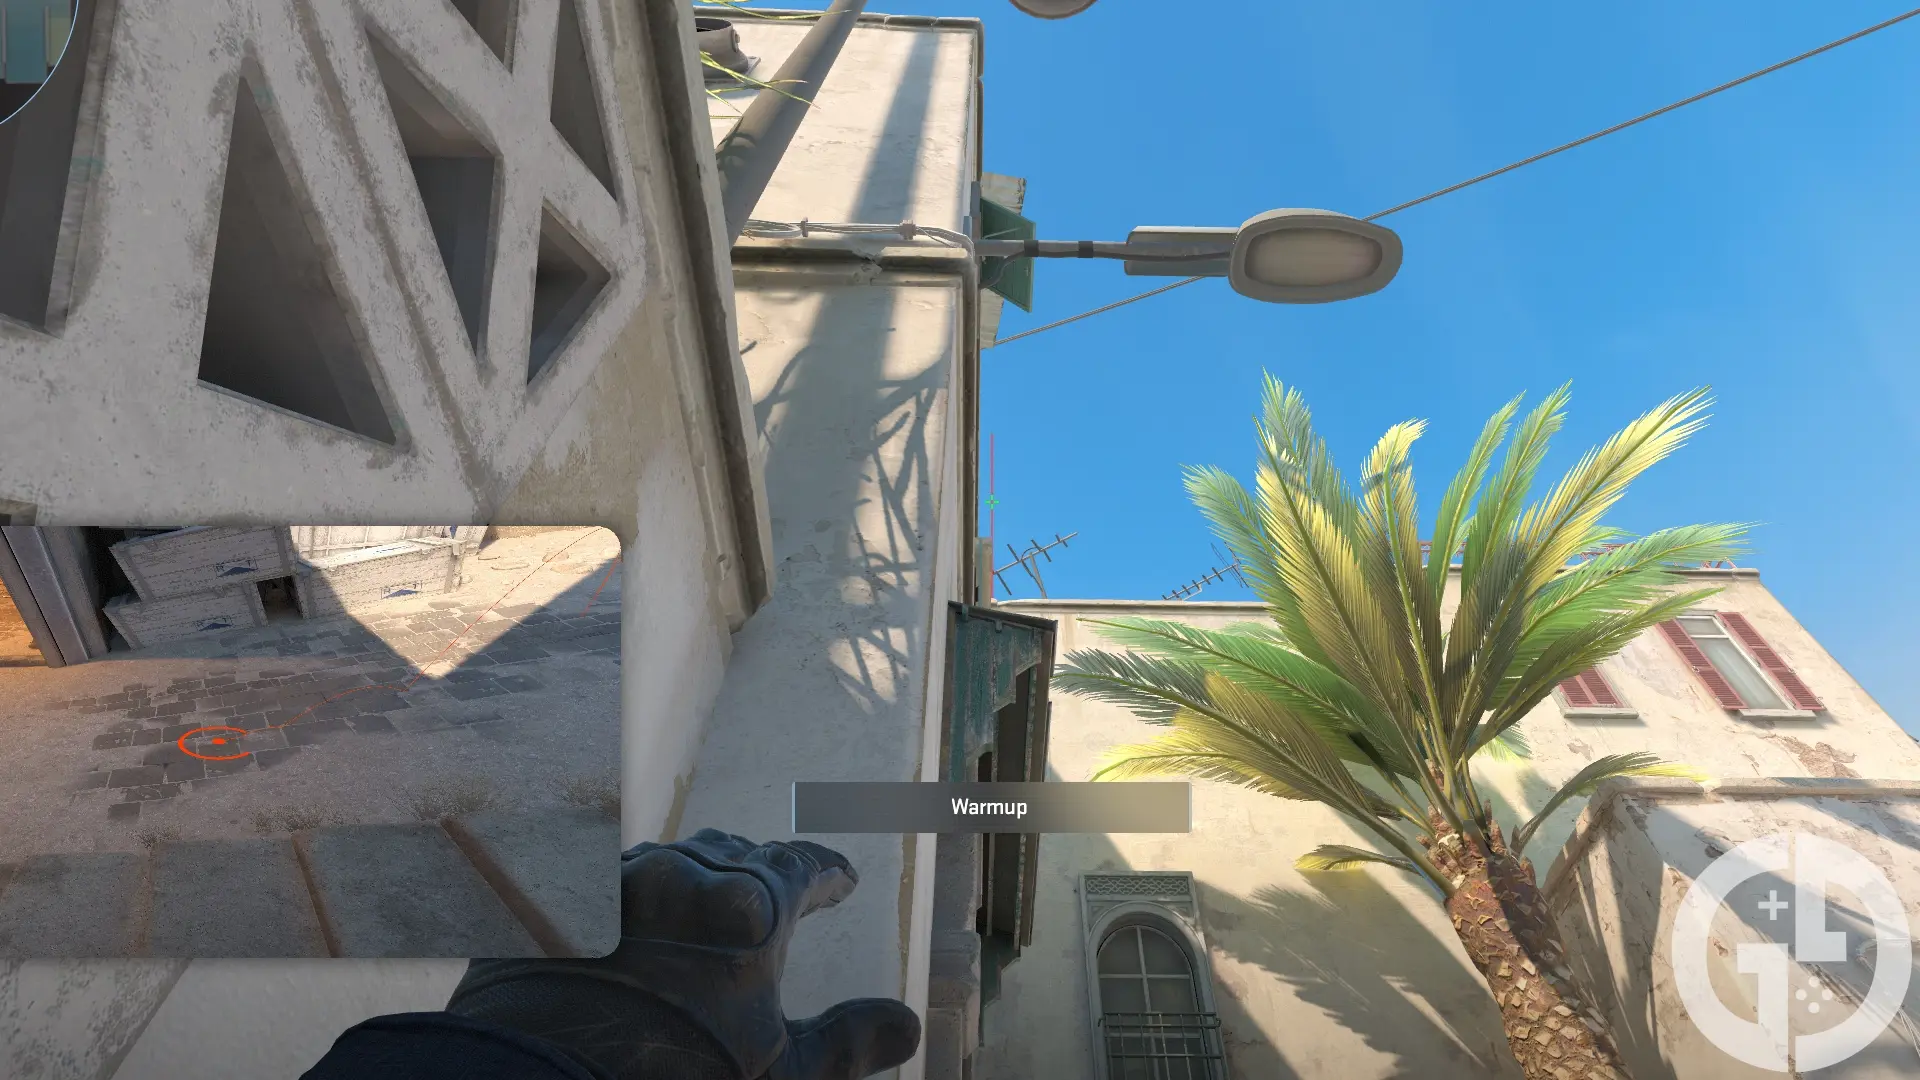
Alternatively, there's also a smoke that covers the same area from Catwalk if you only have one or two players pushing from Long and the rest executing from Catwalk:
- Stand in the middle of the metal gate at the start of Catwalk and face the opposite wall
- Line your crosshair up to the end of the piece of wood that's sticking out of the wall
- Do a standard throw
Catwalk onto A Site
This is a two-part execution that blocks the view of anyone holding Car onto Catwalk, so you'll need two people to pull this off - or at least someone to drop you an extra smoke.
- At the start of Catwalk opposite the short stairs, there should be a jutted wall - position yourself in the corner that connects to the other part of the wall
- You should see three flower shapes embedded in the wall on A Site
- Aim in the centre of the furthest right (3rd) flower
- Do a standard throw
Then for the second part:

- Position yourself in the middle of the metal gate at the start of Catwalk
- Aim at the dark spot above the top left corner of the window
- Do a standard throw
You'll want to ensure that the first part is done first if you're doing this solo, as the second smoke will block your vision of the flower and leave you unable to line it up.
Mid to B split
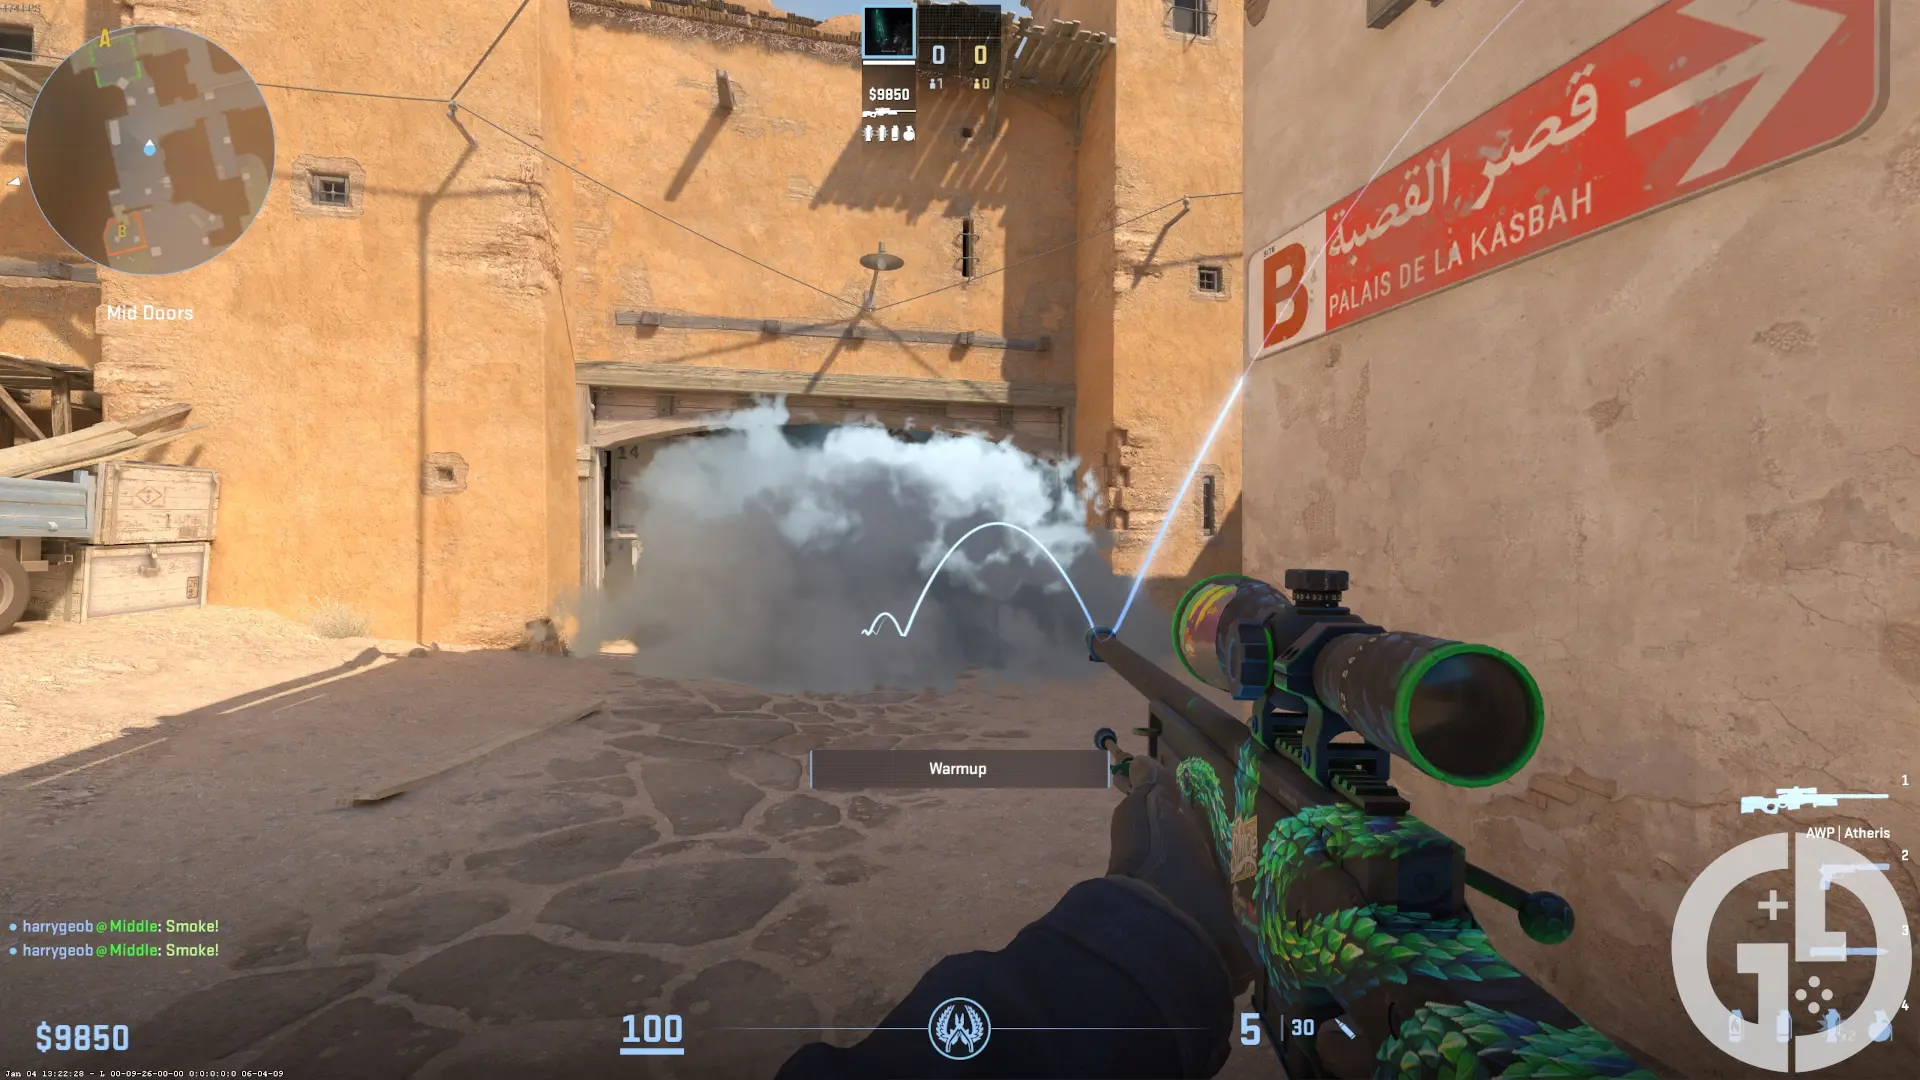
- Hug the back right of X Box on the T-side
- Throw a smoke at the top dark spot on the left side of the doors
- Do a standard throw
This will cover the entire width of the Mid side of CT Spawn, letting you push through Mid Doors and up onto B Site. Players will still be able to see through a gap at the top onto B Window though, but CS Tactics thankfully discovered that throwing a second smoke in the same spot expands into the top, covering any angles.
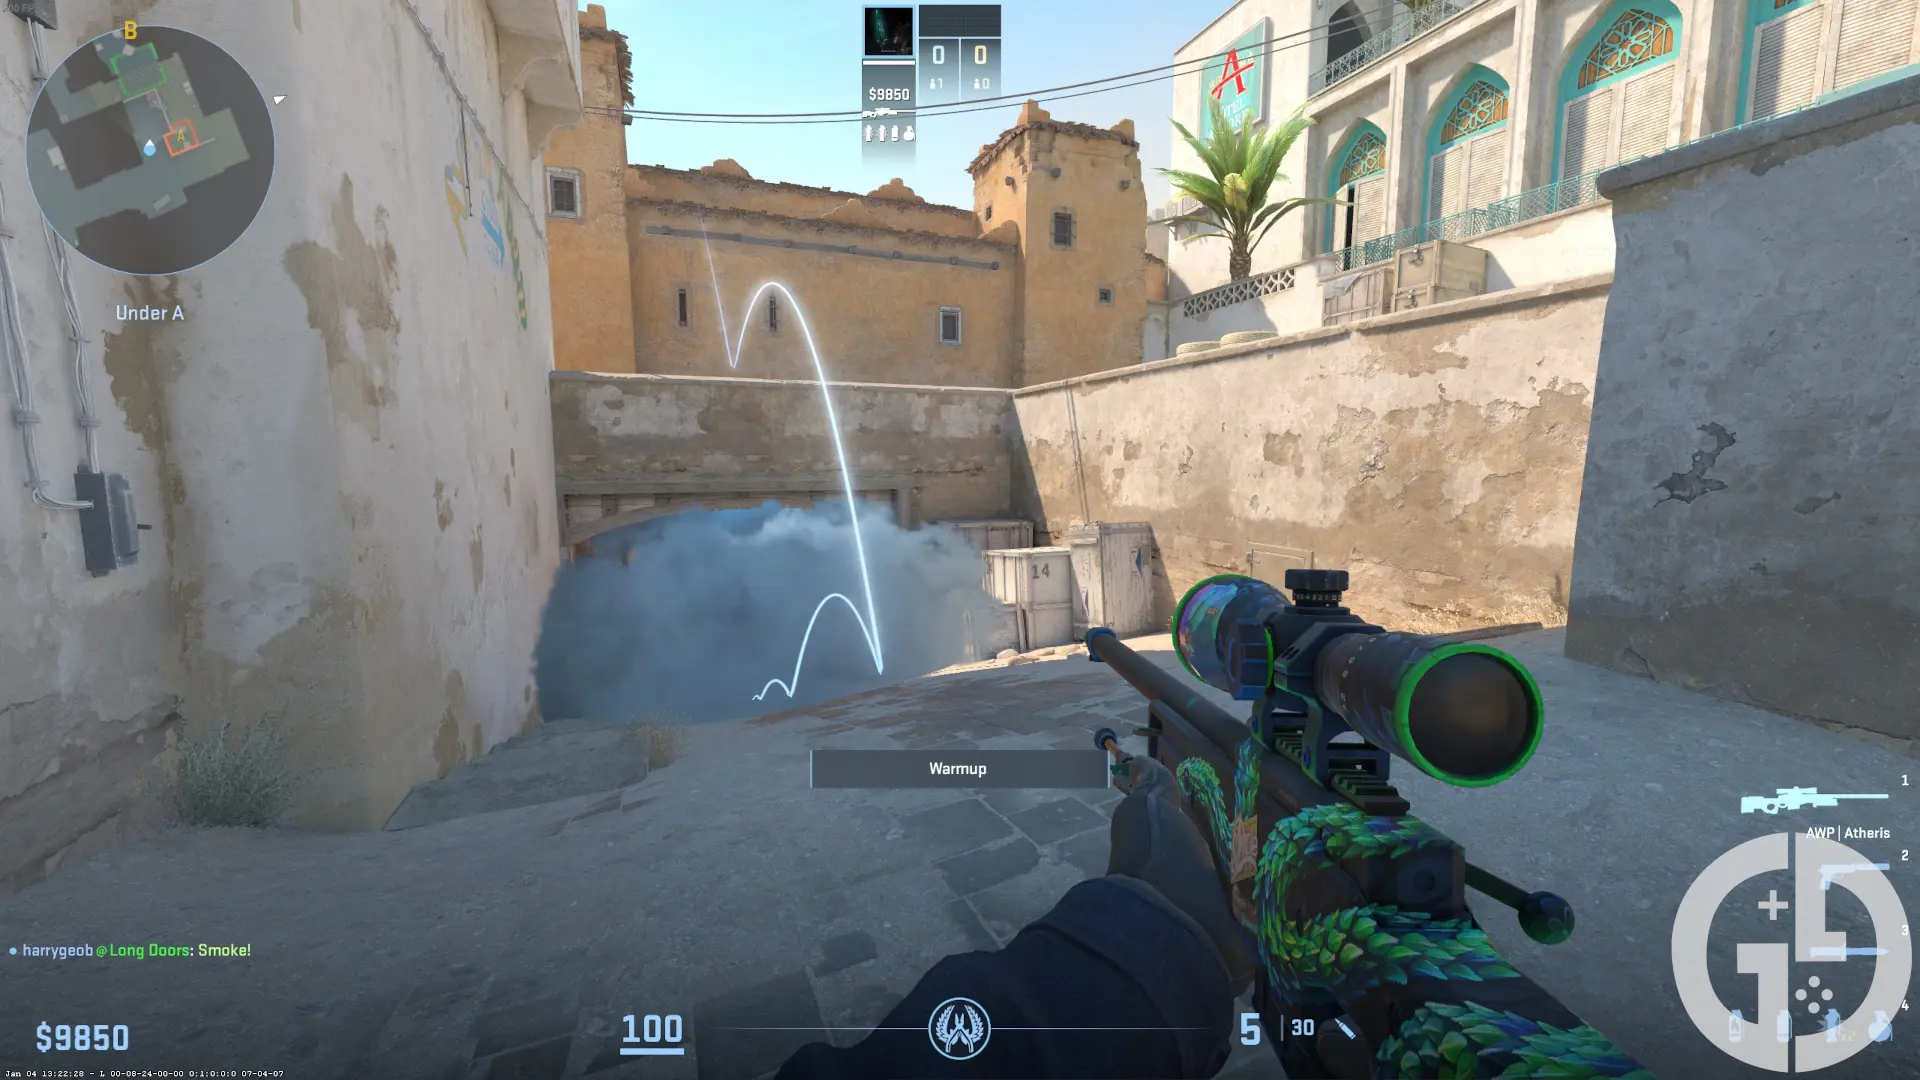
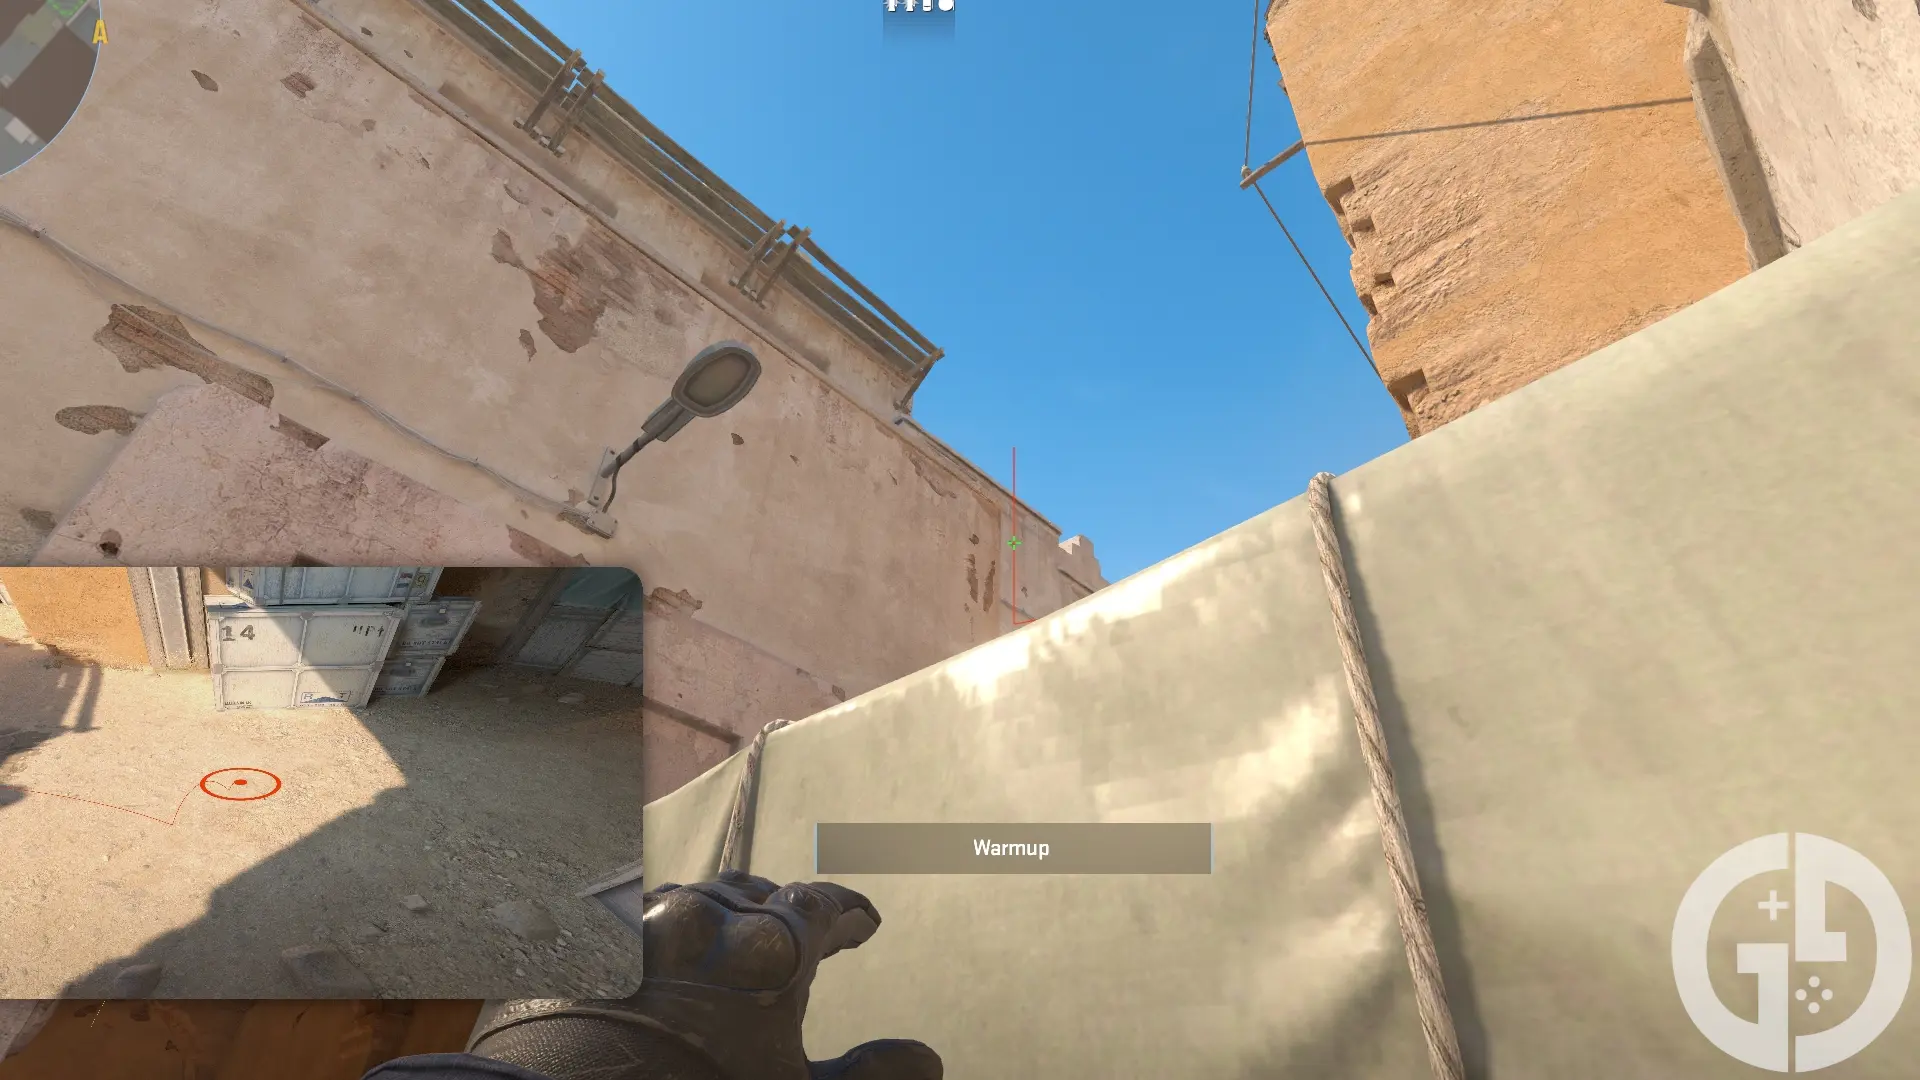
T Side B Site Window

- Stand on top of the bush to the right of the doors into Tunnels from T Spawn
- Aim at the upper dot to the right of the square hole
- Do a jump throw
This covers the window and extends down below to catch any CT who might be watching from that area.
Tunnels to B Site Door
- Stand behind the box in Upper Tunnels just before the walkway into B Site
- Aim directly up and just above the bottom right of the open section in the bottom right
- Do a standard throw
This is an excellent pairing with the B Window smoke just before, as it cuts off any CT from Mid onto B with ease.
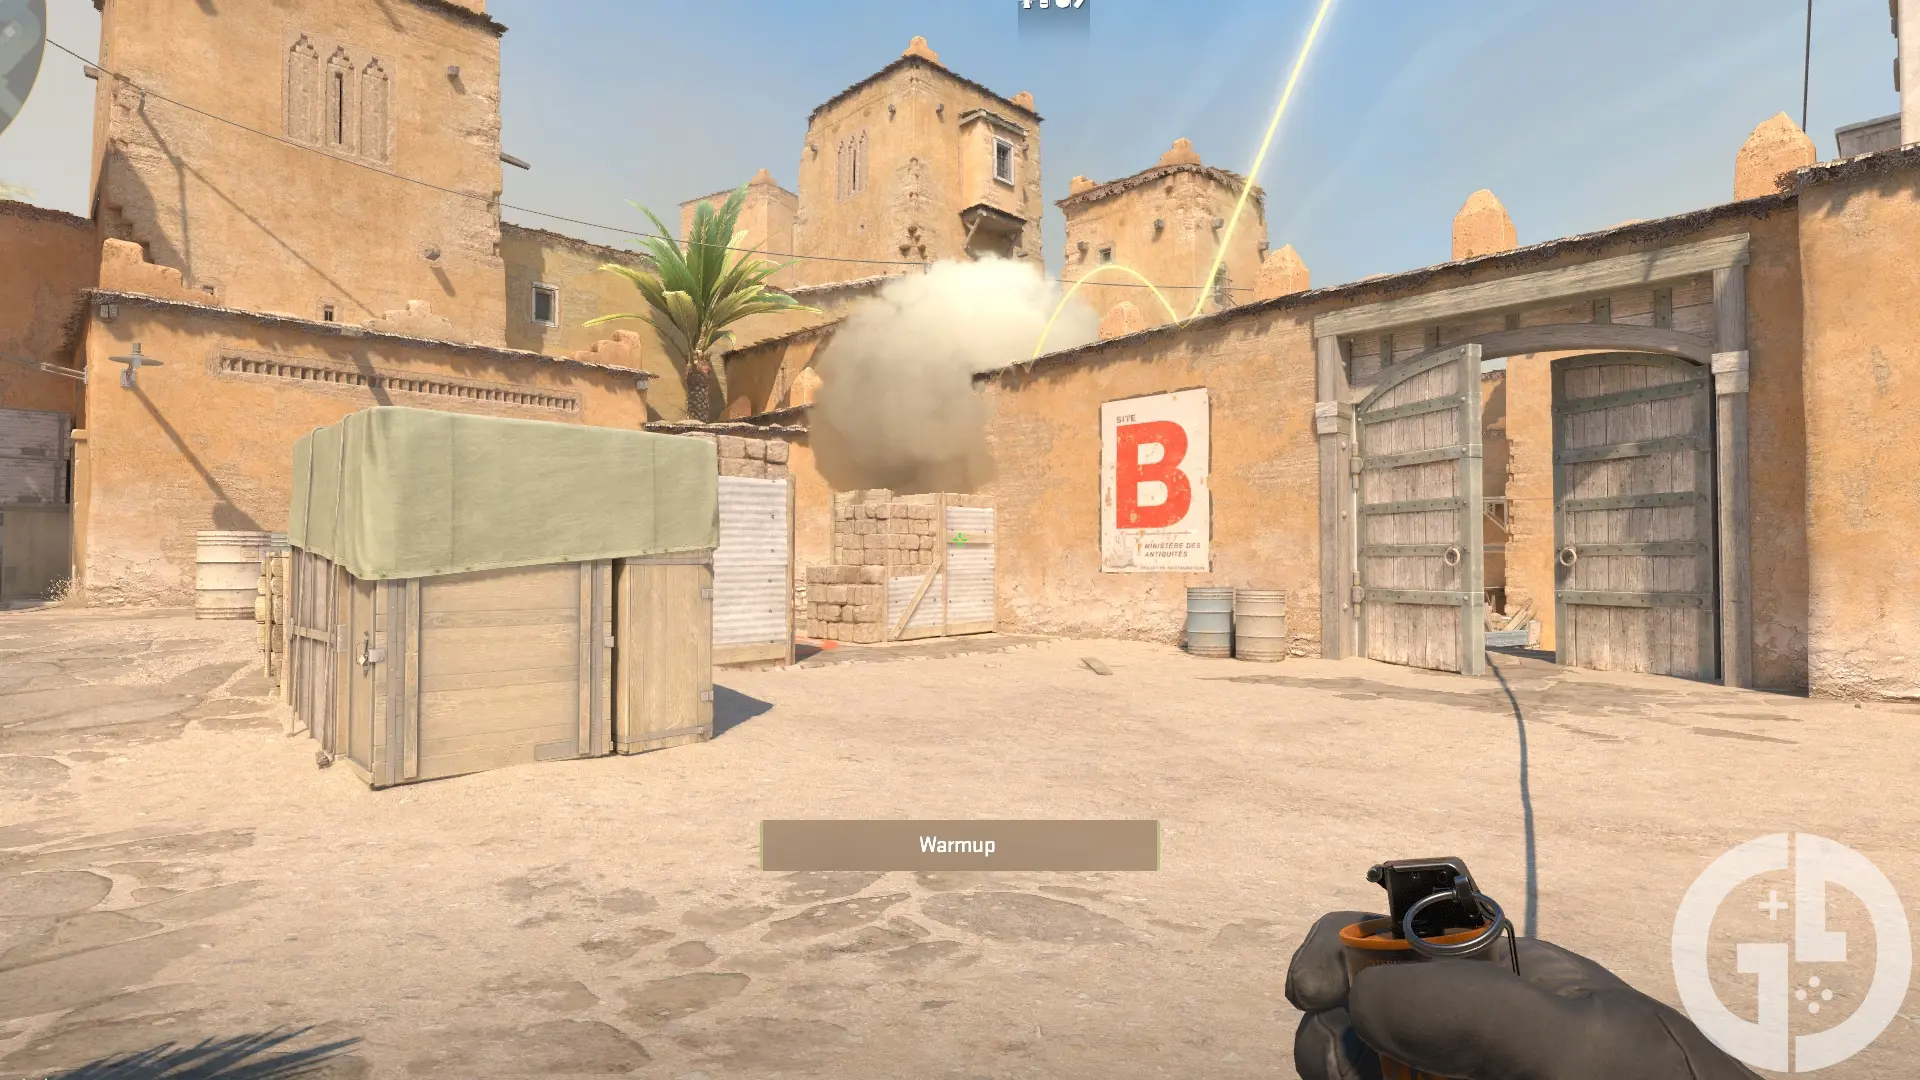
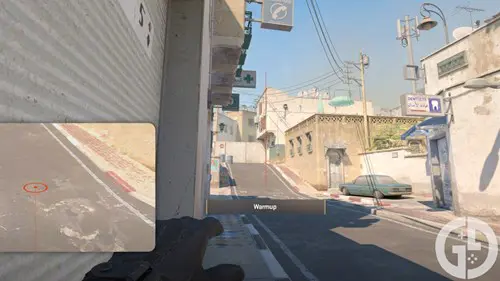
CT Spawn Mid Doors
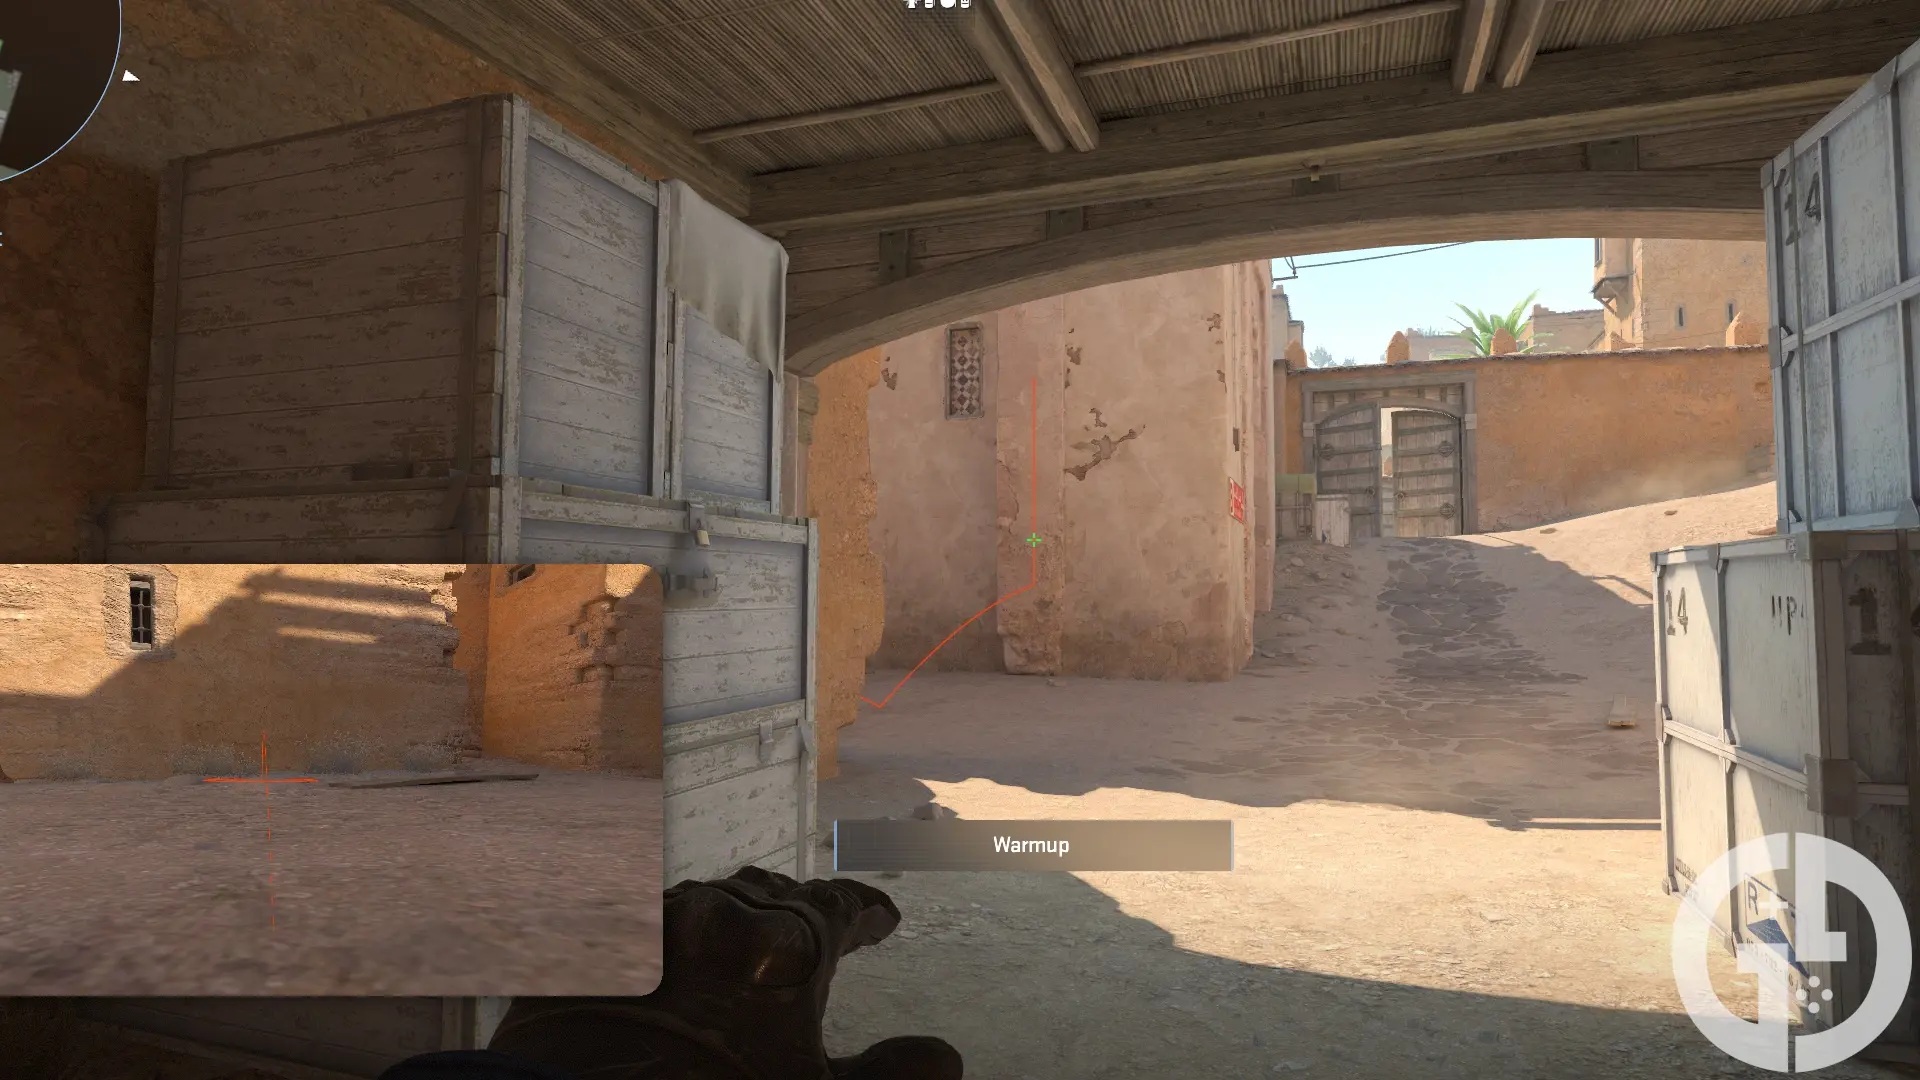
- Run towards Mid from CT Spawn
- Run throw onto the pillar that juts out from the wall
This is a super simple and classic smoke to let CTs cross over from Spawn onto B Site. While it isn't as used any more due to the angle from T Spawn being blocked off, it is still helpful to know if you need to cross late round.
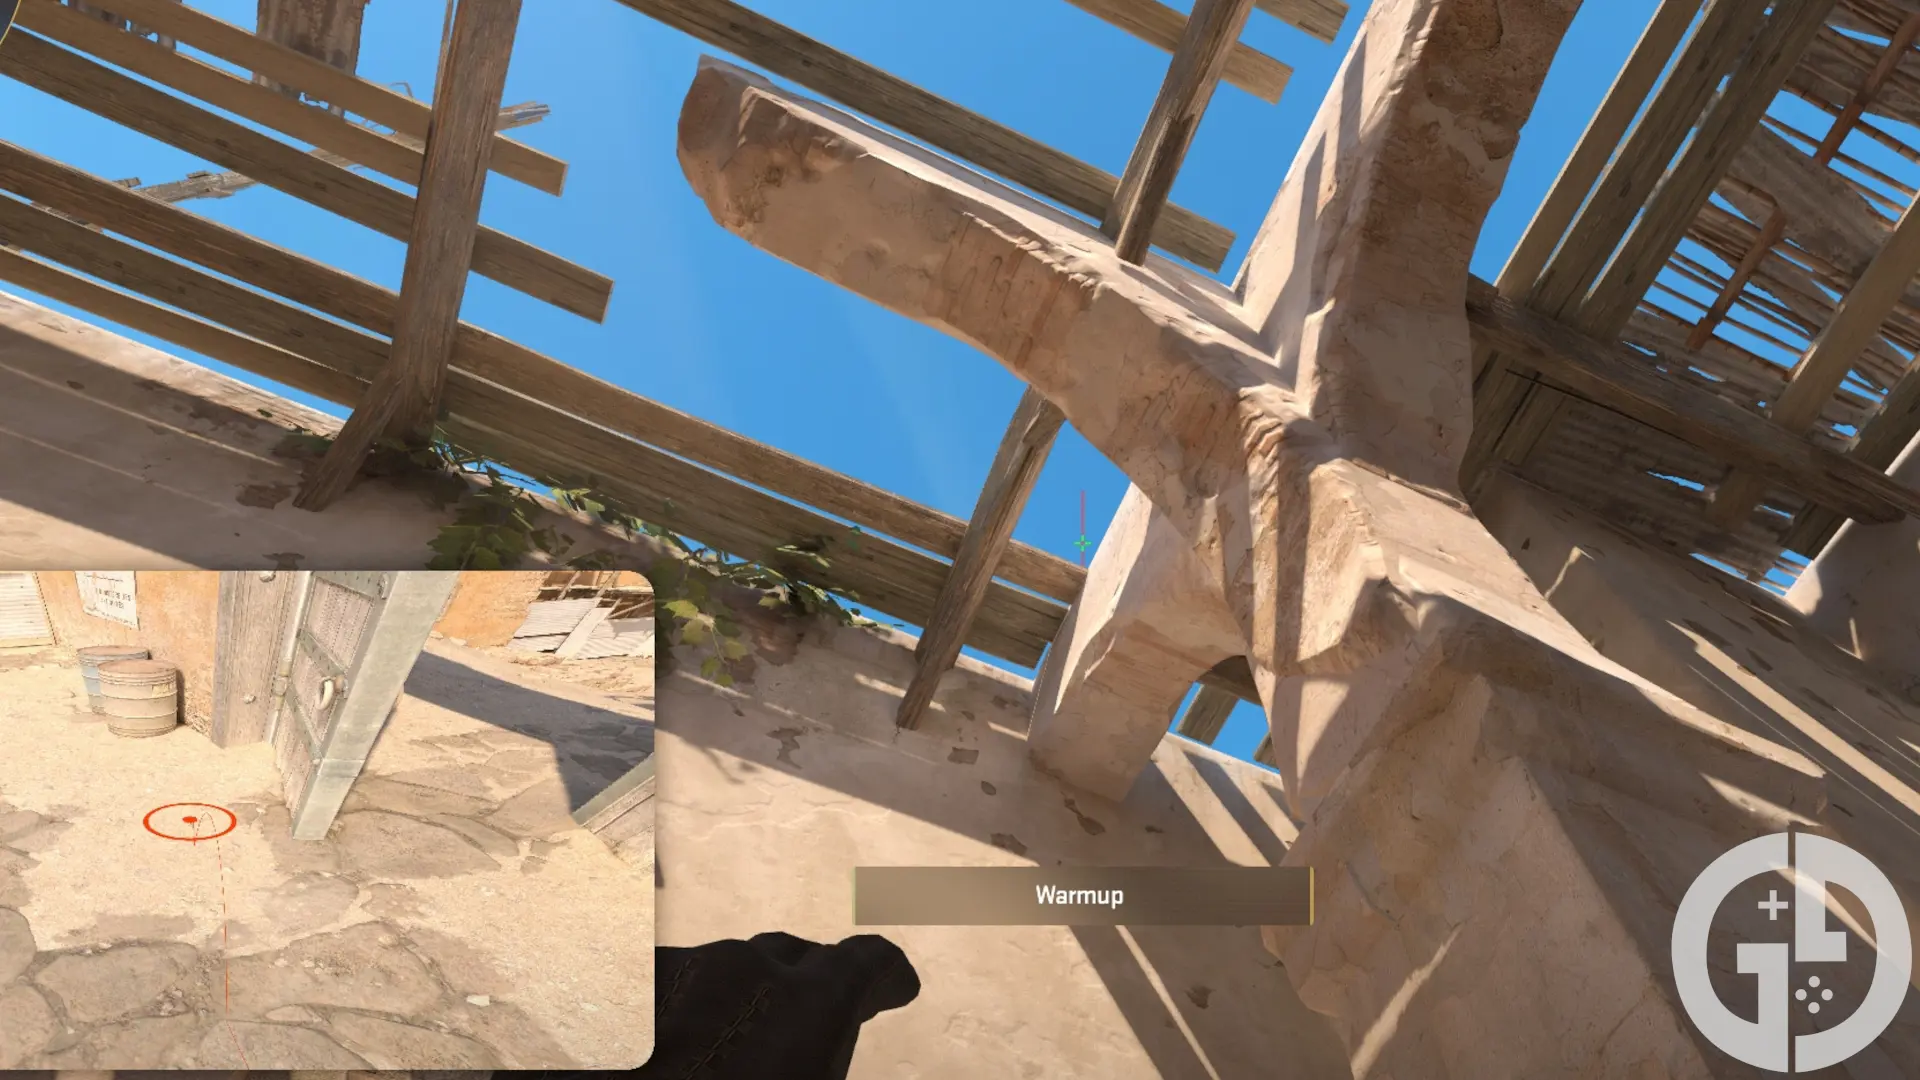
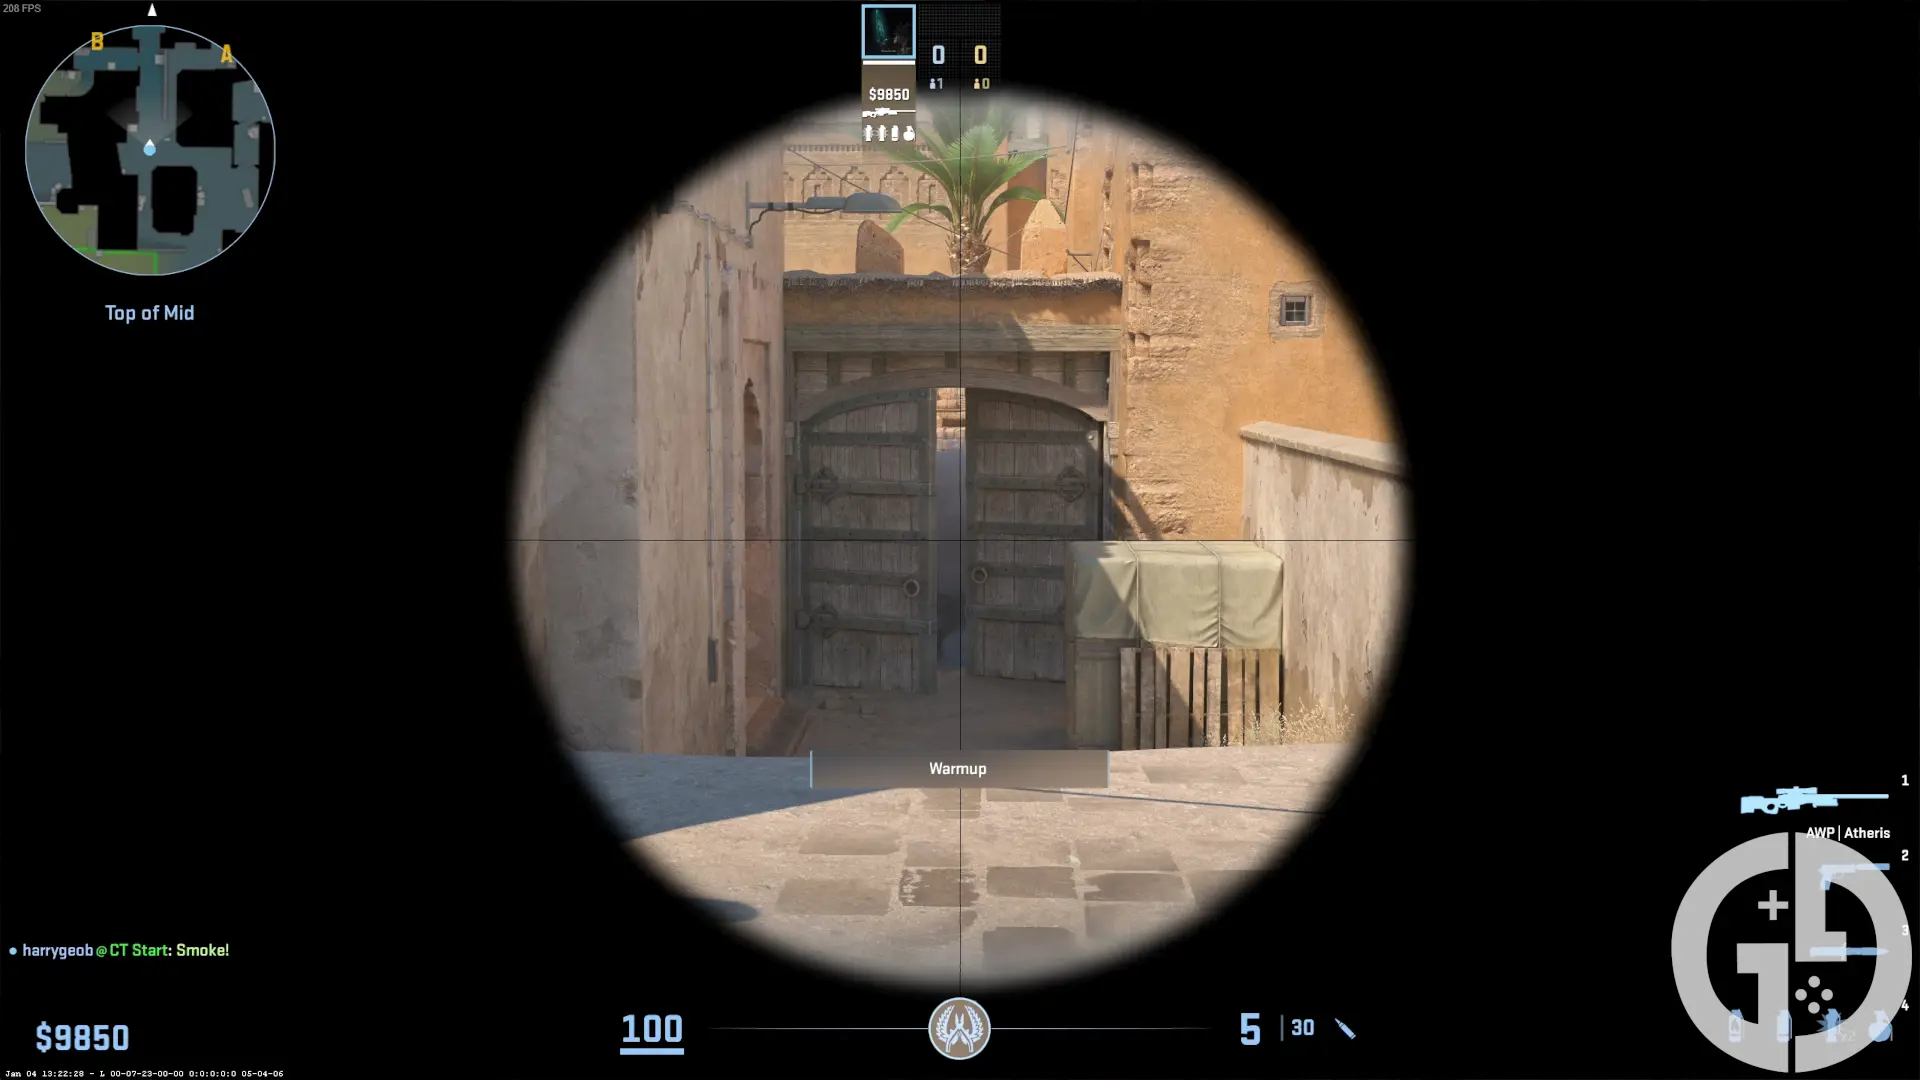
Upper Tunnels from CT Mid
- Stand against the metal next to the truck in CT Mid
- Aim on the bottom left of the 3rd stone above the doors onto B Site
- Do a jump throw
This is especially helpful for retaking B Site as a CT, which is notorious for being one of the hardest retakes in the game. This blocks off the entirety of Upper Tunnels, which is where many defending Ts like to sit off-site.
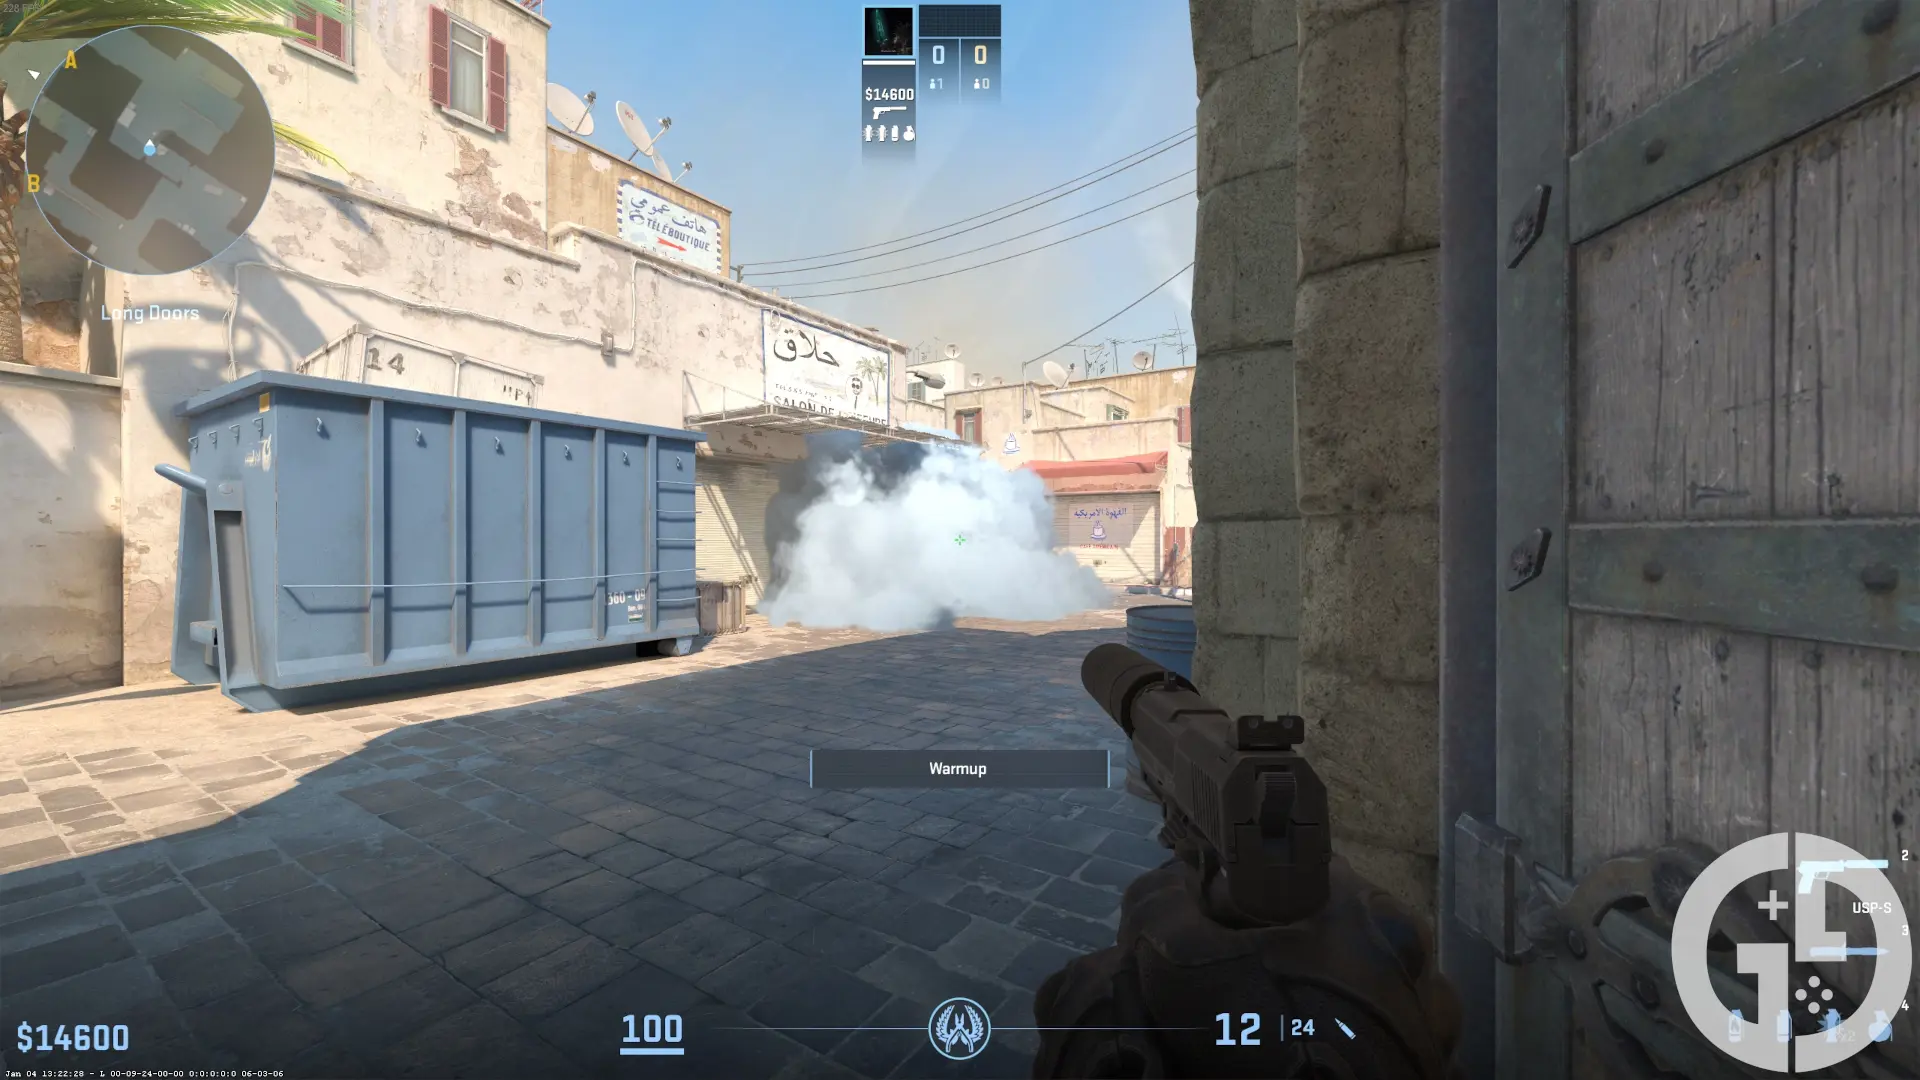
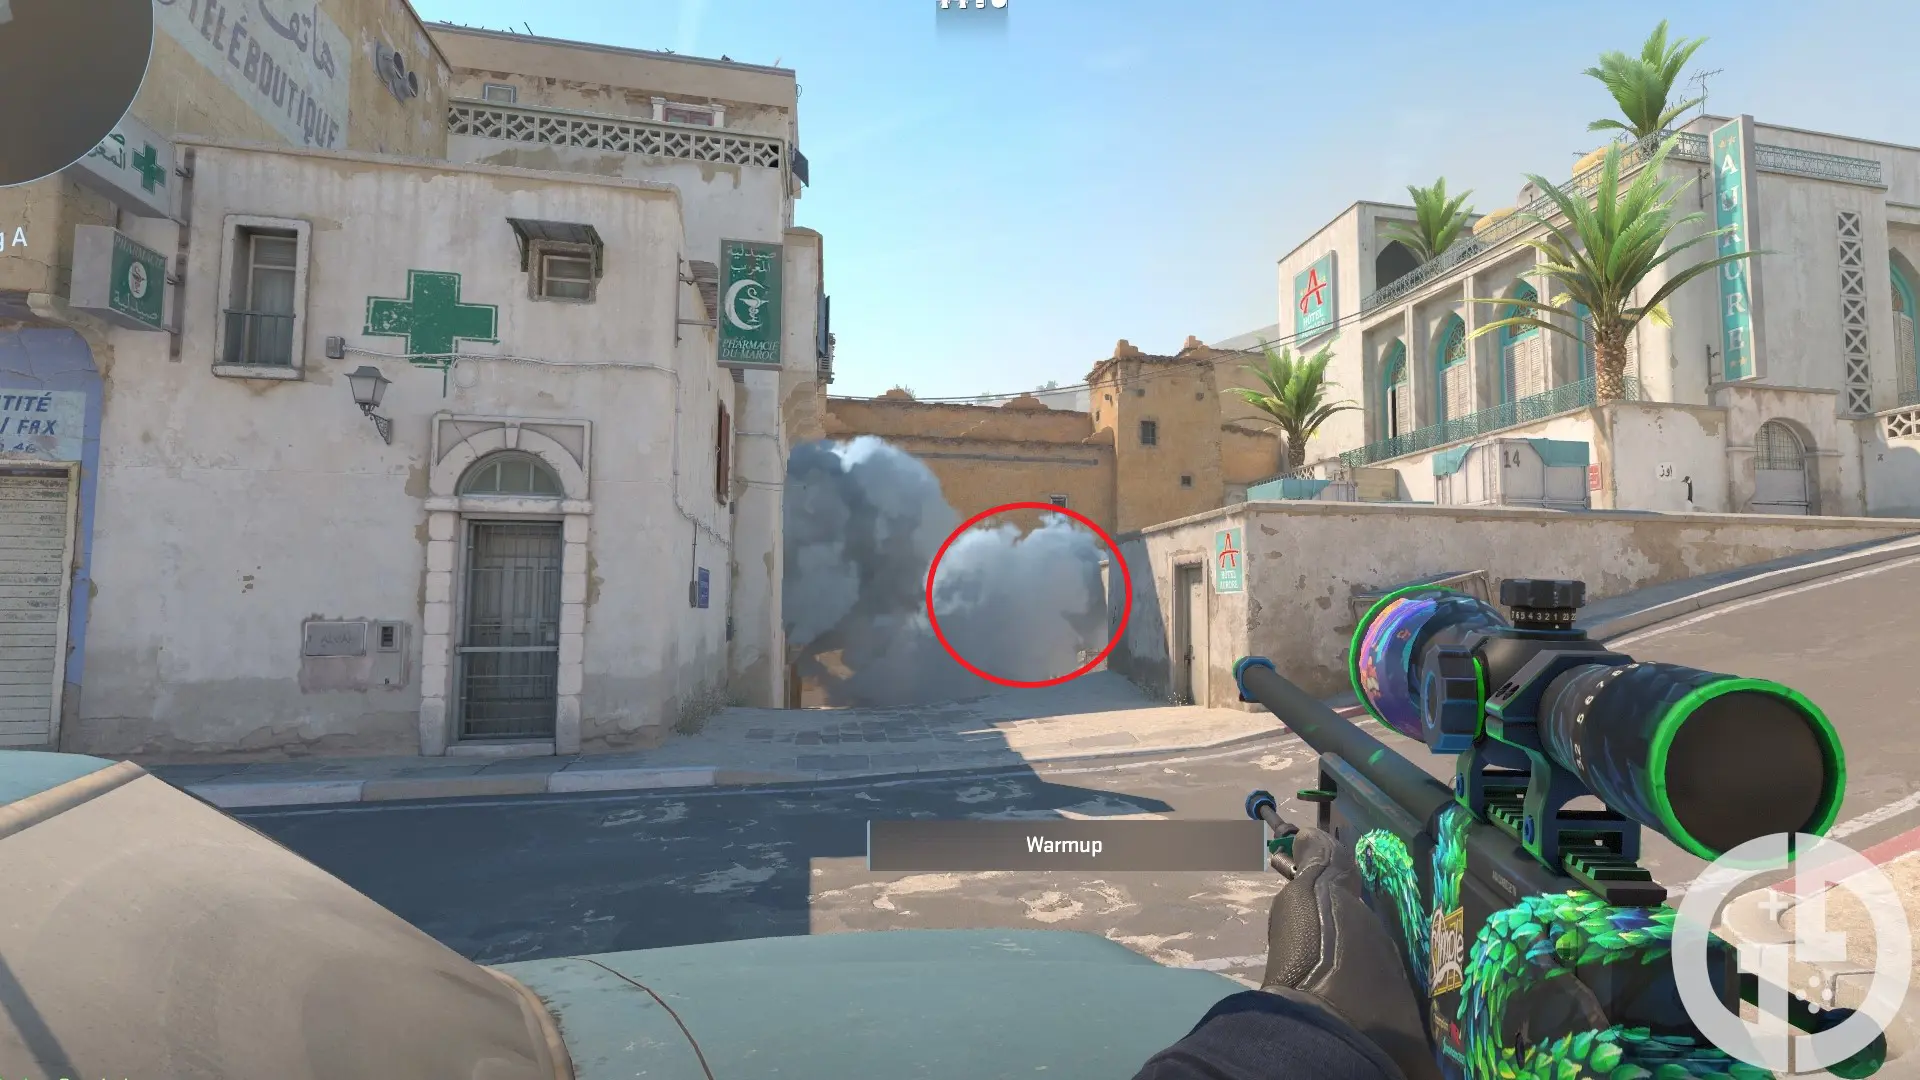
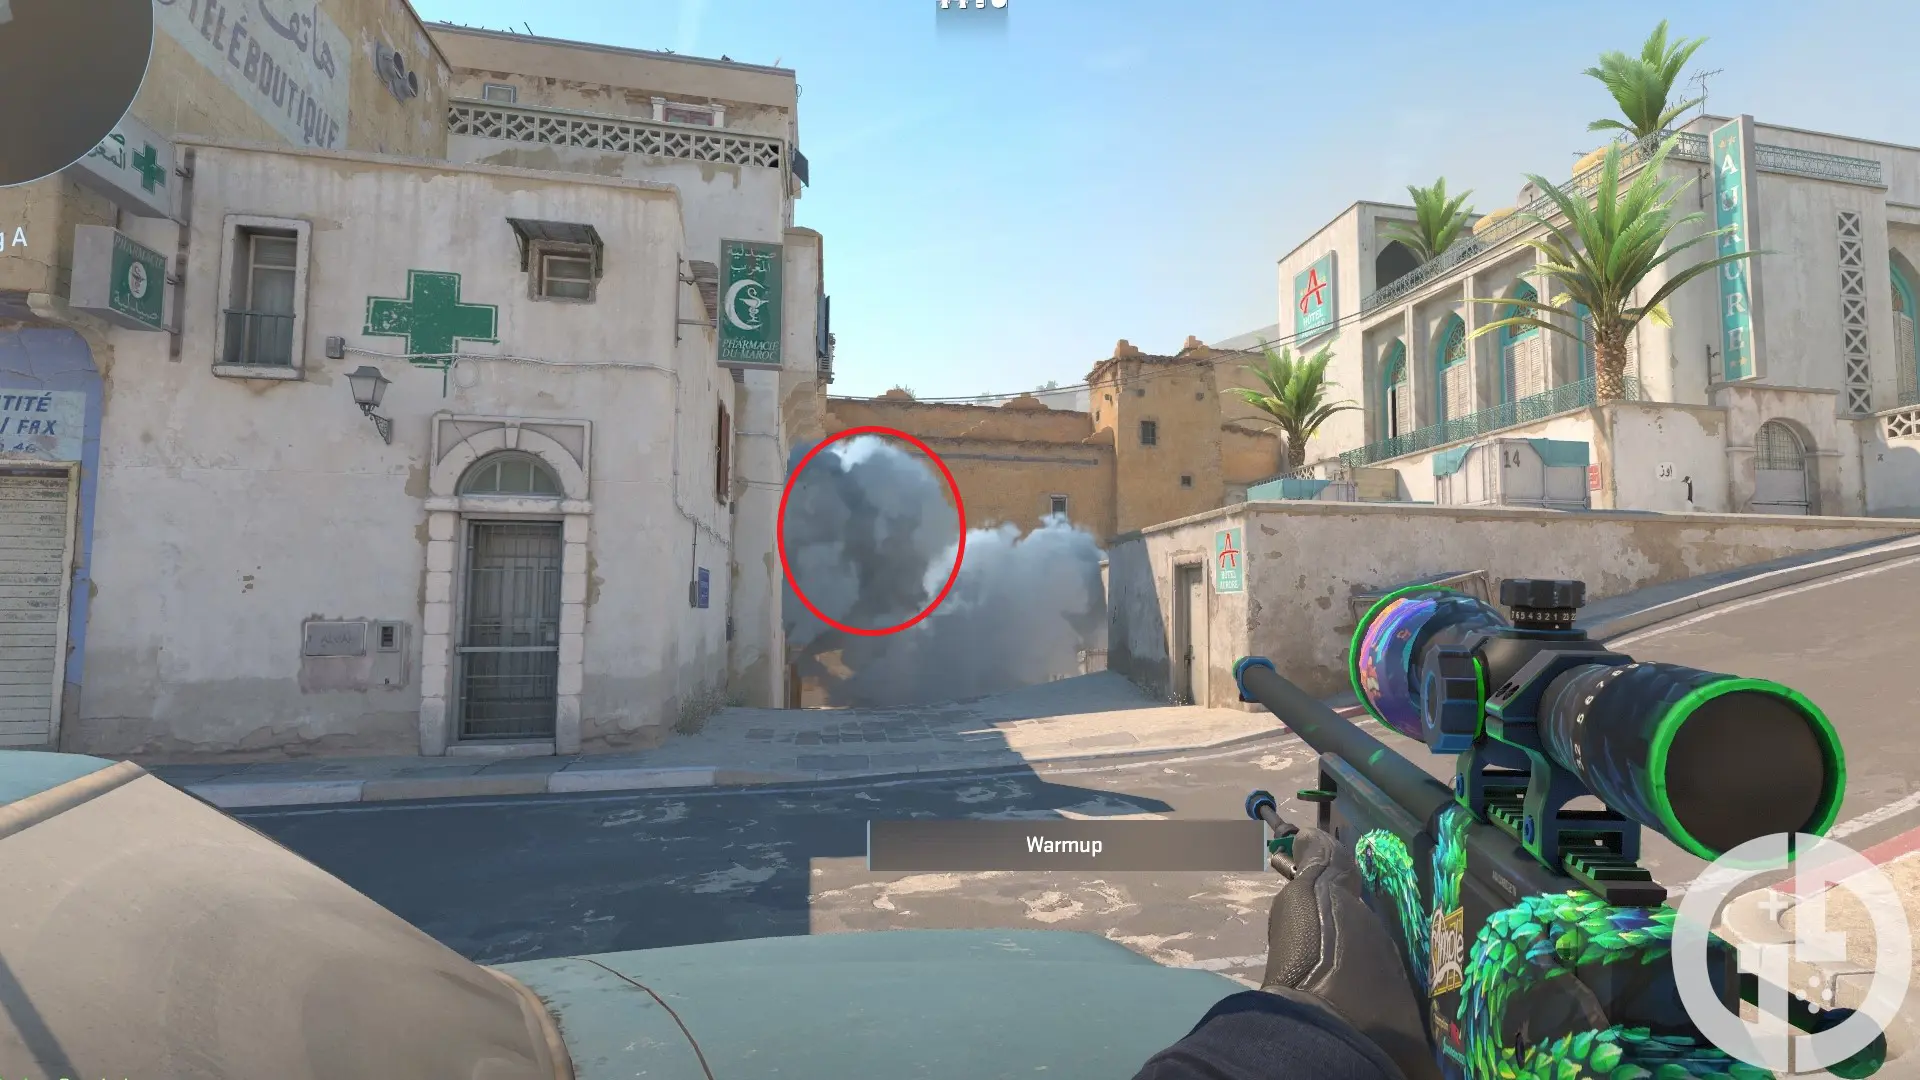
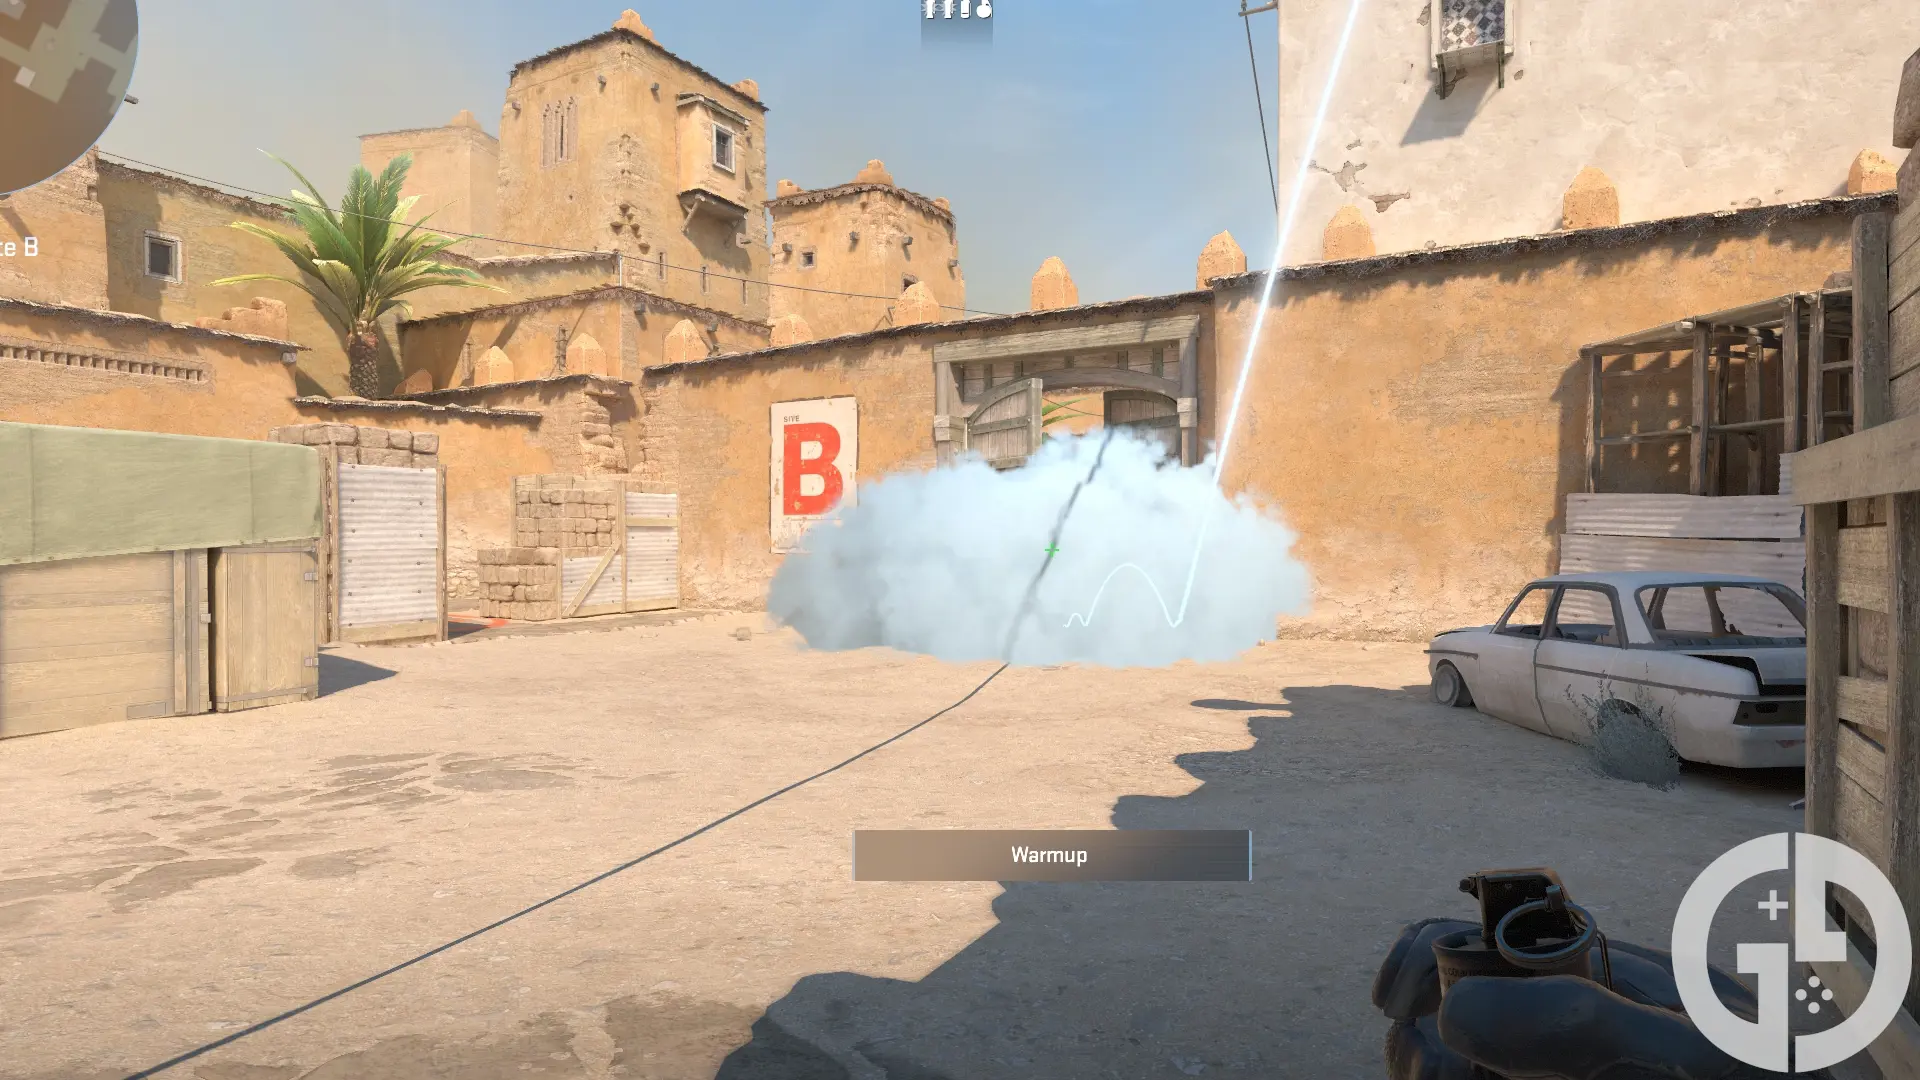
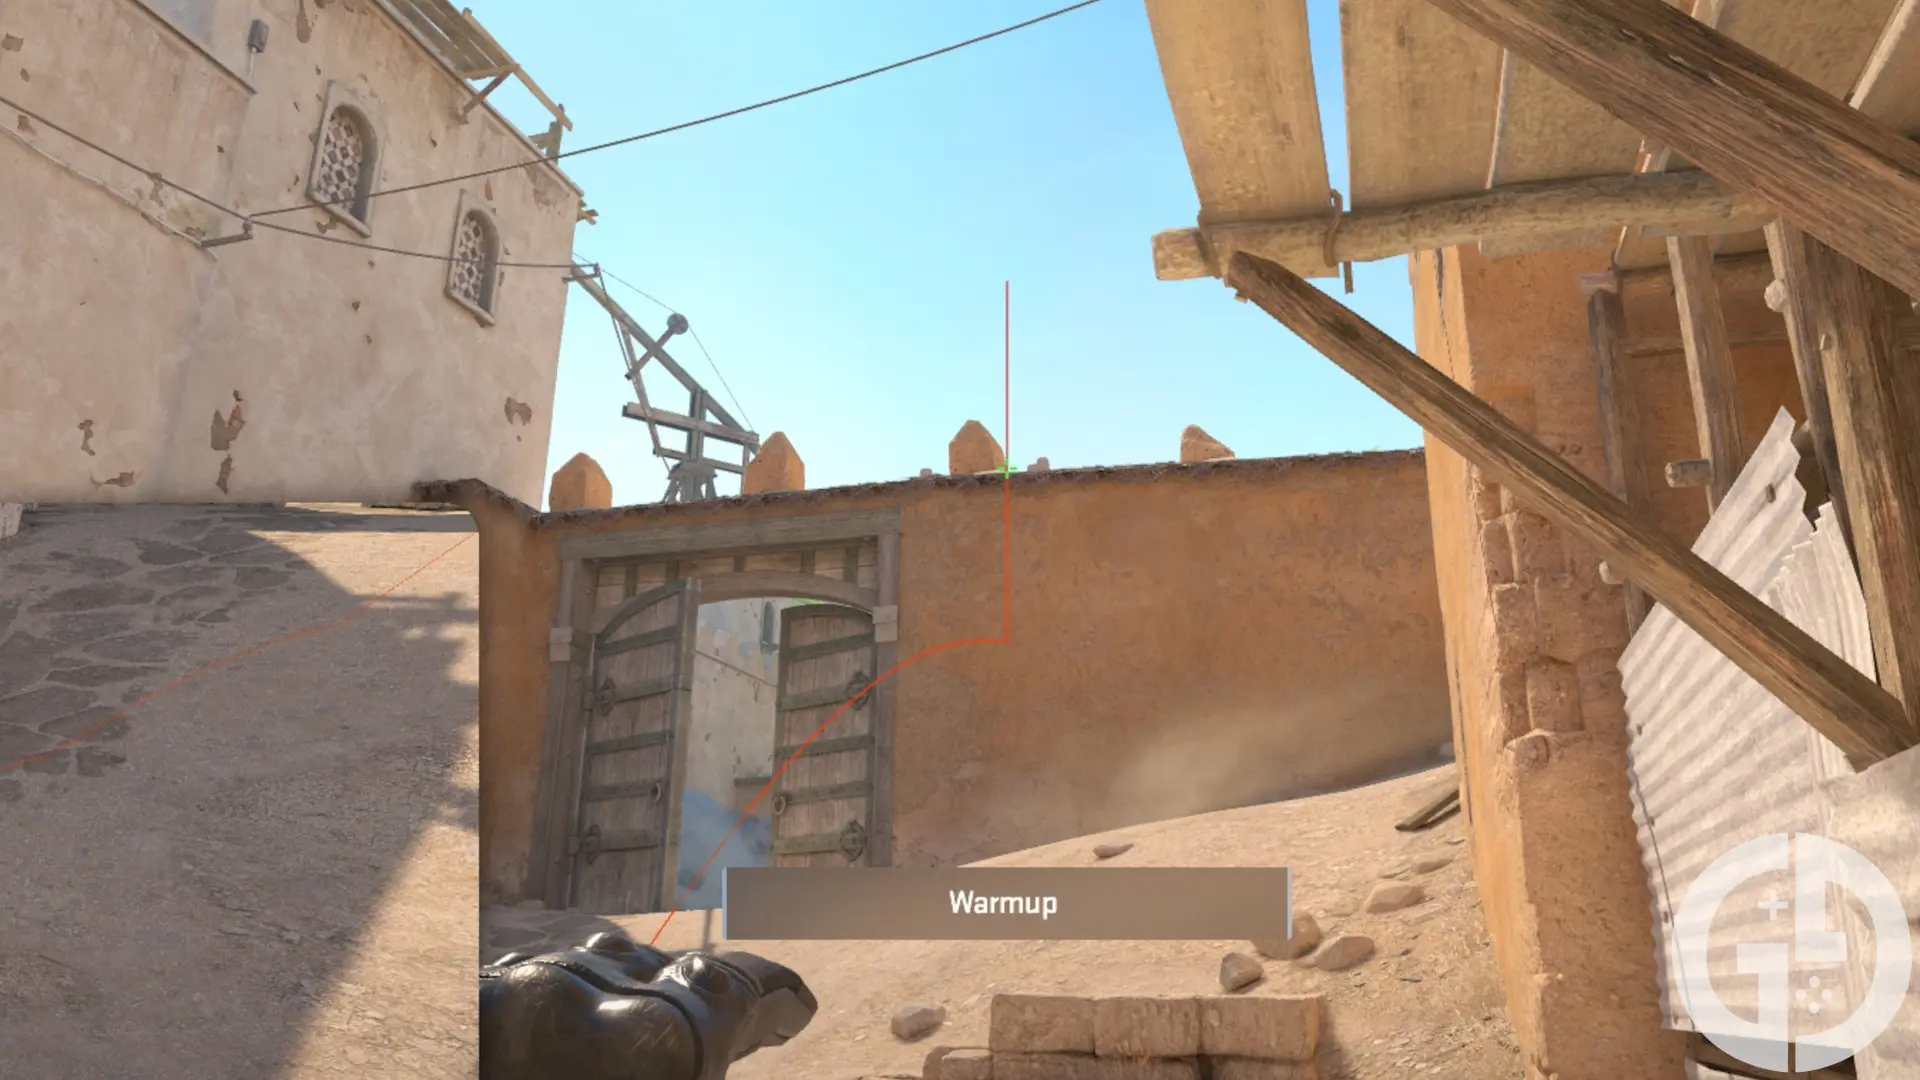
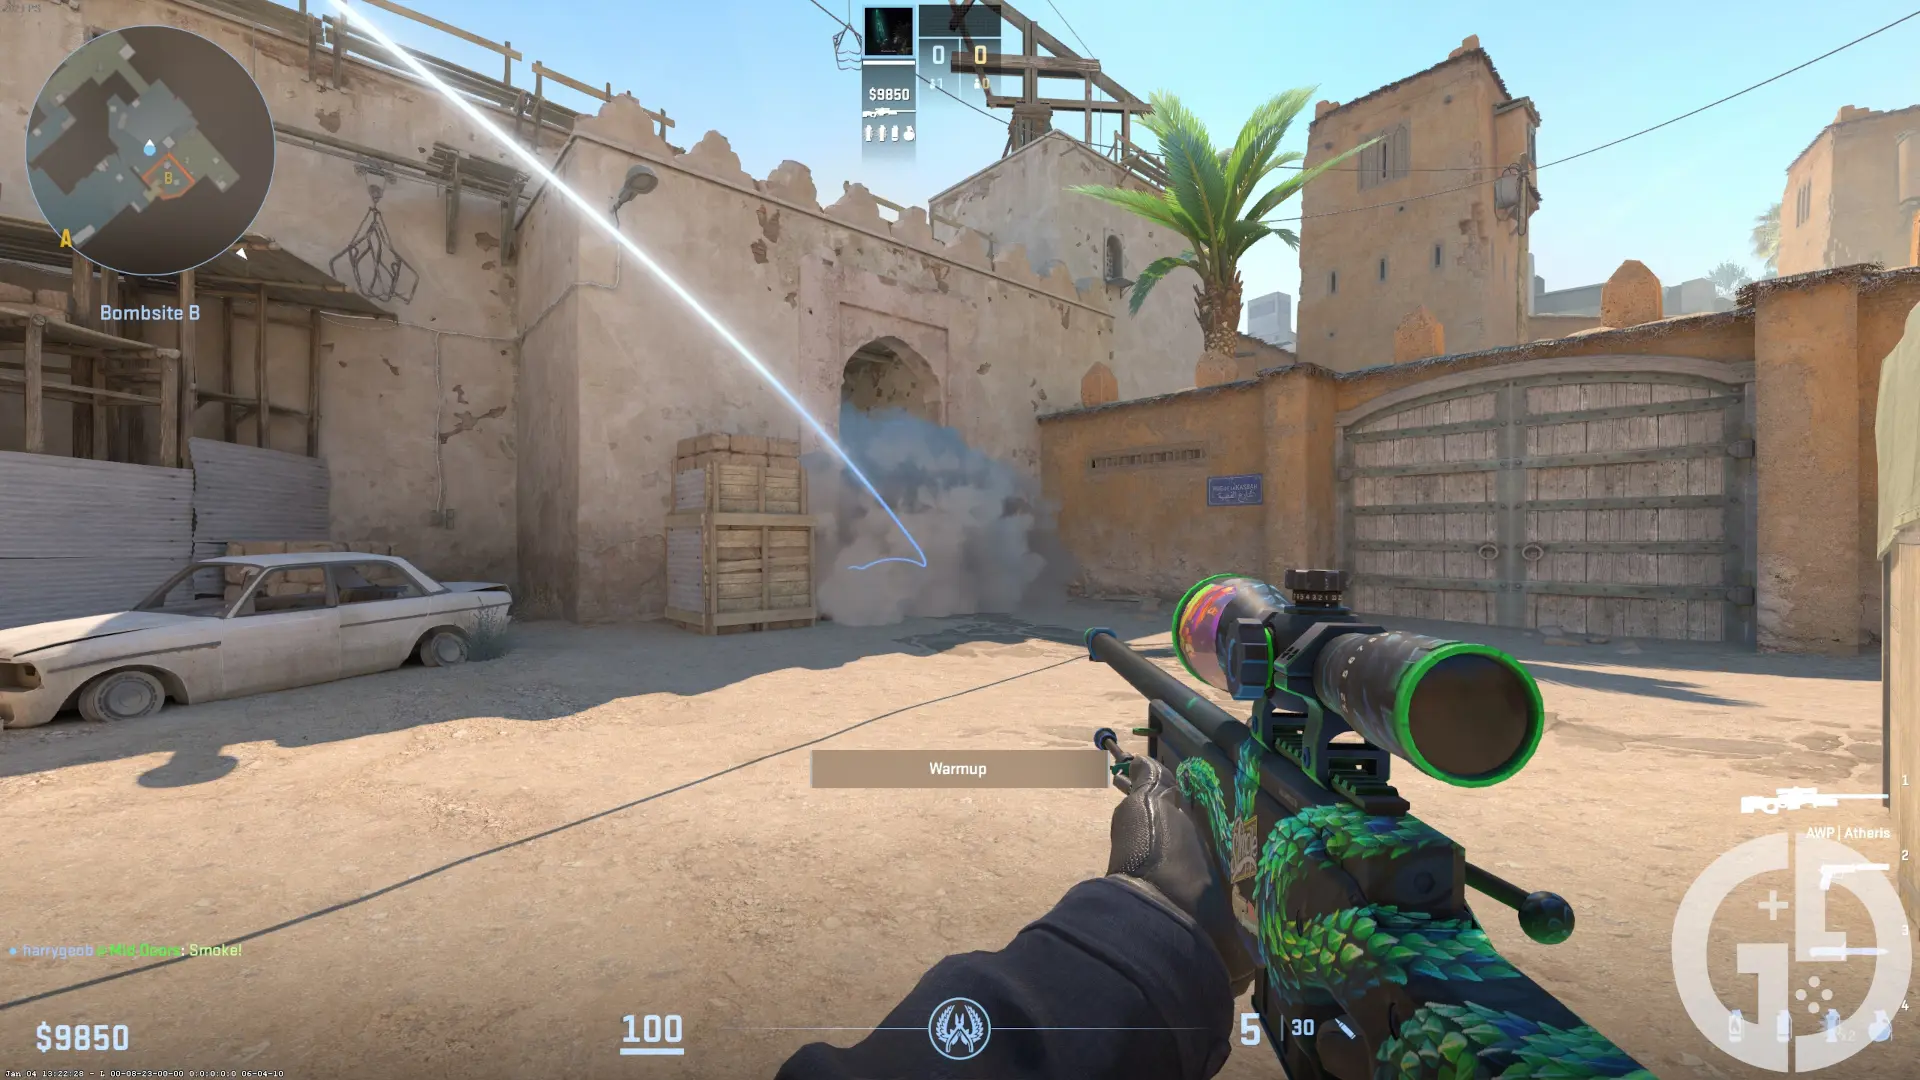
B Site Car Split

- Aim on the right-hand door onto B Site from Mid
- Do a running throw
This one is a super simple one to pull off, but it gives you a much easier entry onto B Site from Mid. With this, you'll be able to clear Car in isolation, then move out onto the rest of the site from there.
Best flashes for Dust2 in CS2
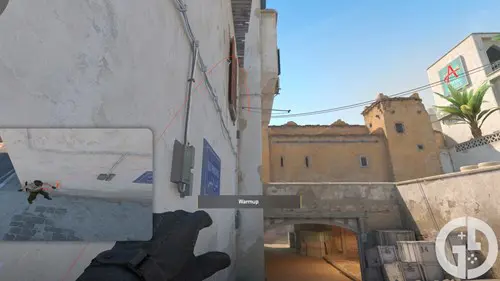
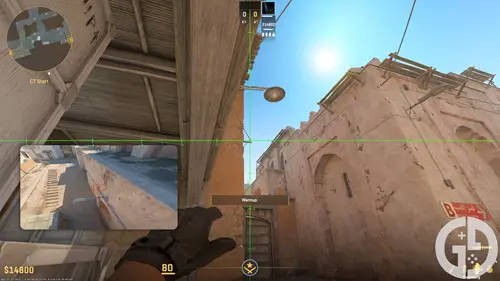
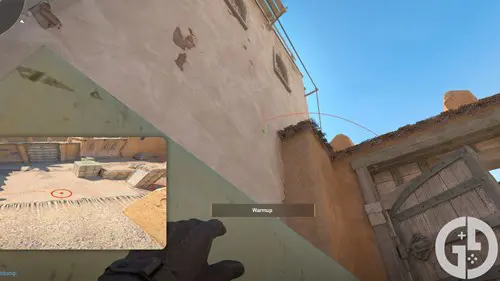
CT A Long Corner
- Stand on the left side of the garage and face towards A Site
- Aim at the top right corner of the red window
- Do a jump throw
This is an excellent flash for pushing A Long Corner as a CT, as it bounces off the phone sign and gives Ts no time to react or turn away, leaving them blind and ready for an easy kill.
A Long Ramp
- Stand against the wall on A Ramp and face towards CT Spawn
- Aim high on the white wall that juts out ahead of you
- Do a running throw
If you've had to retreat from Long towards A Site, this flash is perfect for catching any Ts rushing down towards you.
A Site to Long
- Crouch behind the left box on Default A Site
- Aim three-quarters of the way up the left-hand side of the tall box to your right
- Do a standard throw
This will allow you to bounce a flash perfectly into the sightline of anyone pushing up A Long onto the bomb site, which is great if you're all alone and in a pinch.
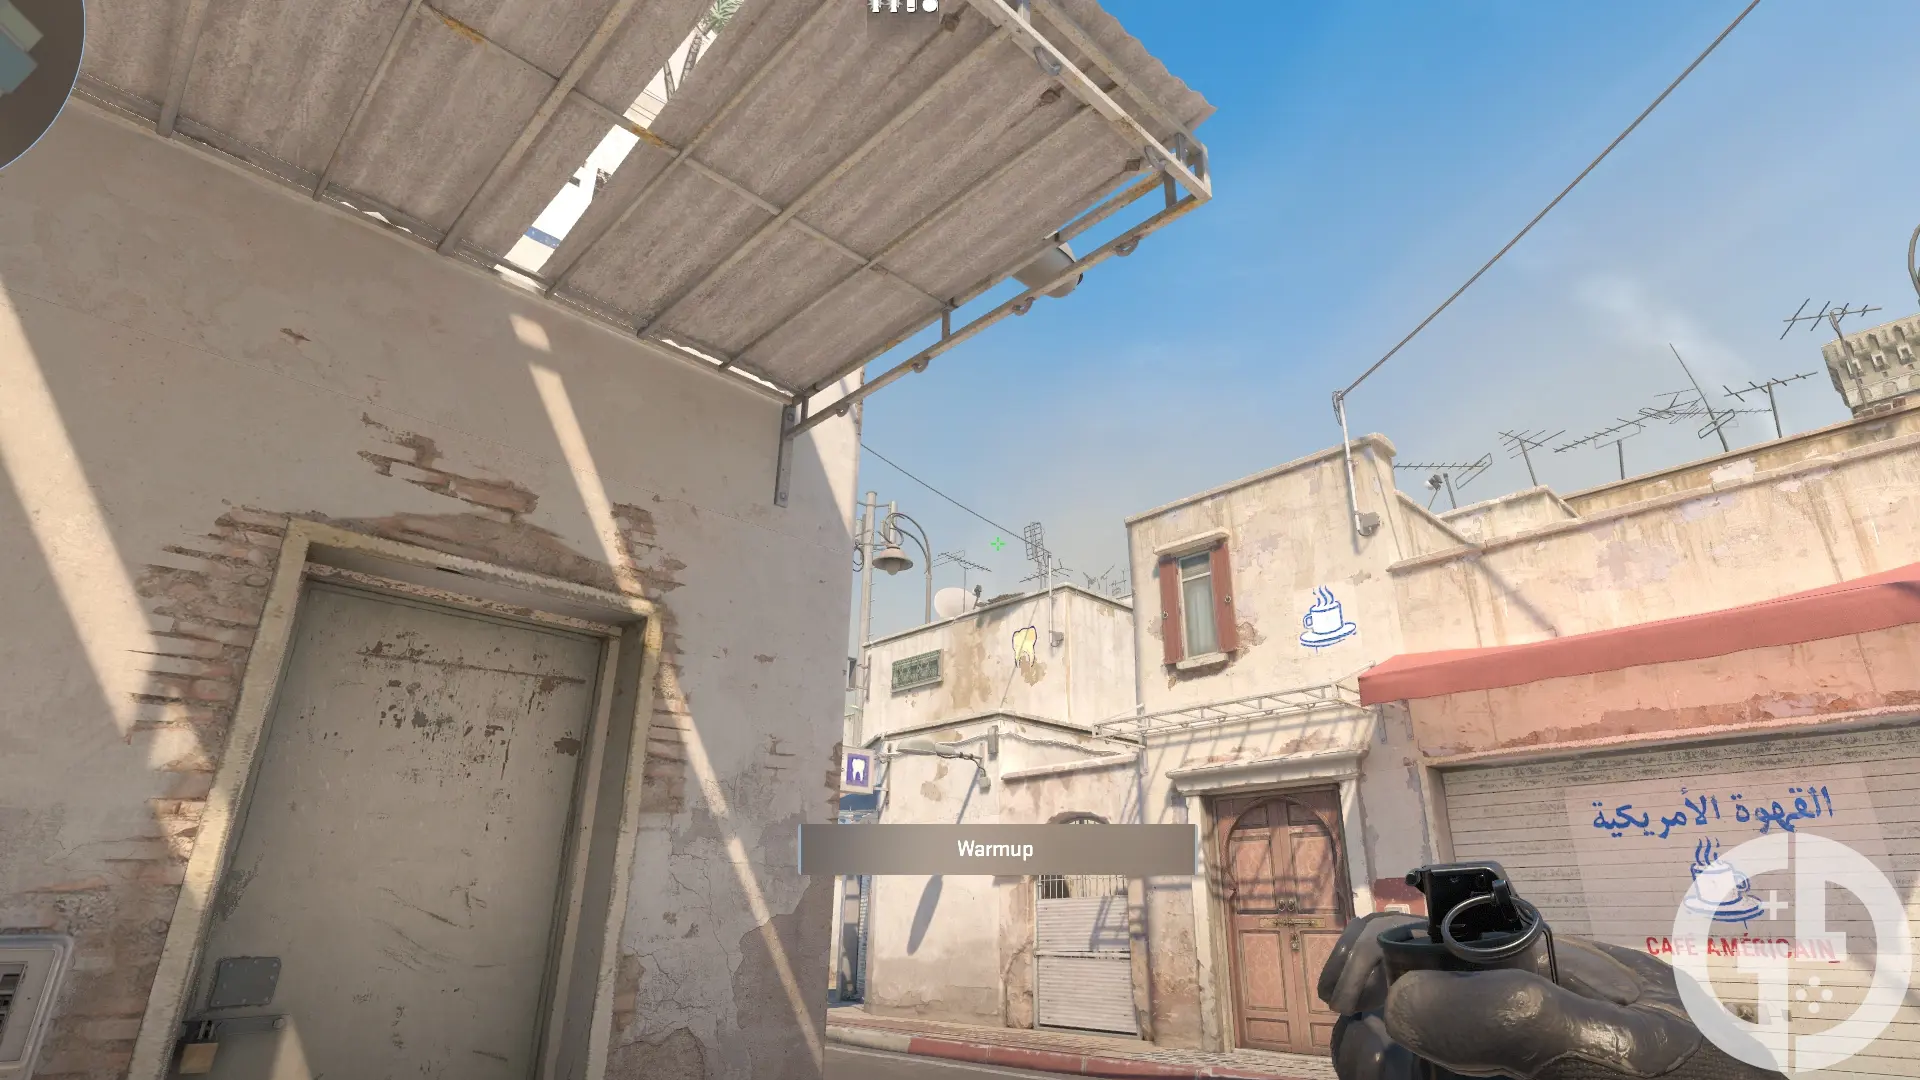
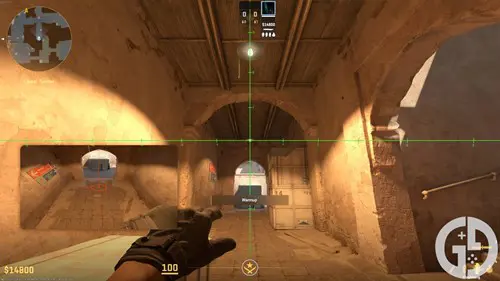
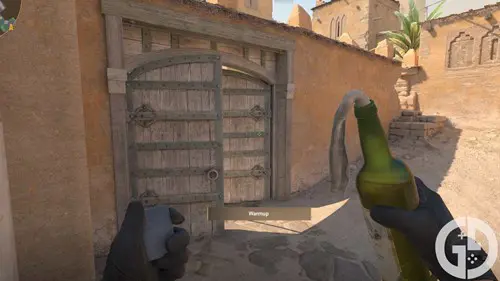
T Spawn to A Long Corner
- Stand behind the yellow car
- Aim just below the wooden circle in the middle of the two doors
- Do a standard throw
This is the perfect flash for pushing through the A Long doors on T Side, as it will completely blind anyone holding either the doors or the corner without any warning. You will still need to check the lower ramp of Long as this flash won't cover that area though.
Mid Doors
- Stand behind X Box and on the right side
- Aim at the top right corner
- Do a standard throw
This is perfect for pushing through the dreaded Mid Doors, as it full blinds both close right and anyone holding the doors from afar. Pair this with the double Mid to B Split smokes for a perfect push.
CT Mid to T Mid
- Stand at the boxes on the Mid side of CT Spawn
- Aim at the the wood holding the wires above Mid Doors
- Do a standard throw
This will fully blind anyone around the T Side of Mid - including anyone up on Short too. It might be a little bit obvious, but it's a fantastic flash to throw if the enemy team is pushing down Mid and you want to delay them or hold control.
Lower Tuns to A Short
- Stand at the back middle of Lower Tunnels
- Aim at the second lightbulb
- Do a running throw, releasing when your crosshair reaches the top of the archway
This is a fantastic supporting flash to assist a teammate pushing Short onto A Site. You will need to have cleared the Mid side of Short first though, but it'll flush out any enemies holding on Catwalk and give them little chance to rush away.
Mid to B Site
There are a couple of different flashes that you can throw from Mid onto the B Site, giving you plenty of options if you're doing a split or a B retake as a CT.
- Stand in the corner of the small box at the top of Mid, before the B Site doors
- Aim towards the B Site tower on the right, and place your crosshair over the right piece of wood
- Do a standard throw
This is great if you know that enemies are closer to the Window side, or hiding behind the pillar. It can be spotted fairly early though with keen eyes, so don't always presume that players are fully blind.
- In the exact same spot as before, look now towards your top left
- Aim at the dark spot on the wall
- Do a standard throw
If you suspect anyone to be closer to Car then definitely use this one, but it's pretty much effective across the whole site. It isn't too visible for anyone on the site too, so they have little time to turn around.
- Stand at the metal plates leaning against the car on Mid
- Aim at the bottom of where the diagonal wood meets the stone
- Do a jump throw
I love using this last one as a support player, as you're in a safe position and it flashes pretty much everywhere on the B Site. It can take a little bit of practice to pull off though, so definitely head into a private match to test it out.
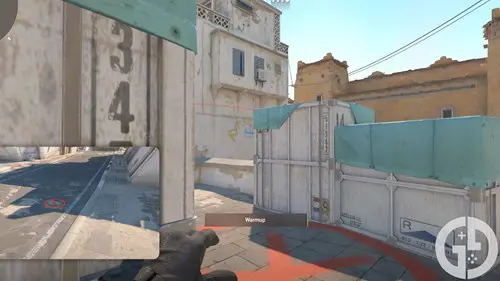
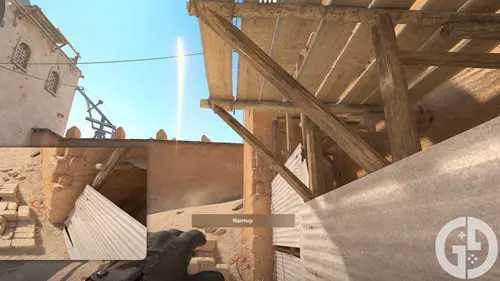
Upper Tunnels B Rush
- Aim at the rear alcove, you don't need to be too precise
- Do a running throw
This flash is perfect for an aggressive push onto B Site, as it flashes almost every active angle and lets you push in front of it to avoid the stun yourself. Just make sure it's in the alcove ahead of the door, as otherwise the flash gets partially blocked for some key angles.
Best molotovs for Dust2 in CS2
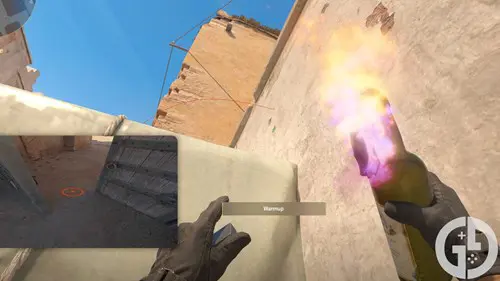
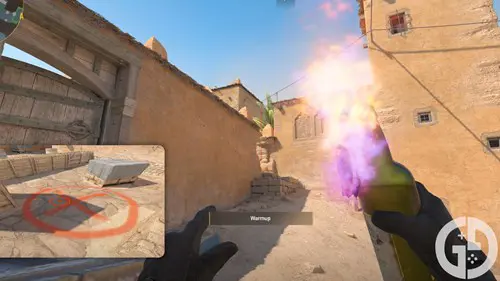
Long Corner to Long Doors
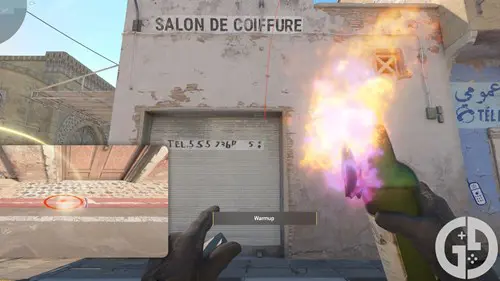
- Stand in the middle of the road on A Long
- Aim at the top right corner of the telephone graffiti
- Run throw left and release at the third line on the blue skip
This will land the Molotov deep into the doors, preventing any players from pushing through and buying you plenty of time. Who knows, you might even get a kill or two in the process!
Long Corner to Car
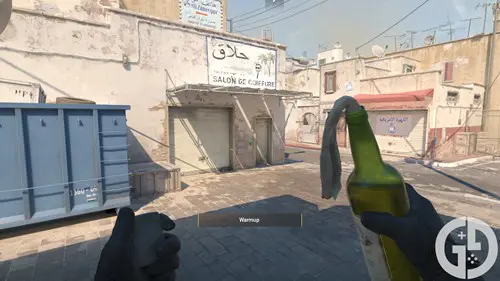
- Stand on top of the barrels next to Long Door
- Aim at the top right of the buzzer next to the door on Long Corner
- Do a jump throw
This will land on the right side of Car, pushing any players holding it back onto a much weaker angle. While they can still remain at the back of Car, they are now exposed to Catwalk - making this excellent for a pincered execute.
A Site Default to Catwalk
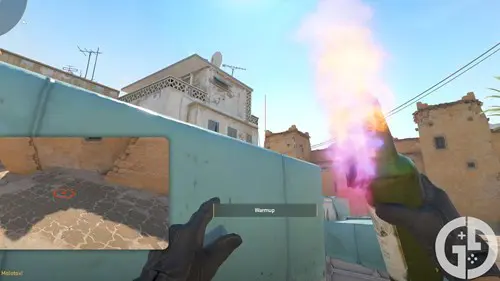
- Stand against the left box on A Site Default
- Look towards Catwalk and aim at the top left corner of the building ahead of you
- Do a standard throw
Use this if you're sensing a quick push from Catwalk or want to block off any players from pushing that area while you check Long or CT Spawn.
Catwalk to A Default
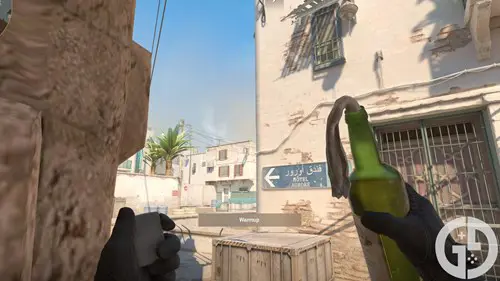
- Stand on the grass on the left at the top of the Catwalk stairs
- Aim at the top right of the building above Default
- Do a standard throw
This is perfect for a retake scenario where you know that someone is planting or defusing the bomb on Default, but do be careful as you're very exposed. Throw a smoke just ahead of you to be extra careful.
Mid Doors
- Stand against the wooden pallet at the back of X Box
- Look up and right and aim at the lower dark spot
- Do a standard throw
Much like most X Box utility for Mid Doors, this clears the door - and is especially helpful for dealing with anyone in the close right spot beyond the doors.
Lower Tunnels to A Short
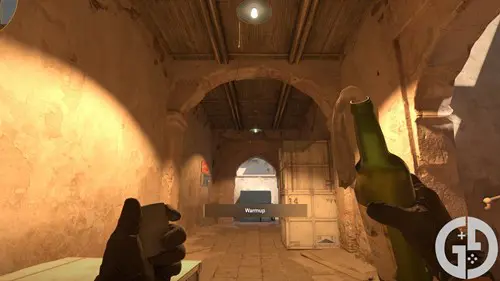
- Stand at the back of Lower Tunnels
- Aim at the first lightbulb
- Do a running throw and release at the top of the open archway
This is ideal for clearing the corner at the back of A Short, as you can't be seen by the holding player and it pushes them all the way back onto Catwalk. Have another player push up A Long and hold Car to catch the retreating enemy.
Mid to B Back Site
- Stand on Green Box at the top of Mid
- Aim at the small dark spots on the right door below the top buckle
- Do a jump throw
This will clear the pesky back site area that players often like to hide in, giving you the freedom to push onto site and clear the closer angles.
Mid to B Default
- Stand in the corner of the small box by Green Box
- Aim at the top left of Window
- Do a standard throw
This will land directly on the Default plant spot, which is perfect if you hear anyone planting the bomb in a retake situation, or defusing your very own plant.
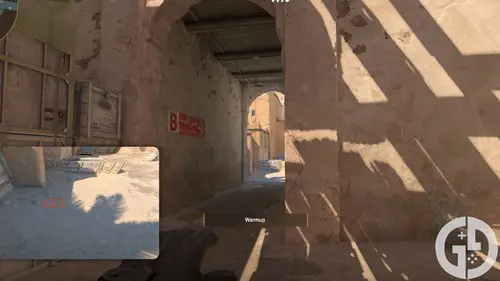
Mid Window to B Tunnels
- Stand in the corner of the wooden platform by Window on Mid
- Aim in the top left corner of the building with the crane on top
- Do a standard throw
This is ideal in a retake situation when you know that the player is hiding in Upper Tunnels, as it blocks them off completely, letting you hop down and defuse.

About The Author
Harry Boulton
Harry is a Guides Writer at GGRecon, having completed a Masters of Research degree in Film Studies. Previously a freelance writer for PCGamesN, The Loadout, and Red Bull Gaming, he loves playing a wide variety of games from the Souls series to JRPGs, Counter-Strike, and EA FC. When not playing or writing about games and hardware, you're likely to find him watching football or listening to Madonna and Kate Bush.
This is part of the ‘Counter-Strike’ directory
Directory contents
-
Best Graphics Settings
-
Pro Crosshair Codes
-
Best Launch Options
-
Bob Settings
-
Change Brightness
-
Jumpthrow Bind
-
Left-Hand View
-
Stretched-Res
-
Hide UI
-
VALORANT Sensitivity
-
Show FPS
-
Crosshair Customisation


