

Best Stratagems in Helldivers 2, tier list for early & late-game unlocks
In this Helldivers 2 Stratagems tier list, we rank all Stratagems from S to D tier to make it easier to know which ones are best, and which ones you should avoid.
This is part of the ‘Helldivers 2’ directory
Directory contents
You only have four slots to bring in Stratagems when playing missions in Helldivers 2, so learning about all the best ones and how they rank is vital to surviving.
Stratagems tier list for Helldivers 2
| Tier | Stratagems |
| S |
Railgun, Orbital Laser, Eagle Cluster Bomb, Eagle 500KG Bomb, Mortar Sentry, EMS Mortar Sentry, ARC Thrower, Autocannon |
| A |
Flamethrower, Grenade Launcher, Machine Gun, Eagle Napalm Airstrike, Jump Pack, Eagle 110mm Rocket Pods, Orbital EMS Strike, Shield Generator Pack, Quasar Cannon, Anti Personnel, Minefield, Autocannon Sentry, Orbital Precision Strike, Eagle Strafing Run, Eagle Airstrike, Orbital Walking Barrage, Eagle Smoke Strike |
| B |
Stalwart, Rocket Sentry, Patriot Exosuit, Spear, Recoilless Rifle, Orbital Gatling Strike, Orbital Gas Strike, Orbital Railcannon Strike, Orbital Smoke Strike, Incendiary Mines, Gatling Sentry, Guard Dog Rover, Heavy Machine Gun |
| C |
Expendable Anti Tank, Laser Cannon, Orbital Airburst Barrage, Orbital 120 HE Barrage, Orbital 380 HE Barrage, Machine Gun Sentry, Shield Generator Relay, Anti Materiel Rifle, Guard Dog, Tesla Tower |
| D |
HMG Emplacement, Supply Pack, Ballistic Shield Backpack |
This Stratagems tier list is based on my experience so far with the game and the community's recommendations:
- S-tier: The Stratagems in this tier are the best and I ended up using them in my loadout to increase my survivability and easily complete objectives on higher difficulties
- A-tier: The Stratagems in this tier are close to the S-tier, but aren't quite as good. However, if you're a more skilled player than me, you might find that they're actually as useful as some S-tier Stratagems
- B-tier: The Stratagems in this tier are good, but their use is more situational than universal
- C-tier: The Stratagems in this tier are helpful only in the early game and become inefficient in the mid to late-game
- D-tier: Do not use these Stratagems in higher difficulties. You'll only face disappointment
This list will evolve and change over time with new updates (which has already happened due to Patch 01.000.100), so make sure to check back frequently.
S-tier Stratagems explained
Railgun
The Railgun is excellent at dealing with heavily armoured enemies thanks to its penetration. You'll need to use it on Unsafe Mode to make the most, but it can help massively with the tougher bugs and bots.
Orbital Laser
This Stratagem is great for clearing a horde of enemies thanks to its massive damage. It targets tougher enemies first, allowing you to focus on smaller enemies that make up a horde. I also find it great for clearing bases, as it will focus on turrets, automaton fabricators, or bug nests.
Eagle Cluster Bomb
The Eagle Stratagems are great because of their call-in speed and ability to be reloaded with a cooldown. The Cluster Bomb is one of the best because of how effective it is at wiping out patrols of enemies with its heavy explosives, and with the rapid call-in speed, it's difficult to miss.
Eagle 500KG Bomb
The 500KG Bomb has the same strengths as other Eagle strats, but it differs wildly with its explosive effects. It delivers a large bomb that wipes out anything within its small radius, allowing you to defeat some of the toughest enemies within a second.
It only gets better with ship module upgrades too, as you can use two of them before having to call in a reload.
Mortar Sentry
The Mortar Sentry has become the go-to stratagem for defensive extermination missions, as it can lock down a point with ease while wiping out smaller and medium-sized enemies that try to go on the attack. Its high damage, long-range, defensive qualities, and large pool of ammo just outright makes it one of the most effective tools in the game.
EMS Mortar Sentry
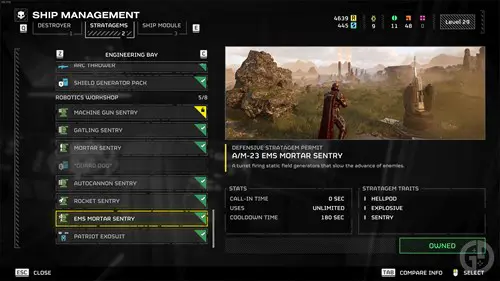
The EMS Mortar has the same benefits as its sister strat, but instead of dealing high damage, it slows enemies to a crawl by firing off explosives that create static fields. It makes defending a point or waiting for the evac vehicle much easier.
ARC Thrower
The ARC Thrower is misunderstood by a lot of players as it can be hard to utilise effectively, but if you know the proper way to use it, you'll reap the rewards. It shoots arcs of lightning in a cone shape in front of you, which can discharge through multiple targets in close proximity, taking out whole groups with a few shots. Plus, you don't need to reload.
Autocannon
The Autocannon is a must-have Stratagem for any team composition. It fires explosive rounds that shred light armour and enemies in close proximity, and can be used for the majority of objectives, such as destroying bug holes, automaton fabricators, spore spewers, and broadcast towers.
I find it speeds up the game due to how much it can do, allowing you to spend more time on maps completing side objectives and POIs.

About The Author
Hritwik Raj
Hritwik has been writing about video games, manga, and anime for more than 8 years. Some of his favourite games include The Last of Us Part II, Fallout 76, Apex Legends, Genshin Impact, and the Souls series.
This is part of the ‘Helldivers 2’ directory
Directory contents


