

Here's how you can complete Perdition in Destiny 2
Perdition is one of the better Master or Legend lost sectors to get in Destiny 2. Here is everything you need to know to complete it.
This is part of the ‘Destiny’ directory
Directory contents
-
Seasonal Artifact Mods
-
All Exotic Weapons & Armour
-
Best Prismatic builds
-
Campaign Mission List
-
Convalescence: Budding
-
Ending Explained
-
Episode Echoes Act 1
-
Episode Heresy Explained
-
Episode Revenant Explained
-
Ergo Sum Exotic
-
Every Prismatic Aspect, Fragment & Ability
-
Red Death Reformed
-
Wild Card Mission
-
All DLC & Expansions
-
Solstice 2024
Perdition is a Master/Legend difficulty Lost Sector in Europa. Destiny 2 has many ways to challenge players, and these extra-hard lost sectors are a massive challenge for solo players. Perdition is a Vex lost sector; it's a manageable one, so it is a good option for pulling off Master and Legend difficulty completions.
Here is everything you need to know to take on the Destiny 2 Perdition Master/Legend Lost Sector.
Preparation before challenging Perdition
As with all master/legend difficulty lost sectors, there are changes to be aware of. First of all, there are Overload and Unstoppable champions to contend with, so make sure you have the right perks and weapons equipped to deal with them. There is increased incoming Arc damage, and increased outgoing Solar and Strand damage.
The Overcharged Weapons modifier will make your fusion rifles do extra damage, and the Shocker modifier means Vex Goblins that you take down will drop a pool of damaging Arc energy.
While you will be doing extra damage with Solar and Strand weapons, you will also have Void and Arc shields to deal with. Range is your friend in this Lost Sector, so I would recommend avoiding close-range weapons.
How to complete Perdition
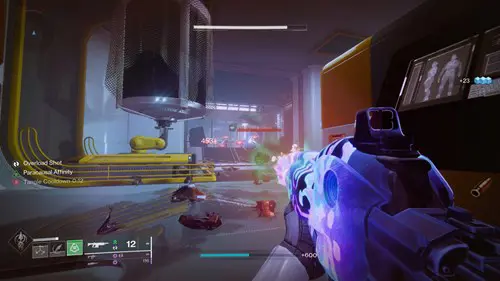
Straight off the bat, you will be faced with a group of Harpies and a Hydra. There are stairs going up to the right, use them as cover and take out enemies safely. Before long they will begin to retreat, at which point you should move cautiously down and follow them.

In this long room, several waves of Harpies and Minotaurs will spawn. Among them, you will have to face an Overload Minotaur. The most important thing to do is hold your ground, let them come to you and take them out from the safety of cover. As much as you feasibly can, take out enemies from a distance.
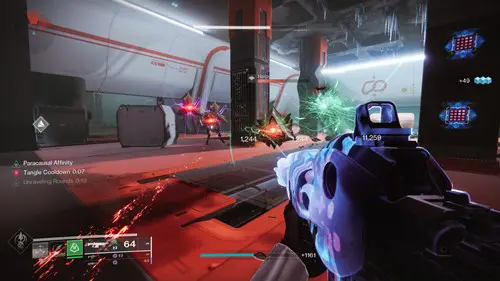
Once the Harpies and the Minotaurs are dealt with, The Hydra will escape through the door to the right. Go through the door and take the stairs up to the next room, where you will be faced with the hardest part of the Lost Sector. There are Overload and Barrier champions, among regular enemies and some Wyverns.
The first to appear will be a group of regular enemies and an Overload Minotaur. The champion will rush you, so use the stairs to retreat if you need to. Once it is dealt with, move into the room to spawn in the next wave of enemies.
This wave consists of the boss Hydra from earlier, a Minotaur, some Goblins, two Barrier Hobgoblins, an Overload Minotaur, and two Wyverns. Again, you can use the stairs at the back of the room to keep your distance. Most of the enemies will be on the far side of the room, so allow them to come to you and pick them off.
The champions won't engage straight away, so clear everything else out first, and then deal with them. With them dealt with, we're on to the boss. This is a straightforward fight against a large Minotaur and many smaller enemies. After the previous room, this part is pretty easy.
If you stay behind cover at the back of the room, there isn't much the boss or the ads can do to you. Pepper them with whatever damage you like, if you can try to clear out the smaller enemies.
The boss will spawn in more waves of enemies as its health gets lower, so do not rush in just because the coast is clear. Instead, once the ads are done, use this time to hit the boss with your super or your heavy for big damage, then back off.
Once the boss is dead, you will still need to clear out any remaining enemies to reach the chest safely. Once you do, the Lost Sector is complete and the rewards are (RNG permitting) yours to take.
For more on the game, check out our Destiny 2 Root of Nightmares walkthrough.

About The Author
Dave McAdam
Dave is a Senior Guides Writer at GGRecon, after several years of freelancing across the industry. He covers a wide range of games, with particular focus on shooters like Destiny 2, RPGs like Baldur's Gate 3 and Cyberpunk 2077, and fighting games like Street Fighter 6 and Tekken 8.
This is part of the ‘Destiny’ directory
Directory contents
-
Seasonal Artifact Mods
-
All Exotic Weapons & Armour
-
Best Prismatic builds
-
Campaign Mission List
-
Convalescence: Budding
-
Ending Explained
-
Episode Echoes Act 1
-
Episode Heresy Explained
-
Episode Revenant Explained
-
Ergo Sum Exotic
-
Every Prismatic Aspect, Fragment & Ability
-
Red Death Reformed
-
Wild Card Mission
-
All DLC & Expansions
-
Solstice 2024


