

DEATHLOOP Pictograms: How To Open Charlie And Fia's Hideout In Afternoon Delight
Where to find all of the DEATHLOOP pictograms inside Fia's fortress during the Afternoon Delight lead.
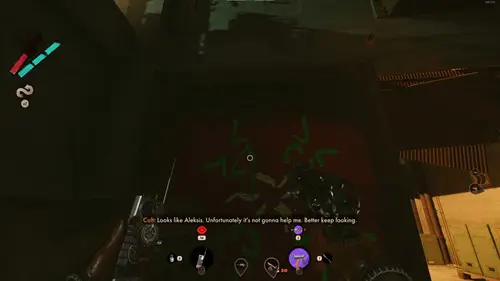
The DEATHLOOP pictograms puzzle in Fia's Fortress can be a head scratcher, but it's a key puzzle that needs to be solved if you ever hope to gain access to the secret hideout and break the loop. DEATHLOOP has a fair few puzzles which need to be solved, allowing you easier access to all the Visionaries so you can perform your deadly final run through Blackreef. So if you need to know where all the DEATHLOOP pictograms are and what they are for, we've got you covered.
- Make sure to check our DEATHLOOP tips if you're just getting stuck in, and you'll learn all you need to survive Blackreef and break the loop.
DEATHLOOP Pictograms: Where To Find Every Pictogram In Fia's Fortress
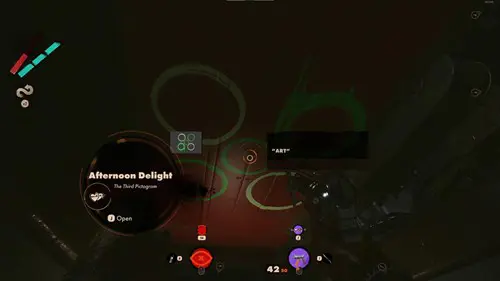
So you've been to the lovers' hideout in Fristad Rock and discovered Charlie's machine, which requires a sequence of cassette tapes to open. The only problem is, you don't know the correct code, so you need to head to Fia's fortress and use the clues to find four pictograms. The clues you get will be random, so cross-reference this guide with the clues in your game to find the right ones:
Lubricates The Shaft
From the previous pictogram, drop down the first ledge inside the elevator shaft and this pictogram is on the wall, above the exit at the bottom.
Wants For Power
Immediately on your right when you leave is a gated room with a battery-powered door and lasers blocking the gap at the top. With Aether and double-jump, you can breeze right on past these lasers, or if you don't have those equipped, head through the doors on your left with the scanner above. In here, along with the reactor schematics, you'll find an empty battery on the desk in the middle, along with a battery charging port in the corner. Charge that battery up, put it in the slot to open the locked door, and the pictogram is on the back wall.
Beneath The Wheeled Behemoth
Right next to the above caged room is a huge truck, with a small staircase downwards. Head down here and you'll find this pictogram on the underside of the vehicle.
Adds Color To Tools And Schema
Remember that room with the reactor schematics inside? This pictogram is in there too, on the wall next to the doorway.
Tends The Main Hall

Head further down the main corridor now and if you take a right by the white, blue, red, and yellow artwork on the floor, there's another pictogram immediately on your right on a reinforced wall. This is on the other side of the path from the elevated walkway, before you reach the "forever young" sign.
Enlivens The Lockers
Turn around and go on the elevated left, then go through the doorway the scanner is pointing at. Break the window on your right, cross to the other doorway on the opposite side, and you're in the locker room. There are a couple of eternalists in here so watch out; the pictogram is on the wall facing the double doors to the nuclear reactor room.
Fia's Stage Exit
Turn around and go back to the corridor with the "forever young" sign at the end. Go through that door - make sure you're not spotted by any eternalists in the main room - and this pictogram is right on the other side of the wall.
Overshadowed By Fia's Shimmering Masterpiece
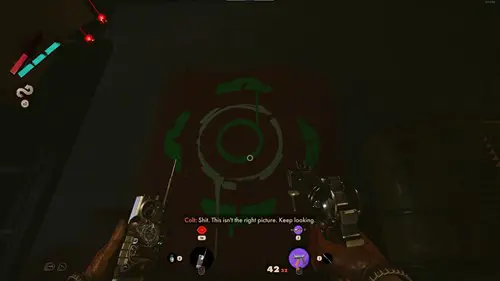
This one is perhaps the most difficult to get to, because it's in the main reactor room. Simply look to the far wall behind the reactor and you'll find it.
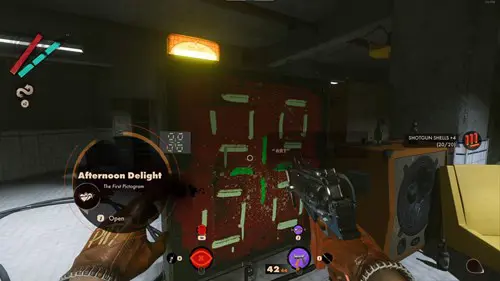
Once you've found all the pictograms - you don't need to memorise them, the images will be stored on the lead - you can head back to the lovers' hideout in the afternoon. Cross-reference the pictograms you found with the blueprint on the table and select the correct cassettes to solve the code.
Now you've found all the pictograms, make sure you check out our DEATHLOOP weapons guide to learn exactly which guns you should be using on your journey.

About The Author
Ford James
Ford is the former Guides Editor at GGRecon.


