

All Stardew Valley Community Center items & where to find them
Complete the Community Center in Stardew Valley with ease by using this breakdown, showing you where to find every item for all the Bundles in the game.
Completing the Community Center is one of the most important tasks in Stardew Valley, but keeping track of all the items you'll need and where you can find them is why it's often such a challenge.
From growing the right crops every season to making sure that you're in the right place to catch an Eel - there's so much that you need to be on top of if you want to do it all in-game as soon as possible.
Crafts Room
Spring Foraging Bundle
| Item | Location |
| Wild Horseradish | Foraging (Spring) |
| Daffodil | Foraging (Spring), Pierre (Flower Dance) |
| Dandelion | Foraging (Spring), Pierre (Flower Dance) |
| Leek | Foraging (Spring) |
These are all super easy to pick up, and I found that the road from your Farm to the Mountains was typically a hotbed for all four.
Foraged items reset every Sunday too, so you might want to leave them all until Saturday to collect so that they're easier to find.
You'll also get 30 Spring Seeds as a reward for this, which can be a nice boost early on in Year One if you've not got the gold for anything else.
Summer Foraging Bundle
| Item | Location |
| Grape | Foraging (Summer), Crop (Fall) |
| Sweet Pea | Foraging (Summer) |
| Spice Berry | Foraging (Summer), Fruit Bat Cave |
Once again these are super easy to find on your travels during Summer, but you can also use the Fruit Bat Cave to get a head start on this if you manage to earn 25,000G in Spring.
Much like Spring you'll also get 30 Summer Seeds as a reward, which can be a nice way to fill out the fridge or keep your energy up as you hunt for Meowmere.
Fall Foraging Bundle
| Item | Location |
| Common Mushroom | Foraging (Fall), Secret Woods (Spring/Fall), Mushroom Cave, Mushroom Log, Tapped Mushroom Tree |
| Wild Plum | Foraging (Fall), Fruit Bat Cave |
| Hazelnut | Foraging (Fall), Maple Trees (Fall) |
| Blackberry | Foraging (Fall), Fruit Bat Cave |
I was able to get a big headstart on this and by Fall I only needed to get one Hazelnut. The Common Mushroom is super easy to find - even without the Mushroom Cave - and the Mushroom Log or the Secret Forest is your best bet in my experience.
That leaves you able to get the other two from the Fruit Bat cave instead, letting you claim the 30 Fall Seeds as a well-earned reward.
Winter Foraging Bundle
| Item | Location |
| Winter Root | Soil & Artifact Spots (Winter), Blue Slimes (The Mines, Floors 41-79) |
| Crystal Fruit | Foraging (Winter), Dust Sprites (The Mines, Floors 41-79) |
| Snow Yam | Soil & Artifact Spots (Winter) |
| Crocus | Foraging (Winter) |
Much like Fall, I was able to get half of this done by Summer and even Spring, as I found plenty of Winter Roots and a couple of Crystal Fruits as I made my way down The Mines.
I did have to wait until Winter came around to get the Snow Yam and Crocus, but they were both easy to find, especially with the pressure of crops out of the way. You'll also get 30 Winter Seeds, which can be a great way of getting a little extra Gold in the cold month.
Construction Bundle
| Item | Location |
| Wood (99) | Trees, Carpenter's Shop |
| Wood (99) | Trees, Carpenter's Shop |
| Stone (99) | Stones, Rocks, Carpenter's Shop |
| Hardwood (10) | Large Stumps, Large Logs, Mahogany Trees |
While this is one of the easiest bundles to complete, it can be quite costly and might be worth leaving nearer to the end. You'll need Stones and Wood for pretty much everything in-game, so sacrificing them early on isn't ideal.
You'll also need to upgrade your Axe at least once in order to chop down Hardwood Stumps and Logs - but the best place to go is the Secret Forest after you've upgraded to the Silver Axe, as this gives around 10 Hardwood every single day.
The reward for this bundle is the Charcoal Kiln, which produces Coal from Wood - and is very handy for another Bundle later on.
Exotic Foraging Bundle
| Item | Location |
| Coconut | Foraging (Desert), Oasis, Palm Tree (Desert/Ginger Island) |
| Cactus Fruit | Foraging (Desert), Oasis |
| Cave Carror | The Mines |
| Red Mushroom | Foraging (The Mines), Secret Woods (Fall), Mushroom Cave, Tapping (Mushroom Tree), Forest Farm Map (Fall), Mushroom Stool |
| Purple Mushroom | Foraging (The Mines), Mushroom Cave, Forest Farm Map (Fall) |
| Morel | Secret Woods (Spring), Forest Farm Map (Spring), Mushroom Cave |
| Maple Syrup | Tapping (Maple Tree) |
| Oak Resin | Tapping (Oak Tree) |
| Pine Tar | Tapping (Pine Tree) |
This can be one of the trickier ones, but with proper planning it turns into a breeze. One thing to bear in mind is that you only need to deposit five out of the nine items to complete it, so you can leave four out if you can't find them.
I went for Cave Carrot, Red Mushroom, Purple Mushroom, Maple Syrup, and Pine Tar, as they were the easiest to find for me. You can get the Coconut and Cactus Fruit with ease once you reach the Desert, but that does require quite a bit of investment and will thus be unlikely for most players.
You'll be given five Autumn's Bounty as a reward, which can be super helpful on any expeditions down the Mines.
Overall Reward
- Bridge Repair
You'll get access to the Quarry after completing the Crafts Room node, which is a fantastic area if you're on the hunt for ore - but it can also be a great space for anything like Kegs or other item crafting equipment.
Pantry
Spring Crops Bundle
| Item | Location |
| Parsnip | Crop (Spring) |
| Green Bean | Crop (Spring) |
| Cauliflower | Crop (Spring) |
| Potato | Crop (Spring) |
You won't have a huge amount of money at the start, but make sure to buy just one of each of the four crops above so that you have got them sorted.
Worst case scenario you can always just wait until next Spring, but you'll want to cross this one off in the first season if possible. You'll also get 20 Speed-Gro for completing this Bundle, which will help you earn a little more in the Summer!
Summer Crops Bundle
| Item | Location |
| Tomato | Crop (Summer) |
| Hot Pepper | Crop (Summer) |
| Blueberry | Crop (Summer) |
| Melon | Crop (Summer) |
The same is true for these four once again, although you'll hopefully have some more money to play with this time around.
Blueberries are the best-performing Summer crop in terms of profit, so you'll be drowning in those hopefully - but don't forget to plant the other three too!
It's also handy that you'll get one Quality Sprinkler as a reward here, letting you start the process towards full automation which will eventually save you lots of time and energy in-game.
Fall Crops Bundle
| Item | Location |
| Corn | Crop (Summer/Fall) |
| Eggplant | Crop (Fall) |
| Pumpkin | Crop (Fall) |
| Yam | Crop (Fall) |
You'll be doing the same thing again here - although I'd recommend planting the Corn in Summer if you can as that gives you an easier chance of getting the Gold crops you'll need for the next Bundle.
One Bee House is your reward for completing this, letting you bring some buzzing company into your farm and create some Honey too - which you'll also need soon!
Quality Crops Bundle
| Item | Location |
| Gold Parsnip (5) | Crop (Spring) |
| Gold Melon (5) | Crop (Summer) |
| Gold Pumpkin (5) | Crop (Fall) |
| Gold Corn (5) | Crop (Summer/Fall) |
This is by far the trickiest part of this collection, and where you're most likely to trip up. None of these are the most profitable crops for their respective seasons, so you'll likely be prioritising others and have less chance of getting Gold quality yields.
Furthermore, your chance of getting Gold crops is increased as your Farming level goes up, so you'll likely also struggle with Parsnips and even Melons in Year One.
Both Melons and Pumpkins are still fantastic crops for profit though, so I'd maybe forgo the most popular choices in Year One in order to get this done, or simply wait until the second year when money is less of a concern.
The reward of a Preserves Jar is a little underwhelming for the effort needed to get there, but it's still a great way to make extra money and is needed for at least one other Bundle.
Animal Bundle
| Item | Location |
| Large Milk | Cows |
| Large Goat Milk | Goats |
| Large Egg | White Chickens |
| Large Egg (Brown) | Brown Chickens |
| Duck Egg | Ducks |
| Wool | Rabbits, Sheep |
I started out on the Meadowlands Farm in Update 1.6 so this Bundle was relatively easy for me to complete.
You will need to make sure that you've got both Brown and White Chickens if you're buying from Marnie, but just keep progressing your Animal collection and this will come naturally.
You'll get a Cheese Press as a reward here, which is not only helpful for your Cows/Goats, but essential for the next Bundle too.
Artisan Bundle
| Item | Location |
| Truffle Oil | Oil Maker (Truffles) |
| Cloth | Loom (Wool), Recycling (Soggy Newspaper), Mummies (Skull Cavern), Desert Trader (Aquamarine x3) |
| Goat Cheese | Cheese Press (Goat Milk) |
| Cheese | Cheese Press (Cow Milk), Desert Trader (Emerald x1) |
| Honey | Bee House, Oasis |
| Jelly | Preserves Jar (Any Fruit) |
| Apple | Apple Tree (Fall), Fruit Bat Cave |
| Apricot | Apricot Tree (Spring), Fruit Bat Cave |
| Orange | Orange Tree (Summer), Fruit Bat Cave |
| Peach | Peach Tree (Summer), Fruit Bat Cave |
| Pomegranate | Pomegranate Tree (Fall), Fruit Bat Cave |
| Cherry | Cherry Tree (Spring), Fruit Bat Cave |
Much like the Exotic Foraging Bundle, while there are 12 potential options, you only need to submit six - making this easier than it would seem.
In my opinion, the Fruit Bat Cave is essential for this, as it saves you from having to plant a bunch of trees and wait for the correct season, and can let you complete it on that alone.
I supplemented my fruit with Cheese and Jelly from animals and the previously earned Preserves Jar though, so you don't have to fully rely on chance to get your hands on the Keg.
Overall Reward
- Greenhouse
The Greenhouse is one of the strongest things in all of Stardew Valley, as it lets you plant crops without any seasonal restrictions, and keep your production going even in Winter.
Fish Tank
River Fish Bundle
| Item | Location |
| Sunfish | Rivers, 6am-7pm, Spring/Summer, sunny weather |
| Catfish | Rivers/Secret Woods, 6am-12am, Spring/Fall, rainy weather |
| Shad | Rivers, 9am-2am, Spring/Summer/Fall, rainy weather |
| Tiger Trout | Rivers, 6am-7pm, Fall/Winter |
These four aren't too bad, you'll just need to pay attention to the specific weather and seasonal conditions in order to catch them. Rainy fish in particular can be a nightmare, as you'll need to strike whenever wet weather occurs and hope that you're lucky enough!
You'll get 30 Deluxe Bait as a reward here though, which is always handy for the rest of the catches.
Lake Fish Bundle
| Item | Location |
| Largemouth Bass | Mountain Lake, 6am-7pm |
| Carp | Mountain Lake, all day Spring/Summer/Fall, all seasons in Secret Woods/Sewer |
| Bullhead | Mountain Lake |
| Sturgeon | Mountain Lake, 6am-7pm, Summer/Winter |
Catching the Sturgeon is the real challenge here, as it's a rare spawn and is a nightmare to grab without the right equipment. Make sure that you've got the Iridium Rod, Deluxe Bait, and a Trap Bobber - from there you just have to hope for the best. I managed to get my Sturgeon from the Traveling Cart though, which saved me a bunch of time and effort!
As a reward though, you'll get one Dressed Spinner, which significantly increases your bite-rate, which you'll definitely find handy when time is of the essence.
Ocean Fish Bundle
| Item | Location |
| Sardine | Ocean, 6am-7pm, Spring/Fall/Winter |
| Tuna | Ocean, 6am-7pm, Summer/Winter |
| Red Snapper | Ocean, 6am-7pm, Summer/Fall, rainy weather |
| Tilapia | Ocean, 6am-2pm, Summer/Fall |
This is definitely the easiest of the fishing bundles, but you'll just need to pay attention to the timings and the seasons to make sure you don't miss anything. The Tilapia is the one you'll definitely need to try for, but just head over to the beach first thing in Summer or Fall and it shouldn't take too long!
Your reward here is five Beach Warp Totems, which can be good if you want to spend a whole day by the waves.
Night Fishing Bundle
| Item | Location |
| Walleye | Rivers/Mountain Lake/Cindersnap Pond, 12pm-2am, Fall, rainy weather |
| Bream | Rivers, 6pm-2am |
| Eel | Ocean, 4pm-2am, Spring/Fall, rainy weather |
As the name suggests you'll only be able to catch these in the dark, making it quite tricky if you don't plan well. The Eel, while having the widest time range, is the most difficult to actually catch of the lot - so make sure to bring a Trap Bobber to make things easier!
You will get a Small Glow Ring once you complete this bundle, but if you're anything like me you'll already have a much better one from the Mines anyway!
Crab Pot Bundle
| Item | Location |
| Lobster | Crab Pot (Ocean) |
| Crayfish | Crabpot (Lakes/Rivers) |
| Shrimp | Crab Pot (Ocean) |
| Snail | Crab Pot (Lakes/Rivers) |
| Periwinkle | Crab Pot (Lakes/Rivers) |
| Crab | Crab Pot (Ocean), Rock Crabs (The Mines) |
| Cockle | Foraging (Beach), Crab Pot (Ocean) |
| Mussel | Foraging (Beach), Crab Pot (Ocean) |
| Oyster | Foraging (Beach), Crab Pot (Ocean) |
| Clam | Foraging (Beach), Crab Pot (Ocean) |
You technically don't need a single Crab Pot in order to complete this bundle, which is ironic considering the name! As you need only submit five of the 10 possible items, conveniently just under half can be obtained by foraging the Beach area.
What's even better is that none of these require you to unlock the Beach bridge, so just make sure to check the area every day for those specific items. You can then complete this by obtaining the Crab from a Rock Crab in The Mines, which you should definitely be crawling anyway.
Thankfully you'll get three Crab Pots as a reward, letting you set them passively in the water and collect your rewards from now on!
Specialty Fish Bundle
| Item | Location |
| Pufferfish | Ocean, 12pm-4pm, Summer, sunny weather |
| Ghostfish | The Mines (Floors 20 & 60), Ghosts (The Mines) |
| Sandfish | The Desert (Pond), 6am-8pm |
| Woodskip | Secret Woods, Forest Farm |
These fish require you to go to specific, often hard-to-reach places in order to search them out - but they're not too much bother if you give it time and know where to look.
Both the Sandfish and Woodskip are super easy to catch once you unlock their respective locations, and I was lucky enough to get a Ghostfish from a Ghost drop in The Mines when farming for Prismatic Jelly. I did miss the chance to get the Pufferfish in Year One though, so I'd definitely go for that directly if you don't want to wait another year.
You get five Dish O' The Sea once you complete this Bundle though, which gives you a Fishing buff and can be super helpful if you're struggling to catch anything else within this section.
Overall Reward
- Glittering Boulder Removed
This removes the Glittering Boulder that sits next to the Mine entrance, allowing players to pan for minerals in the water. This is probably the weakest of all rewards from the Community Center, but never know when you might strike gold - quite literally in this case!
Boiler Room
Blacksmith's Bundle
| Item | Location |
| Copper Bar | Furnace (Copper Ore) |
| Iron Bar | Furnace (Iron Ore) |
| Gold Bar | Furnace (Gold Ore) |
You'll be able to quickly see that the Boiler Room is one of the easiest collections to complete in the Community Center, and if you're anything like me then you'll likely already have everything to complete it right away.
Just make sure to explore The Mines in order to get all of the required ore here, which amounts to five of each type. Copper can be found in Floors 1-40, Iron in Floors 41-79, and Gold in Floors 80-120.
You get an additional Furnace once you complete this, letting you expand your ore production and unlock all-new exciting items!
Geologist's Bundle
| Item | Location |
| Quartz | The Mines (All Floors) |
| Fire Quartz | The Mines (Floors 81-119), Omni Geodes, Magma Geodes |
| Earth Crystal | The Mines (Floors 1-39), Geodes, Omni Geodes, Duggies (The Mines) |
| Frozen Tear | The Mines (Floors 41-79), Frozen Geodes, Omni Geodes, Dust Sprites (The Mines) |
I managed to pick up all of these when passively exploring The Mines, with the Fire Quartz being the only somewhat difficult one due to its position deep within.
It's a nice treat to get five Omni Geodes as a reward here though, as they can hold all sorts of items and artefacts, and can even be traded directly with the Desert Trader for an Artifact Trove if you're looking to complete the Museum.
Adventurer's Bundle
| Item | Location |
| Slime (99) | Slimes (The Mines) |
| Bat Wing (10) | Bats (The Mines/Skull Cavern) |
| Solar Essence | Ghosts, Metal Heads, Squid Kids (The Mines), Mummies, Iridium Bats (Skull Cavern), Fish Pond (Sunfish), Krobus |
| Void Essence | Shadow Brutes, Shadow Shamans (The Mines), Serpents (Skull Cavern), Fish Pond (Void Salmon), Krobus |
This is by far the easiest Bundle in the entire Community Centre, as you not only need just two of the four items, but these are all things that you should have an abundance of already.
I submitted the Bat Wings and a Solar Essence as I was just short on Slimes, but you could easily just go for the first two.
You even get a Small Magnet Ring for completing this, which is one of my favourite items in the early game - making it so that you have a wider radius to pick up items.
Overall Reward
- Minecarts
This is one of my favourite things to get, as it allows you to instantly teleport between fixed points in the town, saving you so much time. I typically use it to head to The Mines from the Bus Stop, and then down to the Blacksmith to break open any Geodes I've found or donate anything to the Museum.
Bulletin Board
Chef's Bundle
| Item | Location |
| Maple Syrup | Tapping (Maple Tree) |
| Fiddlehead Fern | Secret Woods (Summer), Skull Cavern (Prehistoric Floors), Green Rain Trees |
| Truffle | Pigs |
| Poppy | Crop (Summer) |
| Maki Roll | Cooking (Fish/Seaweed/Rice) |
| Fried Egg | Cooking (Egg) |
I struggled the most with the Bulletin Board overall, and the Chef's Bundle was a little bit of a pain to complete. While most items can be collected as you play, you'll need to make sure to plant the Poppy in Summer and expand your farm enough to have Pigs.
Don't miss the Maki Roll recipe on Summer 21 either, as you'll otherwise need to wait for a rerun or pay for it at the Stardrop Saloon.
Three Pink Cakes are nothing to scoff at though, and will make a perfect birthday present for any of your favourite villagers!
Dye Bundle
| Item | Location |
| Red Mushroom | Foraging (The Mines/Secret Woods), Mushroom Cave, Tapping (Mushroom Tree) |
| Sea Urchin | Foraging (Beach), Beach Farm |
| Sunflower | Crop (Summer/Fall) |
| Duck Feather | Ducks |
| Red Cabbage | Crop (Summer) |
| Aquamarine | The Mines (Floor 40+/any Floor after finishing), Fishing Treasure Chests |
You'll want to first make sure that you've unlocked the Beach bridge expansion, as Sea Urchins only spawn on the additional section.
Furthermore, make sure that you're checking the Traveling Cart every Friday and Sunday as that's the only place you can buy Red Cabbage seeds before Pierre in Year Two.
Thankfully the reward is worth it though, as you'll get a Seed Maker, which is super handy if you've got any Ancient Seeds.
Field Research Bundle
| Item | Location |
| Chub | Mountain Lake/Rivers |
| Frozen Geode | The Mines (Floors 41-79) |
| Nautilus Shell | Beach (Winter), Beach Farm |
| Purple Mushroom | The MInes, Mushroom Cave, Forest Farm |
These should come to you naturally as you explore and fish, so you'll just have to remember to keep a hold of at least one as you find them. The Nautilus Shell is the main one that'll hold you back though, as that can only be obtained in the Winter by most players.
A Recycling Machine is the reward for this Bundle, letting you turn rubbish into wonders and save the planet in the process!
Fodder Bundle
| Item | Location |
| Wheat (10) | Crop (Summer/Fall) |
| Hay (10) | Marnie, Desert Trader, Silo/Autofeeder |
| Apple (3) | Apple Tree, Fruit Bat Cave |
This is another fairly easy one that just takes a bit of planning to achieve. The Hay can be picked up simply from Marnie or from your animal's Autofeeder once the Silo is filled, but you'll need to remember to plant some Wheat seeds in the Summer or Fall - but they do grow in just four days.
Furthermore, while you can rely on the Fruit Bat Cave for the Apples, I find that it's best to plant a tree as the chance of getting three to spawn is a little annoying to deal with.
Your animals can be treated to a Heater as a reward for completing this Bundle, keeping them toasty in those cold Winter months.
Enchanter's Bundle
| Item | Location |
| Oak Resin | Tapping (Oak Tree) |
| Wine | Keg |
| Rabbit's Foot | Rabbits, Serpent (Skull Cavern) |
| Pomegranate | Pomegranate Tree, Fruit Bat Cave |
The Wizard certainly has a trick up his sleeve with this one, as these items can take quite a while to get.
As far as I can tell Rabbits only drop a Rabbits Foot when at max relationship, so make sure to pick one up early if possible. Furthermore, try and complete the Artisan Bundle early to get your hands on a Keg and start the Wine making process.
Annoyingly you only get five Gold Bars as a reward here, which aren't exactly hard to get at the point where you can complete this Bundle. I guess the Wizard is a cheapskate!
Overall Reward
- Friendship
This is one of the best rewards, as it increases every non-marriageable Villager's Friendship rating by two whole Hearts, giving you a big boost when it comes to all your relationships.
Vault
2,500 Bundle
| Item |
| 2,500 Gold |
5,000 Bundle
| Item |
| 5,000 Gold |
10,000 Bundle
| Item |
| 10,000 Gold |
25,000 Bundle
| Item |
| 25,000 Gold |
While by far the simplest collection of Bundles, the Vault will set you back 42,500 Gold overall, making this a costly investment.
Overall Reward
- Bus Repair
Although this is expensive, especially early on, I'd recommend getting this as soon as you can reasonably afford it, as the Bus Repair allows you to access the Desert and everything that area holds.
I went for this in the Fall after my first big Crop sale, but you could easily opt for this in the Summer too if you have enough cash lying around.
Abandoned JojaMart
The Missing Bundle
| Item | Location |
| Wine, Silver Quality or better | Cask |
| Dinosaur Mayonnaise | Mayonnaise Machine (Dinosaur Egg) |
| Prismatic Shard | Mining |
| Ancient Fruit, Gold or better (5) | Crops (All Seasons) |
| Void Salmon, Gold or better | Witch's Swamp |
| Caviar | Preserves Jar (Sturgeon's Roe) |
This Bundle is only accessible after you've completed and restored the Community Centre, and is found where the JojaMart used to be. As you can imagine it's quite difficult, with many rare items required.
You'll likely have used your first couple of Prismatic Shards to get the Galaxy Sword or donate to the Museum, but the best place to get more is in the Skull Cavern or Level 100+ of The Mines.
You'll also want to use the Greenhouse for your Ancient Fruit, and also take advantage of the Seed Maker to create as many as you possibly can.
Overall Reward
- Movie Theater
Who doesn't love a good film? With the Movie Theater, you'll now be able to watch various films either on your own or with a Villager - which is perfect if you want to enhance your relationships.
How to unlock the Community Center
You'll unlock the Community Center any day after Spring 5 in Year One by entering Pelican Town from the Bus Stop screen when it is not raining.
A cutscene with Mayor Lewis should trigger, and he'll show you the nodes and strange creatures that have appeared. Make sure to head back into the Community Center and interact with one of the nodes to unlock the 'Rat Problem' quest.
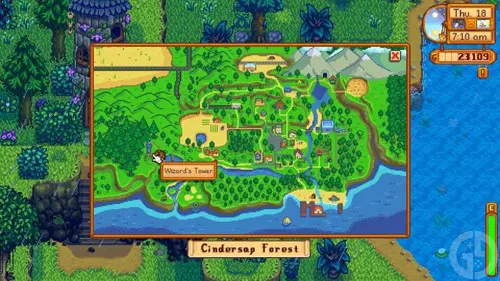
You'll then want to head to the Wizard after he invites you via letter the next morning, and he will teach you how to understand the Junimos, allowing you to start your work on restoring the building.
You can find more tips and tricks for your farming adventure on our Stardew Valley homepage, including all of the best mods you should definitely download, where to find the Bookseller, and what to do when green rain arrives.

About The Author
Harry Boulton
Harry is a Guides Writer at GGRecon, having completed a Masters of Research degree in Film Studies. Previously a freelance writer for PCGamesN, The Loadout, and Red Bull Gaming, he loves playing a wide variety of games from the Souls series to JRPGs, Counter-Strike, and EA FC. When not playing or writing about games and hardware, you're likely to find him watching football or listening to Madonna and Kate Bush.


