How to get to the Unmoored World in Dragon's Dogma 2 & reach the true ending
Unlocking the true ending in Dragon's Dogma 2 and reaching the Unmoored World gives players a lot to explore, including new loot and unique bosses to fight.
While Dragon's Dogma 2's standard ending puts the Arisen in their rightful place, unlocking the 'true ending' and reaching the Unmoored World is where the game truly concludes.
It is rather complicated to get there though, and there are many trials that you must face once you're in the alternate reality. However, with special bosses to fight and unique loot to claim, you definitely won't want to miss out.
SPOILER WARNING: Obvious spoilers for the end of Dragon's Dogma 2, and its secret final area. Proceed only if you're OK with this being revealed!
How to reach the Unmoored World
You'll first need to make sure that you've passed the point in the main story where you fight Talos and reach the 'Legacy' main quest that leaves you face-to-face with the Dragon.

You'll want to choose to 'fight' the Dragon in this instance, which should shortly take you to a scene where you're riding on its back.
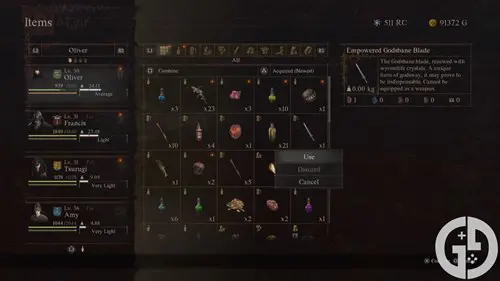
Climb around to the underneath of its chest and look for the glowing heart. Open your inventory, find the 'Empowered Godsbane Blade', and then select 'Use', ensuring that your character is on top of the heart area.
This will 'kill' the Dragon, and take you to the Unmoored World - an alternate reality where the horrors of the world can be found.
If you've already seen the 'standard ending' and want to instead experience the true ending, then you can select 'Load from last save' after the credits have ended. However, if you've already opted to begin again, you'll need to play all the way until the final quest once more.
How to complete the true ending
Achieving the true ending in Dragon's Dogma 2 requires certain parameters to be met, although you can do some of them in a number of different ways, and it can be quite confusing too.
You'll need to make sure that you have:
- Picked up your main Pawn and completed 'Dreams Apart'
- Completed 'A Scholarly Pursuit'
- Completed 'Hall of the First Dawn'
- Activated the final red light that appears at the Seafloor Shrine
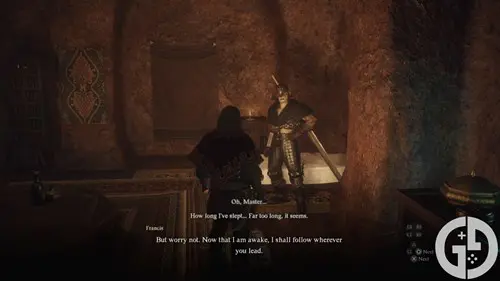
Dreams Apart is definitely the first thing that you'll want to do, as you won't get too far in this treacherous world without your main Pawn. To do this you'll want to head to the Forbidden Lab in Bakbattahl and go up the stairs to Phaesus' office.
This will then lead directly to the 'A Scholarly Pursuit' quest, in which you'll need to follow Phaesus' lead and remove the strange red light that appears outside the palace.
You'll need to be very careful here as Phaesus can die and put the whole ending into jeopardy. He fell for me just before the end of the quest, and luckily I had a Wakestone free to quickly revive him!
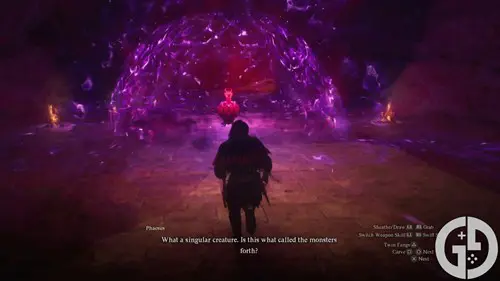
These strange red beacons will then appear near all of the major towns and cities across the Unmoored World, and each one holds its own unique boss that will eventually destroy the surrounding area if not dealt with quickly.
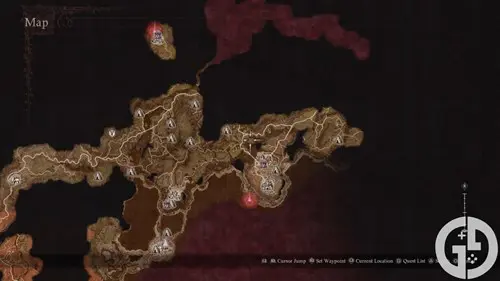
You won't want to waste any time resting here unless absolutely necessary, as the progress is defined by in-game time. There are four areas that you'll need to evacuate in order to 'complete' the true ending, being Vernworth, Sacred Arbor, Bakbattahl, and Volcanic Island Camp.
Each one requires you to complete two tasks after speaking to the town's 'leader' (Brant for Vernworth, Glyndwr for Sacred Arbor, for example). As you are on a time limit though, it might be best to take out all of the bosses linked to the red beacons first, as that'll let you evacuate without any stress.
![]()
These bosses can only be damaged by attacking their glowing pink weak points, and they will take zero damage if you attack them in any other way. Furthermore, getting too close to the areas that are engulfed in the glowing pink aura will cause you to die and 'fail' the ending, so make sure that you stay away!
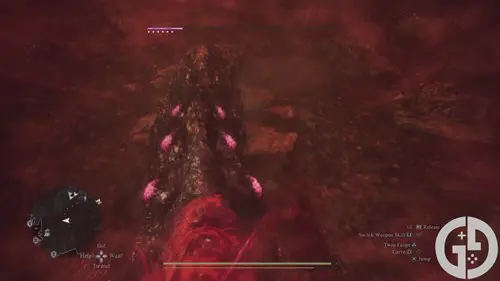
I found that the Magick Archer was the best Vocation for dealing with these tough bosses, as I was able to fight from a distance and directly lock on to each of the weak points.
However, if you're not too bothered about saving everyone, or are finding the bosses a bit too difficult, all you need to do is just sleep for four days and all of the beacons will activate, leaving the final one to appear in the Seafloor Shrine. I myself struggled when doing this, and found that I was only able to evacuate the Volcanic Island Camp and Vernworth, and fight the bosses in Sacred Arbor, Vernworth, Agamen, and Bakbattal.
Activating the beacon in the Seafloor Shrine will lead you to the end of the game, so make sure to only do this when you've wrapped everything up. You will need to do a bit of manoeuvring across the back of another dragon - which I'm not ashamed to admit bested me more than once - but once you've done that you will have completed the true ending and be ready for new game plus!
Head to our Dragon's Dogma 2 homepage to see if there's anything you missed on your first playthrough, as you'll have to deal with Dragonsplague, solve all of the Sphinx riddles, find all of the Maisters, and understand the different smithing styles.

About The Author
Harry Boulton
Harry is a Guides Writer at GGRecon, having completed a Masters of Research degree in Film Studies. Previously a freelance writer for PCGamesN, The Loadout, and Red Bull Gaming, he loves playing a wide variety of games from the Souls series to JRPGs, Counter-Strike, and EA FC. When not playing or writing about games and hardware, you're likely to find him watching football or listening to Madonna and Kate Bush.


