

All Final Fantasy 7 Rebirth Protorelic locations in the Grasslands & Junon
Here you'll find out everything you need to know about the Protorelic Phenomenon quests in Final Fantasy 7 Rebirth to complete them in the Grasslands and Junon.
As you explore each region of Final Fantasy 7 Rebirth, you’ll soon be swept up in various quests for Chadley, including the lengthy Protorelic Phenomenons – so I'm here to break down how to complete these quests in both the Grasslands and Junon regions.
Protorelics, in the game, are connected to a huge variety of trophies and vary from region to region. So whether you’re fighting bandits or playing Fort Condor, we’re here to give you a helping hand.
All Grasslands Protorelic Intel in Final Fantasy 7 Rebirth
To get your hands on the Grasslands Protorelic in Final Fantasy 7 Rebirth, you’re going to have to pursue some familiar faces from Remake: Beck’s Badasses. This motley crew of bandits have already purloined the relic and won’t part with it easily.
Grasslands Phenomenon Intel 1: Wild Bandit Chase

The first Protorelic Phenomenon will lead you to the lookout at the very edge of the Grasslands region. Once you’ve climbed to the lookout’s roof, you’ll need to take on Beck’s associates while he scarpers with the Protorelic.
The best way to beat them is by using fire spells to pressure them and deal elemental damage, so make sure you have some Fire Materia set and ready to go.
Grasslands Phenomenon Intel 2: One Badass Barbecue
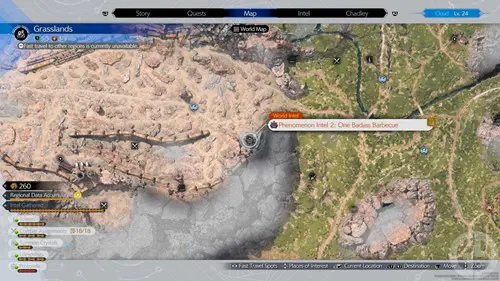
The next step will require you to head to an abandoned facility in the desert portion of the Grasslands just outside of Kalm. There’s a Chocobo Stop nearby that can provide some helpful fast-travel options if you go there earlier.
To complete this part of the quest, you’ll need to stealthily navigate your way around the bandits that have taken over the facility. Use the large shipping containers in the area to avoid their line of sight, and press Circle to dive into cover if they get close to spotting you.
The bandits have routine patrol patterns, so once you’ve learned them, you’ll be able to avoid their gaze with no problem.
Once you’ve made it to the main building of the facility, Beck and his cronies will head inside. When you confront them, one will be left as bait while the others flee. Simply beat him to complete this part.
Grasslands Phenomenon Intel 3: Diversionary Tactics
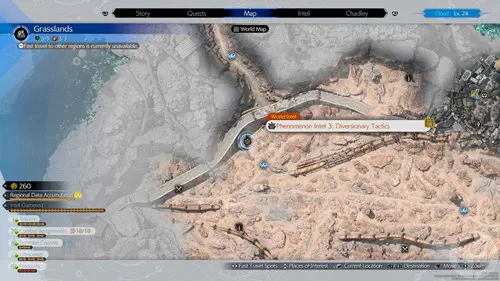
Nearby, there is a warehouse that is seemingly abandoned. This is perhaps the easiest section of the quest.
Once inside, you’ll be expected to guess which of the bandits is hiding the Protorelic behind their back (it’s not that hard, just look for the sparkles behind them). Once you do, the fight will ensue with more of their gang.
As they make their slippery escape again, you’ll hear them discussing the key that they have buried. This will give you access to their hideout.
So, all you need to do is start treasure hunting with your Chocobo. Once you’ve sniffed out the trail to the buried key, you’ll be able to take on the final part of the quest.
Grasslands Phenomenon Intel 4: Taking Care of Business
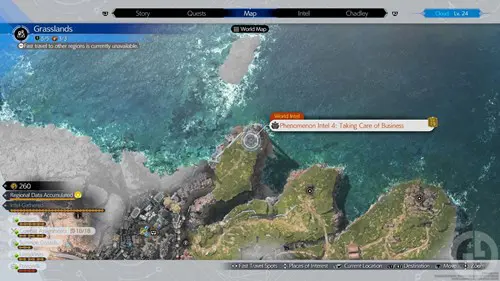
The final section is in an abandoned warehouse on a spit of land near Kalm. You’ll need the key you dug up earlier to get to the gated area. Once you get inside, you’ll see Beck and his bandits are all dead (!!!). Just kidding, they’re only playing dead. So, it’s time to give them a rude awakening.
You’ll undoubtedly notice there is a large container hanging above them. Pull the lever inside to drop the crate on them and get them on their feet. Once you do, you’ll have to beat them, and the Modded Sweeper they activate.
The Sweeper is weak to thunder spells, so having some Lightning Materia would be handy. It can be easily scrapped when hitting its weapon parts, so focus on them to pressure it before finally staggering and beating.
After the fight, in an attempt to turn into a legitimate business, you’ll just have to pay 2,000 Gil to get the Protorelic. Sure it stings the wallet a bit, but if it helps them turn over a new leaf, what’s the harm, right? And that's it, the first Protorelic is finally yours.
All Junon Fort Condor Protorelic Intel
When you get to the Junon Region’s Protorelic quests in Final Fantasy 7 Rebirth, you’ll see that it’s completely different from the Grasslands. Rather than taking on a fresh set of bandits, you’ll be sucked into the polygonal world of Fort Condor, a tower defence strategy game.
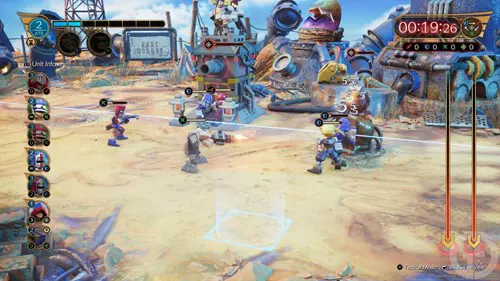
With Fort Condor, you’ll have to deploy various units that will attack enemies and defend your base. In a rock, paper, scissors style: Rangers (arrow) beat Enforcers (shield), Enforcers (shield) beat Vanguards (sword), and Vanguards (sword) beat rangers (arrow).
You'll also have Barret, Tifa and Cloud as hero supports. So, deploying your units according to the enemy’s tactics is essential to push forward and beat the boss.
While you can effectively deploy any strategy to try and win, these were the methods I found to be the most effective when playing Fort Condor.
Junon Phenomenon Intel 1: The World of Fort Condor

Hero Units - Cloud and Barret
Formation - Assault: Offense Focused
Perhaps your biggest concern here is the M.O.T.H. Unit and Blast-Ray which are equally powerful and fast. Utilising your Elite Rangers to acquire Barret quicker as a support hero is key. However, you're going to want to set up a formidable attack against the Rangers, so be sure to conserve your Vanguards to deal some heavy damage to their ranged units.
Junon Phenomenon Intel 2: O Captain! My Captain!
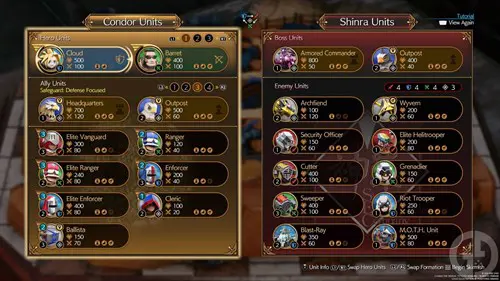
Hero Units - Cloud and Barret
Formation - Safeguard: Defence Focused
The enemy has a lot of offensive units in this round, so prepare your defences with the Ballista and Enforcers that will slow their assault. Once you've whittled down the remaining units, get Cloud as close as possible to the larger monsters so that he can decimate them with his Braver attack before continuing the advance.
Junon Phenomenon Intel 3: Princess in Another Castle

Hero Units - Cloud and Tifa
Formation - Entrench: Stronghold Defence Focused
The Trebuchet and Ballista are integral to your various offences and defences here. Placing Ballista at each path will help to deal with the larger monsters that can quickly break through your ranks. As you eventually push forward, set up two or three trebuchets on the other side of the central mound so that they can deal some heavy damage to the boss while peppering the remaining enemies with your standard and elite units and summoning Tifa if the monsters get too close to your base.
Junon Phenomenon Intel 4: Interdimensional Warlock

Hero Units - Cloud and Tifa
Formation - Balanced: Offense and Defence Focused
For the final match, having a balanced team was incredibly helpful. By pushing forward with your Elite Enforcers on the right path, you can stymie a lot of the progress the enemy will attempt to make Additionally, your Clerics will come into their own here. Make sure you get them out as soon as possible so they can continuously heal your units as they push forward to the Warlock.3
Once you've completed these matches, the next Protorelic is all yours, and you even get a hint of what is to come of collecting them all.
For now, that’s everything you need to complete all the Protorelic Intel locations in the Grasslands and Junon regions in Final Fantasy 7 Rebirth. As we complete more, we’ll be updating this page, so be sure to keep popping back.
In the meantime, don’t forget to check out our Final Fantasy homepage, where you can find plenty of FF7 Rebirth guides, like the best party combinations, the best Materia to set and how to play Queen’s Blood.

About The Author
Jack Roberts
Jack is a Guides Writer at GGRecon. With a BA (Hons) & MA in English and Creative Writing, he was also the Gaming Editor for The Indiependent. When not pondering which game has the best cup of coffee (and drinking far too much of it himself), he can often be found playing Dead by Daylight, Street Fighter or making yet another build in Bloodborne.


