Best Star Wars: Squadrons Loadouts

Gather your pilot pals and suit up with a squadron as Star Wars: Squadrons hits hyperspace at breakneck speed. As plucky players join either the New Republic Navy or the Galactic Empire, the action moves to an uneasy time on both sides for the galaxy far, far away. In the aftermath of Star Wars: Return of the Jedi, the Galactic Civil war comes to a head in this flight simulator.
Although there's a typically colourful Story Mode, the core of Squadrons is held up by its ambitious multiplayer that's split into both Dogfights and Fleet Battles. Climbing the ranks might seem like a daunting task when you're facing off against other Luke Skywalker-esque fighters, but with some simple loadout tweaks you'll soon be a hotshot pilot that even Han Solo would be proud of.
From the main menu, you're encouraged to head over to either the Republic or Empire hangars and change each of your four ships' loadout. Whether its the X-Wing, Y-Wing, A-Wing, and U-Wing or TIE Fighter, TIE Bomber, TIE Reaper, and TIE Interceptor, the right loadout can make our break your multiplayer matches.
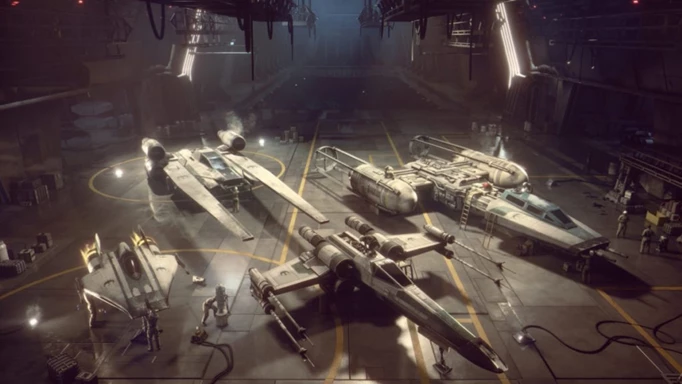
 Click to enlarge
Best Star Wars: Squadrons X-Wing loadout
Starting with possibly the most iconic Star Wars ships out there (aside from Millennium Falcon), you'll want a tactical loadout for what's your most accessible ship. Firstly, a heavy Ion Cannon will tear through an enemy's shield in hopefully no time at all. The X-Wing is more vulnerable than other ships in Squadrons, meaning Seeker Warheads are invaluable for taking out enemy fire.
Primary Laser: Ion Cannon
Left Auxiliary: Repair Droid
Right Auxiliary: Cluster Missiles
Countermeasures: Seeker Warheads
Hull: Ferroceramic Hull
Shields: Nimble Deflector
Engine: Microthrust Engine
Best Star Wars: Squadrons Y-Wing loadout
Y-Wings are nippier and have the sole challenge of taking out the capital ships as quickly as possible. Although the Y-Wing doesn't get all the fame and glory of the X-Wing, their bombing streaks are a major coup. When it comes to their larger role, they're packing a punch in terms of firepower. This can be optimised with short bursts of fire from something like a Heavy Rotary Cannon.
Primary Laser: Heavy Rotary Cannon
Left Auxiliary: Ion Bomb
Right Auxiliary: Proton Bomb
Countermeasures: Sensor Jammer
Hull: Dampener Hull
Shields: Conversion Shield
Engine: Sublight Engine
Best Star Wars: Squadrons A-Wing loadout
The speedy A-Wing can be overcharged with its shields and is a deadly addition to the Squadrons list. A flashy loadout on your primary can seem tempting, but trust us, the Standard Laser Canon is what you'll want to go for here.
Primary Laser: Standard Laser Cannon
Left Auxiliary: Cluster Missiles
Right Auxiliary: Quick-Lock Missiles
Countermeasures: Seeker Warheads
Hull: Dampener Hull
Shields: Scrambler Shield
Engine: Microthrust Engine
Best Star Wars: Squadrons U-Wing loadout
Support ships are often neglected in Squadrons, but let's remember they're often what wins the war in multiplayer. The chunky U-Wing is hard to bring down thanks to this little trooper picking shields and defence over attack. While it's similar to the TIE Reaper in loadout, here's what you need to know.
Primary Laser: Laser Cannon
Left Auxiliary: Supply Droid
Right Auxiliary: Tactical Shield
Countermeasures: Seeker Warheads
Hull: Deflector Hull
Shields: Fortified Deflector
Engine: SLAM Engine
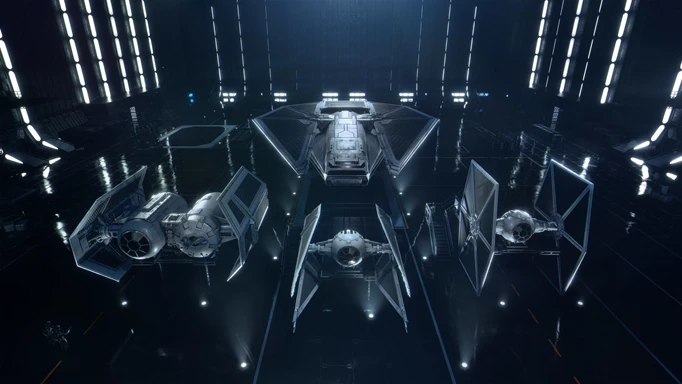 Click to enlarge
Best Star Wars: Squadrons TIE Fighter Loadout
Pretending you're a veritable Darth Vader, jump in the cockpit of his legendary ship. Effectively the Empire's version of the X-Wing, the TIE Fighter can zip through battle with ease. Even though the Empire's ships lack the shields of the Republic, that doesn't mean they'll be going down without a fight. Despite those playing as the Empire tending to stick with TIE Interceptors and Bombers, there aren't plenty of TIE Fighter fans. Here's the ideal loadout.
Primary Laser: Burst Cannon
Left Auxiliary: Proton Torpedo
Right Auxiliary: Ion Torpedo
Countermeasures: Sensor Jammer
Hull: Dampener Hull
Engine: SLAM Engine
Best Star Wars: Squadrons TIE Bomber Loadout
TIE Bombers have the honour of being the strongest ship to grace Squadrons as they chug through the cosmos and dole out jaw-dropping damage. Given the following should ensure the TIE Bomber has the most powerful loadout in the entirety of the game.You should still bear in mind that Bombers shouldn't be your go-to choice for taking on smaller ships. This is one goliath saved for the Mon Calamari Cruisers.
Primary Laser: Guided Rotary Cannon
Left Auxiliary: Assault Shield
Right Auxiliary: Multi-Lock Missiles
Countermeasures: Chaff Particles
Hull: Standard Hull
Engine: Microthrust Engine
Best Star Wars: Squadrons TIE Reaper Loadout
With the TIE Reaper being designed as a support ship, it's supposed to annoy rivals by buzzing around and being increasingly hard to take out. You'll want to supercharge your TIE Reaper's loadout as a dogged ship that will need to be repeatedly hit as it tries to fly away. A reaper can be the MVP in terms of sheer survivability.
Primary Laser: Guided Laser Cannon
Left Auxiliary: Targeting Beacons
Right Auxiliary: Turret Mines
Countermeasures: Seeker Warheads
Hull: Reinforced Hull
Shield: Scrambler Shield
Engine: Twin Ion Engine
Best Star Wars: Squadrons TIE Interceptor Loadout
Finally, it's the most popular ship to take off in Star Wars: Squadrons. While the Interceptor's fan-favourite status means plenty of pilots have got to grips with this one in no time at all, it also means few have learned the proper loadout to make the most out of their TIE Interceptors. With a few minute changes, the Interceptor can live up to its impressive legacy.
Primary Laser: Standard Laser Cannon
Left Auxiliary: Cluster Missiles
Right Auxiliary: Anti-Starfighter Missiles
Countermeasures: Sensor Jammer
Hull: Dampener Hull
Engine: Propulsion Engine
Getting the perfect loadout will take a lot of grind, however, it can be done. When players reach Level 40, they'll have enough Requisition to unlock every component. Even though the above are held by many as the "best" loadouts, it's a case of trial and error. Ultimately, it's up to players to decide what works best for them and how they want their squadron to function. Now you know which loadout is going to give more bang for your Galactic Credit, it's time to spread those X-Wings and soar to victory for whichever side of the Galactic Civil War gets your support.
Stay up to date with all the latest esports and gaming news by checking out our social channels here: Twitter | Facebook
Images Motive Studios
