

Destiny 2 King's Fall Raid Walkthrough
King's Fall has returned in Destiny 2, and we have the tips you need to complete it.
This is part of the ‘Destiny’ directory
Directory contents
-
Seasonal Artifact Mods
-
All Exotic Weapons & Armour
-
Best Prismatic builds
-
Campaign Mission List
-
Convalescence: Budding
-
Ending Explained
-
Episode Echoes Act 1
-
Episode Heresy Explained
-
Episode Revenant Explained
-
Ergo Sum Exotic
-
Every Prismatic Aspect, Fragment & Ability
-
Red Death Reformed
-
Wild Card Mission
-
All DLC & Expansions
-
Solstice 2024
Destiny 2 King's Fall is finally here, the classic raid from the original game has been revived and revamped. Destiny 2 is a very different game from its predecessor. While the raid is mostly the same as we remember from the first game, there are a couple of changes that might stump a long-time Guardian. Here is everything you need to know to complete the Destiny 2 King's Fall raid.
- Guardians are getting a new subclass, learn all about it in our Destiny 2 Strand subclass guide.
Destiny 2 King's Fall Raid: Court of Oryx
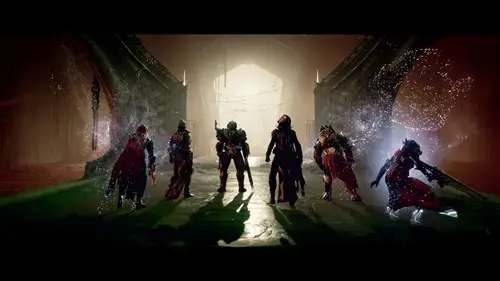
The King's Fall raid begins at the Court of Oryx. You start in a large room, there is a corridor leading to a portal in front of you and exits on the left and right. Along the corridor to the portal, there are six statues. The objective here is to gather relics and insert them into each of the statues, two at a time, to open the portal. The first two relics are on the pillars in front of you. Two Guardians need to grab them, and when the coast is clear, insert them at the same time into the same statue.
After that, relics will being to spawn to the left and right of the main room. The exits lead to bridges, which in turn lead across to more rooms. One relic will spawn on each side, so you will need players to grab them and bring them back to whichever statue is currently active and insert them at the same time again. It is important to note that while carrying a relic, you are not able to use your weapons.
The difficulty here is that many enemies are going to spawn as you go. The main room will fill up with enemies, there will be more on the bridges leading out, and more again in the two rooms across those bridges. Your best bet is to divide into two teams of three, one team for each side. On each team, one person grabs the relics, one person stays with them to cover them, and the last person hangs back and clears out enemies.
Barriers will form on the doors leading out of the main room, so the Guardians who are dealing with enemies will need to shoot them down. Once twelve relics are placed into all six statues, the portal will open and you can enter the raid proper.
- A new season has just begun, learn what you need to know in this Destiny 2 Season of Plunder explainer.
Destiny 2 King's Fall Raid: Tomb Ships Puzzle
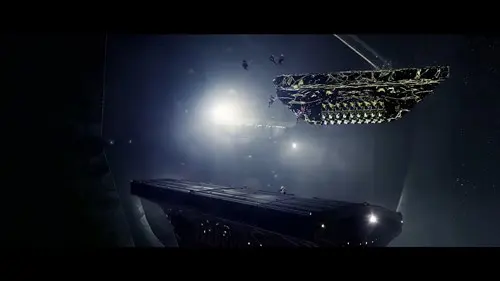
Your next challenge is a jumping puzzle. As you make your way forward after the portal, you will have to jump across some swinging pendulums. After that, you will come to a vast open space, where you will be on one platform and there will be another one on the far side of the area. Between you and the other side, Hive Tomb Ships will be flying around. As you can probably guess, you need to ride the Tomb Ships in order to get across.
Now, this is a tricky thing to explain in writing, and I do have to recommend you look for a video if you want to see how this is done. What I can say is that the ships follow a set path, you can watch them and learn exactly where they will be and when. If you want to figure this out for yourself without simply following a tutorial, it is fairly simple to do. Look for a Tomb Ship that flies close to the other ledge, one that you could jump to there from. Then, watch where that ship comes from, and which other ships it passes. You can use this method to essentially trace a path backwards through the ships.
Don't be afraid to jump out there and have a go, while the ships will disappear and you will die if you fall, you will spawn back at the start fairly quickly. Have some fun with this, but if you are getting sick of trying and falling, maybe check out a video that shows the path. Or, if you really want to skip ahead, you can use a sword and some careful jumping to fly your way across.
When you reach the other platform, go around to the other side of it to find another docked Tomb Ship. Ahead of it is a small gap in the wall, blocked by a forcefield. There are plates on either side of the ship, and when stood on they deactivate the forcefield. The idea here is that two people can stand on the plates and the others can ride the ship through the gap. Then, they can stand on two more plates on the other side while the people at the start ride a second ship through.
That said, you can also ride the Tomb Ship to the wall, and before it goes through the forcefield, jump off to the left. There is a hidden room in the wall on the left with a chest in it. You can grab the chest here, and provided there isn't too much bumping and shoving, you can get your whole team through here.
Regardless of how you do it, head on up the gravity lift to the first proper encounter of the raid. Yes, we are just getting started.
- The next chapter of the Destiny saga begins with the Destiny 2 Lightfall release date.
Destiny 2 King's Fall Raid: Totems
The Totems are what we would have called a confusing raid puzzle in 2015, which is pretty funny by modern raid standards. How far we have come! So, when you enter this room there will be a bunch of Hive worshipping in front of a large door. There is a plate in the middle of the room, and exits to the left and right. These exits lead to small caves, which are full of mist and have giant totems floating above more plates. At the entrance to each cave, there is an orb.
The objective here is to open the door. To do so, you need to gain stacks of Deathsinger's Power and stand on the plate in the middle. To get Deathsinger's Power, you need to pick up one of the orbs and hold it for thirty seconds. However, those plates in each cave need to be stood on or the totems will wipe out the team. However, the mist in each cave will gradually kill anyone who is not within the aura of the orb. So, here is what you need to do.
Divide into two teams of three again, one team for each side. One player per team will grab the orb, this will keep them safe as they run for the plate under the totem on their side. Another player on that team will join them shortly after. The aura from the orb lasts for thirty seconds. Before the timer counts to zero, the aura needs to be taken by another player. If the thirty seconds end and no other player grabs it, the orb will respawn at the entrance of the cave. The third player on the team will spend the encounter in the middle room, clearing out enemies.
The player who first grabs the Brand of the Weaver must run to the plate under their totem. Killing enemies will then grant them stacks of Deathsinger's Power. Shortly after, the next player will come and take the aura. The first player must then go to the centre plate, where the Deathsinger's Power will be gradually deposited. Once done, they must grab the Brand Claimer. This item drops from Blightguards, Taken Knights that spawn on the balconies in the centre room. The third member of each team should take it upon themselves to deal with these Blightguards while keeping the room clear of enemies. This creates a cycle where you consistently have one Guardian on the totem plate and one on the centre plate opening the door.
All the while, you will have hordes of Hive entering the area through various doors. In the middle room, they come in on the balconies above, as well as through the main door you are there to open. They can get close very quickly, so a close-range weapon like an SMG would be ideal. In the side caves, you will have enemies coming out of doors both on ground level and above. They can be quite far away, so a good ranged weapon like a pulse rifle would be useful here.
Continue this cycle until all the symbols on either side of the main door light up, opening the door and completing the encounter.
- Something you should familiarise yourself with before tackling King's Fall are the new Destiny 2 Season 18 artifact mods.
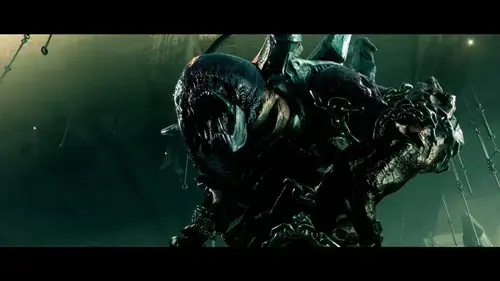
Destiny 2 King's Fall Raid: Warpriest
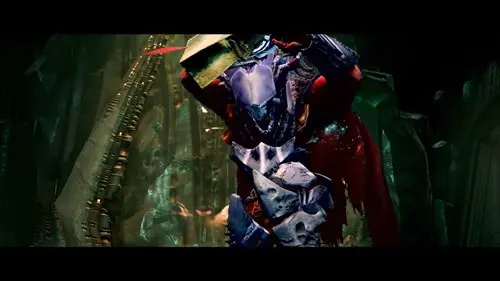
Now we are facing off against the first boss of the raid. The Warpriest is a giant Boomer Knight. The Warpriest is on a platform in the back of the room. You enter directly in front of him, on the ground floor. On your immediate left and right are higher platforms that you can use for cover. On the floor, and on the left and right ledges there are plates on the ground, these will be important shortly. In front of the Warpriest are three huge monoliths floating in the air.
You start the encounter by standing on the three plates. Enemies will enter through doors around the arena, so clear them out as quickly as you can. Eventually, three yellow health bar Knights will appear. Once all three Knights are taken out, you will see 'Glyph sequence started; appear in the bottom left. When this happens, the three stone monoliths will begin to glow one at a time. The order in which they begin to glow corresponds to the order in which you must step on the three plates in the back of the room.
However, the monoliths only glow on the sides facing the Warpriest, so someone will need to get on that side of them in order to see the order. This is most easily done by standing directly beneath them on the Warpriest's side, as then he will be on the ledge above you, which you can use for cover. Once you have the sequence, step on the three plates in that order.
The person who stands on the third plate gets the Brand of the Initiate. This aura allows anyone nearby to do damage to the Warpriest. The person with Brand of the Initiate will have a timer ticking down. When the timer reaches zero, the Warpriest will activate the Oculus and attempt to wipe your team. In order to avoid death, another player must kill one of the Blightguard Taken Knights, grab the Brand Claimer and use it to take the Brand of the Initiate and restart the timer. After three rounds of this, the Warpriest will retaliate by activating the Oculus regardless. To survive this, use one of the monoliths as cover. Whichever one you hide behind, the Warpriest will destroy, so you only get a handful of attempts before he will get you.
That is basically it, repeat the process until the Warpriest is dead. Although the monoliths disappear, the glow will still appear so you can still figure out the pattern for the plates. The trick is to maximise DPS with linear fusion rifles, supers, anything that hits hard, all while swapping the Brand of the Initiate and letting the timer run down as much as possible to maximise the time you have to do damage. Once the Warpriest is dead, we can move on.
- In Lightfall, we are headed off to Neptune and the capital city of Destiny 2 Neomuna.
Destiny 2 King's Fall Raid: Maze And Golgoroth
Once you step through the portal after the Warpriest, you will be at the start of a maze. This maze is incredible simple, in short, I can tell you that if you take a right, then a left, then a left, then a right, and go straight ahead, you will be done. The only other thing of note is the chest in the centre of the maze. The chest is behind a locked door, and you need to step on four plates in the right order to open it. To get to the centre, from the beginning, take a right, then a left, then a left, and when you come to a hole just before the right turn towards to end of the maze, look to your left to see the door.
If you imagine the maze as a grid, the start to the finish as the bottom to the top, then the first plate is to the left of the centre. The second plate is in the bottom right corner, the third plate in the bottom left corner, and the fourth plate is in the top right corner. Have a Guardian step on each of the plates in this order to open the door and get to the chest. However you choose to complete the maze, the exit at the top takes us to Golgoroth's lair.
Golgoroth is a giant Ogre, shooting the orb on the ceiling will get him to emerge from the ground in the centre of the pit. There is a raised area all around the pit where you are largely safe from Golgoroth, but ads will spawn in through doors there. Your first job is to clear out these ads so that you will be free to engage with Golgoroth. This is where his gaze becomes important. Golgoroth has a large critical hit spot on his back, you can't miss it. It glows very brightly. It can be difficult to get a good shot on it because of the location, so you will likely need to get up on a box or something to hit it. When you shoot the spot, you will get Golgoroth's Gaze.
This basically means that until the twenty-second timer runs out, Golgoroth will focus entirely on you. He will fire Taken orbs at you, which you can shoot down. While he does this, his stomach will open and that is his weak spot. The rest of the team needs to hit him there as hard as they can, but there is an extra step. Around the ceiling, there are more orbs that can be shot down. These orbs create an area in which your damage is massively increased, so the team will need to stand in one of these areas in order to defeat Golgoroth. In the original version of the raid, the six orbs were there from the start. In Destiny 2, only the first orb on the right appears. The first orb on the left appears after the right one is shot down, then the second one on the right, second on the left, and so on. The idea here is that you will need to alternate sides and positions throughout the fight.
Here is the strategy. One player shoots the spot on Golgoroth's back, gaining Golgoroth's Gaze. Ideally, you want to time this just as the other players shoot down one of the orbs on the ceiling. Once the orb is down, the player with Golgoroth's Gaze must stand on the upper level, behind the dropped orb to give the team a clear shot at his weak spot, which is his belly. Four members of the team then have twenty seconds to stand in the dropped orb and unload as much damage as they can into Golgoroth. It is advisable to use a Titan bubble with weapons of light, or a Well of Radiance, basically anything that buffs the damage of all players.
Before the timer is about to run out, a second player who should now be in position behind Golgoroth will shoot his back to get his Gaze, then quickly move into position behind the second orb on the left side. The damage dealers will move to the next position, while the Guardian who had the Gaze first will then get into position to shoot Golgoroth in the back from the right side of the room. The third orb will be shot down, the middle one on the right side, and the action will be moved there. Repeat this process until all orbs are exhausted, or Golgoroth is back in the dirt.
One more mechanic to be aware of is the hard mode mechanic from the original Destiny version. When the orb of light is dropped and the damage dealers stand in it, one of them at random will be overcharged with light. You will see this in the tooltips on the bottom left of the screen. If this is you, you need to run over and stand near Golgoroth when the timer ticks down. Doing so will have you explode and do damage to Golgoroth. If you are still standing around your teammates, you will blow them up instead.
- While on Neptune, we will be meeting the planet's protectors, the Destiny 2 Cloudstriders.
Destiny 2 King's Fall: Wipeout Wall and Deathsingers
The next section of the raid is affectionately remembered as the Wipeout wall, because it reminded players of the TV show, and definitely nothing else. There is nothing funny about the long shafts that thrust violently out of the wall. This part is fairly simple, you need to make your way across the room, jumping from ledge to ledge and avoiding the obstacles. Remember to use your Ghost here, as there are invisible platforms that you need your Ghost to be able to see. Cross the room and make your way up to the final area of the raid.
This final arena is a long room, with four small platforms in each corner, and two large platforms in the middle, one on either side. When you enter the room first, the Deathsingers will be on each of the two taller platforms. Above one of the smaller platforms you will see a glowing Taken orb. It is too high up to reach by jumping, you need to build platforms to get there. Not just anyone can pick it up, as one member of your team will become Torn Between Dimensions, and appear like a Taken. That person must go and get the orb.
To do so, the other members of the team must stand on the platforms to create a path the Torn Between Dimensions player can use. The path is constructed by standing on of the plates in the correct order to reach the orb.
This is one of the biggest changes to the raid from the original version. Before, you had to create a series of platforms across all four plates, and you only needed to do it once to begin a damage phase. Now, you only need to stand on two plates. When you enter the room, the orb will be above one plate, and a Revenant Knight will be standing on another one. Defeat the Knight, then stand on that plate first. Then, have another player stand on the plate under the orb. This will create the platforms that the Torn Between Dimensions player can use to jump up and grab the orb. Repeat this process three times to get the Brand Claimer.
Once they have the Brand Claimer, they need to jump down and use it on the Deathsinger who is currently attacking. Once that is done, the Deathsinger becomes vulnerable. The best spot to gather your team for damage is on one of the small ledges between the two sisters. Stand on the one opposite the Deathsinger you are currently attacking and do as much damage as you can. Once the damage phase is over, repeat the original process. It is important to know that once you kill one of the Deathsingers, you must kill the other one in the next damage phase. If you don't, the team will wipe. As such, it can be a good idea to weaken both sisters until they have very little health, so they can both be taken out quickly.
- Click here to learn more about the Fortnite x Destiny 2 crossover.
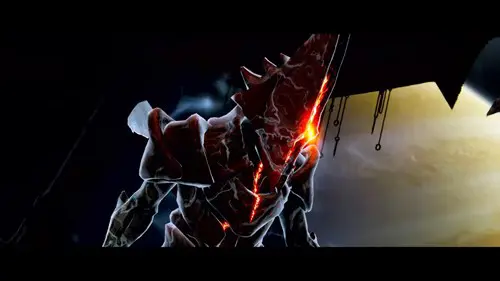
Destiny 2 King's Fall Raid: Oryx, The Taken King
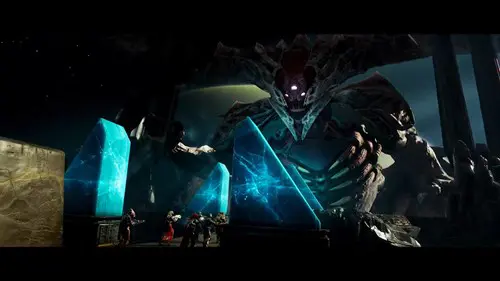
We are now at the final boss, the Taken King himself. This fight bears some similarities to the previous one, so you won't be totally lost to begin with. Oryx will appear at the back of the room, he is so huge he is actually outside of the room moving around it. Shortly after he appears, Oryx will make his way to one of the four plates in the room, and slam on it. When he does, it will begin to glow. This will also make one random player Torn Between Dimensions, Like the last encounter, you need to create platforms using the plates. This will allow the Torn Guardian to climb up and grab another orb.
When the third Torn Guardian grabs the orb, they must come back down and take the brand from the Knight called the Vessel of Oryx who spawns at the back of the room. This will give them the Aura of Immortality. While all of this is happening, Ogres will be spawning at the four corners on either side of middle platforms. They appear just behind and to the side of each of the plates. It is crucial that these Ogres are taken out quickly, before they can move away. Once killed, they drop a Corrupted Light orb that you will use later to damage Oryx.
When the player kills the Vessel of Oryx, they will get an aura around them. Any Guardians within that aura will be completely invincible, which you will need to be for what comes next. When Oryx slams the plate again, use the Corrupted Light dropped by the Ogres to stun him. Step into them and wait to see the notification that says your name, and that you have detonated the Corrupted Light. When you see that, run as fast as you can back to the centre and gather in the protective aura to survive the explosion. The Corrupted Light orbs will detonate and now you can damage Oryx. Hit him in his exposed chest with as much damage as you can.
After damage phases, Oryx can start dropping meteors on you, because he doesn't know the meaning of fair play. To avoid them, keep running. Run around until they stop falling, and avoid getting too close to other players as your meteors might hit the other player. Also he will create a bubble at the end of the room. When he does, you need to kill the Knights that spawn on the platforms, and then stop the Thrall from reaching the bubble.
One of your teammates at random will be transported inside the bubble. There they will face the Shade of Oryx, who flies around wielding a sword. He mostly stays outside the bubble where he is difficult to see, but he will come in to attack. More teammates will be transported inside the bubble periodically. You need to defeat the Shade or Oryx to escape the bubble.
Once you do, continue the process of stunning and damaging Oryx until his health drops to a threshold on his health bar, which is about a quarter. Once it does, he will enter his last stand and move to the end of the room, charging a final attack to wipe your team. Hit him with everything you have to defeat Oryx and complete the raid.
That is everything you should need to do to complete the Destiny 2 King's Fall raid, if there are significant changes we will be back to update this guide. For more on the game, check out our Destiny 2 Arc 3.0 guide.

About The Author
Dave McAdam
Dave is a Senior Guides Writer at GGRecon, after several years of freelancing across the industry. He covers a wide range of games, with particular focus on shooters like Destiny 2, RPGs like Baldur's Gate 3 and Cyberpunk 2077, and fighting games like Street Fighter 6 and Tekken 8.
This is part of the ‘Destiny’ directory
Directory contents
-
Seasonal Artifact Mods
-
All Exotic Weapons & Armour
-
Best Prismatic builds
-
Campaign Mission List
-
Convalescence: Budding
-
Ending Explained
-
Episode Echoes Act 1
-
Episode Heresy Explained
-
Episode Revenant Explained
-
Ergo Sum Exotic
-
Every Prismatic Aspect, Fragment & Ability
-
Red Death Reformed
-
Wild Card Mission
-
All DLC & Expansions
-
Solstice 2024


