Final Fantasy 14 P1S Savage: Asphodelos The First Circle Raid Guide

Now that there’s been a couple days of clears and strategy refinement for Final Fantasy 14's P1S Asphodelos: The First Circle (Savage) raid, the path to success for the fight becomes clearer. Even though the fight is relatively easier compared to fights found in other Final Fantasy 14 Savage raids or even in later fights for its own tier, the battle with Erichthonios is still a tough battle of positioning and adaptation. Here’s a breakdown of the fight that can help your static prog and clear within no time!
Final Fantasy 14 P1S Savage: The First Circle Raid Guide
 Click to enlarge
Here’s a general breakdown of the mechanics the boss will implement in order throughout the fight:
- The boss will open the fight with Heavy Hands, a normal tank-buster that can be mitigated and shielded easily.
- Next, is a simple raid-wide aoe called Warden’s Wrath. Shield and heal to get past it.
- To prepare for the next mechanic, Aetherial Shackles, the four melee players will stand N, W, S, E right under the boss model, while the four ranged players stand NE, NW, SW, SE, at max melee range or further. At random, two players will be debuffed with a red or purple chain.
- To resolve this mechanic, simply ensure that the red chained player is standing in a position at max melee range, and the purple debuffed player is right under the boss. The damage from the mechanic will then be spread out to the three closest players for purple chain, and the three furthest players for the red chain. As long as those two players are in their appropriate positioning before the mechanic goes off, everything will be fine.
- After this, the boss will begin to cast Gaoler’s Flail, arena-wide AOE’s that are indicated by the type of weapon the boss will slam on the ground on his East and West sides, the order in which he uses each weapon is determined by which weapon he showcases first. The configurations are as follows:
- If the boss drops down a sickle/scythe, he will cleave the room in a 270-degree area, leaving only a safe section on the opposite side of where he drops the weapon. For instance, if he drops the sickle on his West side, then the safest area to stand will be on his East.
- For the flail, the boss will cover his immediate melee-range area in an AOE. For this, you can simply stand at max-melee range or further to avoid the hit.
- For the chakram, the boss will cleave in a donut AOE, meaning anywhere inside his hitmarker will be safe.
- Following this is Pitiliess Flail of Grace or Purgation.
- This is a tankbuster knockback that the maintank will need to mitigate and hold for on the NW or NE sides of the arena. It cannot be mitigated with Arm’s Length.
- If it’s a flail of grace, the party will need to stack behind the boss to share damage, after the tankbuster, no swap is required. The main tank will not share the damage.
- If it’s a flail of purgation, the offtank will have to Provoke the boss as he is casting the tank buster, and will have to hold opposite the main tank to resolve the incoming follow up flare damage. If the offtank is too close to the main tank, the main tank will die.
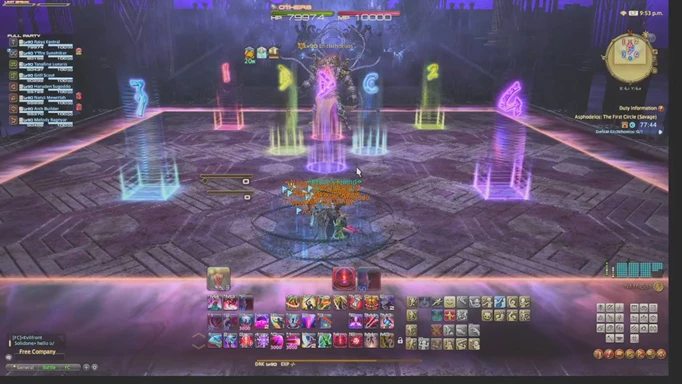
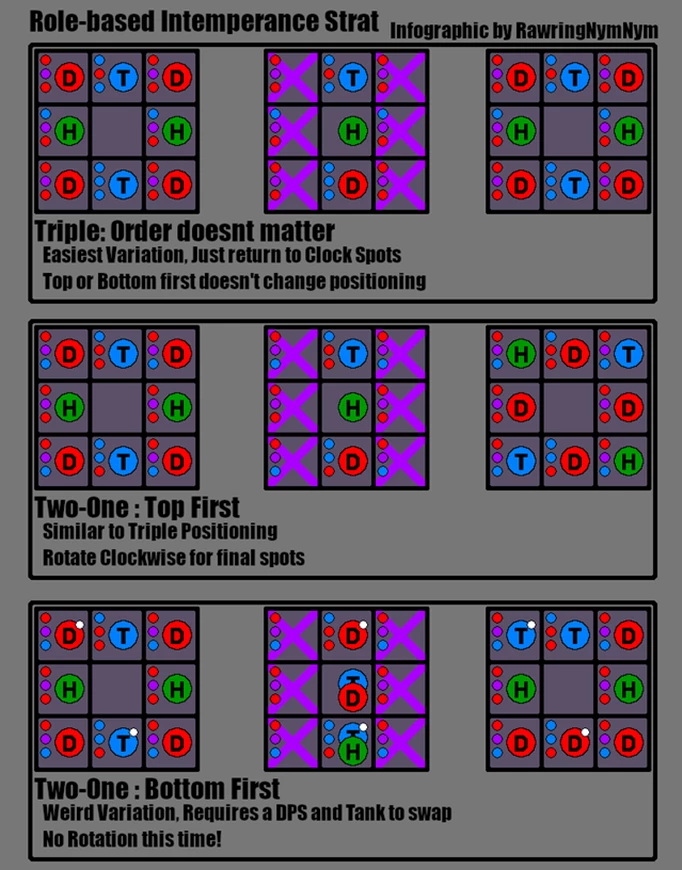
- Next is a raid-wide AOE and room swap, called Intemperence. Here, the boss will change the arena into 9 boxes, each with a mechanic that will need to be resolved or avoided by each player. The positioning will be determined based on the number of elemental stacks present in the South box and how the boss stands.
- This mechanic works just like its normal raid version but is more complicated. User Senpai Inferno offers an easy to understand graphic for resolving the mechanic.
 Click to enlarge
- This mechanic works just like its normal raid version but is more complicated. User Senpai Inferno offers an easy to understand graphic for resolving the mechanic.
- Following this is another Pitiless Flail.
- Next, the boss will use Shining Cells, an AOE and platform change.
- Similar to its normal raid version, players will have to stand on the fire or ice platforms that are opposite to the type of element the boss is casting, while dodging the different Gaoler’s Flail mechanics he implements.
- Outside of a new mechanic called Shackles of Time, nothing here will be new from the rest of the Savage fight or normal fight. Shackles of Time simply requires a player to stand on the opposite element as the rest of the party.
- This phase will end when the boss casts Slam Shut, a high-damage ride-wide that should be properly mitigated and healed through.
- The last new mechanic before the boss shuffles through the fight in random order is Fourfold Shackles, which is similar to Aetherial Shackles.
 Click to enlarge
Here, every player will receive a red or purple chain debuff, and it’s up to each player to run to their position on the map, and stay there until the boss uses the attack four times.- The debuffs are as follows for both red and purple; 3 seconds, 8s, 13s, 18s.
- Which players get each debuff will always be random, but as long as everyone knows what position corresponds with which debuff, the fight should go off without a hitch.
- Red 3s, Red 8s, Red 13s, and Red 18s should stand as follows respectively: NW, NE, SE, SW at max-melee range minimum.
- Purple 3s, 8s, 13,s and 18s, should stand as follows respectively: N, E, S, W on top of the boss’ model.
Once you resolve Fourfold Shackles, the boss will repeat previous mechanics, and it’s up to the party to adapt to the possible different combinations presented. Remember that when it comes to Savage raiding, it’s always going to be tougher executing the fight than learning about it. Be patient, stay focused, and try to have fun! Then once you've beaten P1S, check out our Final Fantasy 14 P2S Savage guide for the next stage.