Destiny 2 Vow Of The Disciple Raid Guide And Walkthrough

The Destiny 2 Vow of the Disciple raid brings with it new mechanics and a plethora of symbols to figure out. Destiny 2 raids are notoriously trick and this one is no different, but we're here to help. This Destiny 2 Vow of the Disiciple raid guide has details on how to navigate every encounter, learn each new mechanic, and successfully defeat Rhulk, Disciple of the Witness.
- Wondering how to get the Destiny 2 Osteo Striga? Our guide tells all.
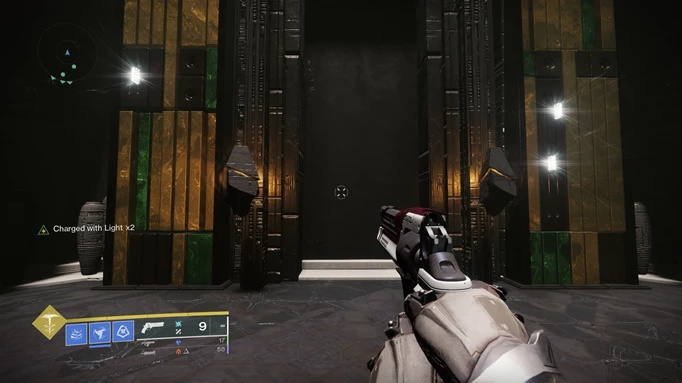
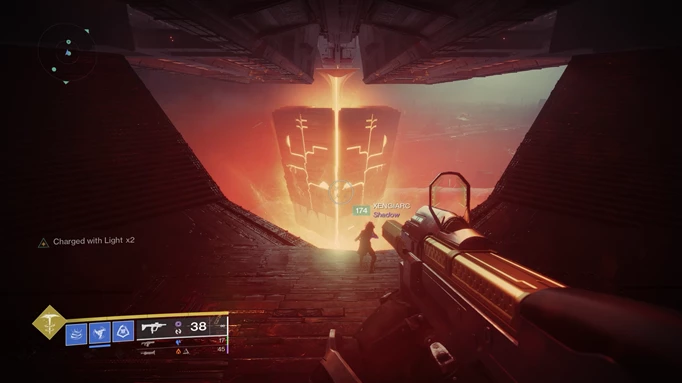
Destiny 2 Vow Of The Disciple Raid Guide: The Door
 Click to enlarge
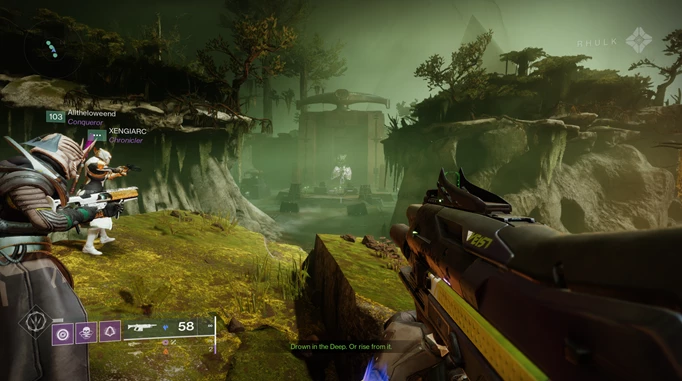
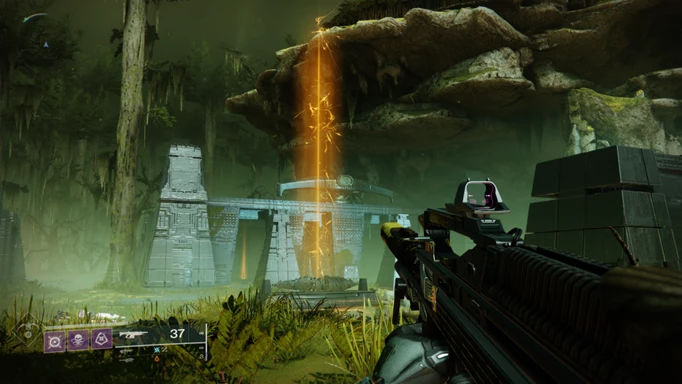
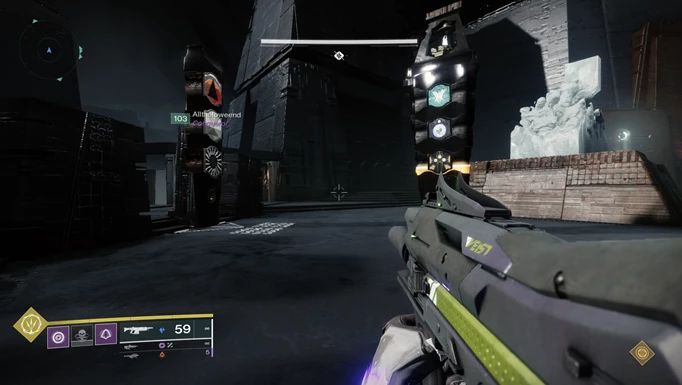
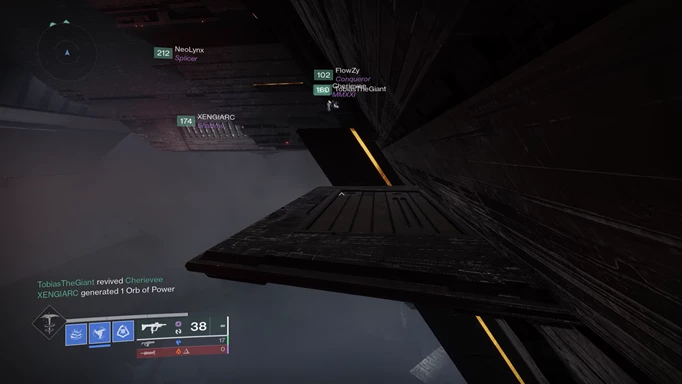
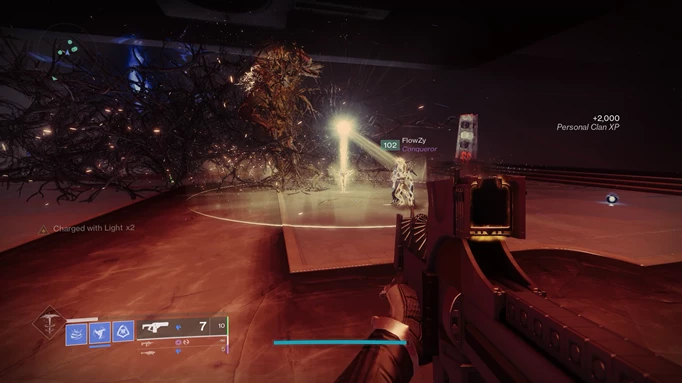
The first step of the raid is opening the door to Disciple’s Bog. Upon loading into the raid, you’ll see some Hive and a Projection of Savathûn spawn. The Hive are fairly painless, so clear these whilst avoiding the Aspect of Savathûn’s lightning attacks. Killing the Aspect of Savathûn will open the door, so it isn’t essential to clear all the adds before you can progress through to the Disciple’s Bog area.
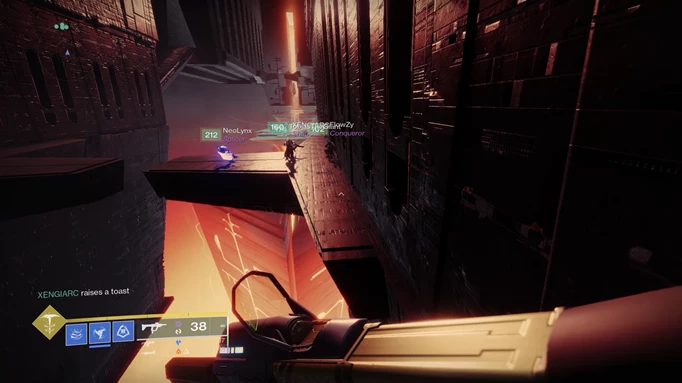
Destiny 2 Vow Of The Disciple Raid Guide: Disciple’s Bog
 Click to enlarge
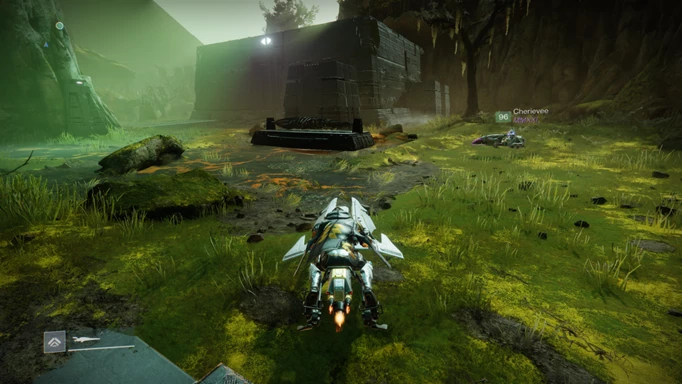
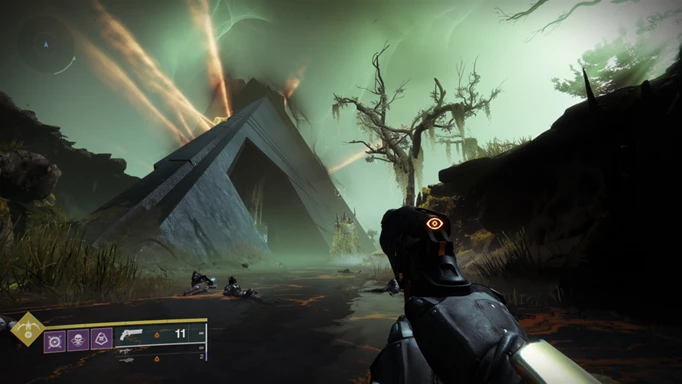
Following the path through some marshlands in Disciple’s Bog will lead you to some pyramid tech on a kind of moving platform which we’ll call the boat from here on. You might also have seen a similar looking boat in public events in Savathûn’s Throne World. This works as an escort mechanic, which is pretty fast-moving.
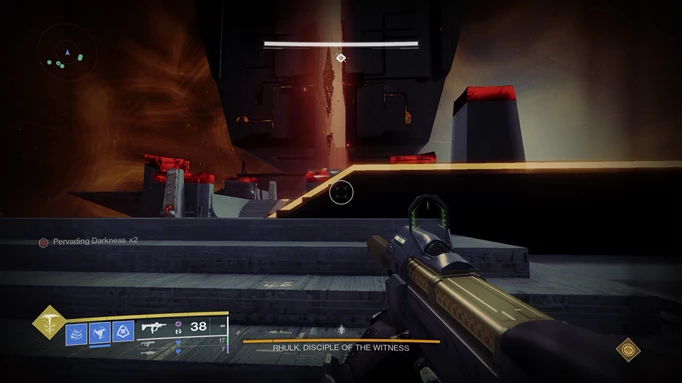
You’ll want to stay on or close to the boat, otherwise a de-buff called Pervading Darkness will begin to stack. As they stack higher your vision will become impaired. 10 of these will cause you to die, so keep a close eye on it and ensure you’re regularly returning to the boat to clear the Pervading Darkness de-buffs throughout this area of the raid.
 Click to enlarge
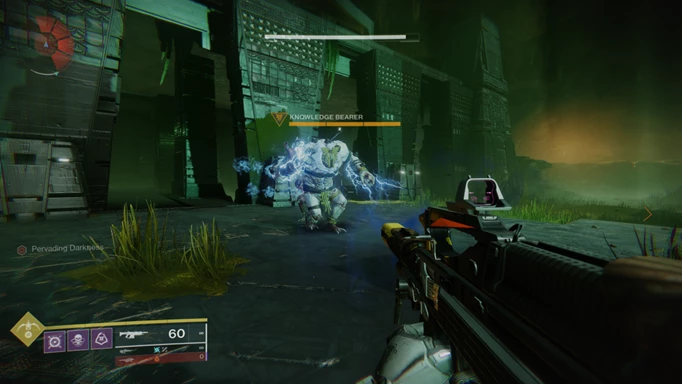
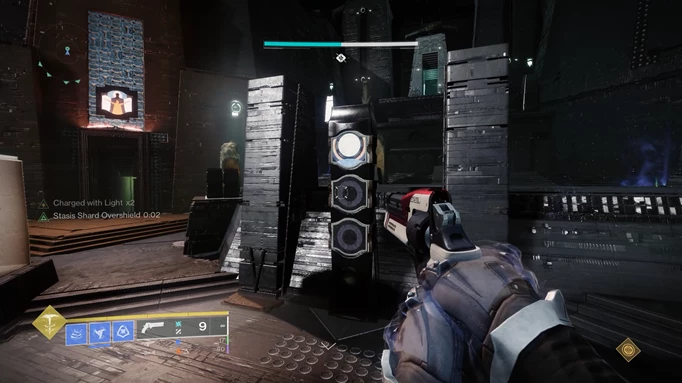
The boat will stop at various intervals and a series of Scorn enemies will spawn. Keep an eye out for Abominations called Knowledge Bearers. Killing these will spawn a series of black crystals that glow orange. Collecting these crystals will give you a buff called Knowledge in the lower-left corner and you can hold up to three of these at a time.
The first will give you a Heightened Knowledge buff, the second will upgrade that to Brimming Knowledge and the third upgrades it further to Overflowing Knowledge. When you’re carrying Overflowing Knowledge you should return to the boat and deposit these. When holding the Knowledge buff, your Pervading Darkness debuff is removed, so you can safely head away from the boat to seek more Knowledge if it’s not immediately visible. Pervading Darkness will also be prevented from stacking in that area once all the Knowledge Bearers are killed, so try to make these a priority.
 Click to enlarge
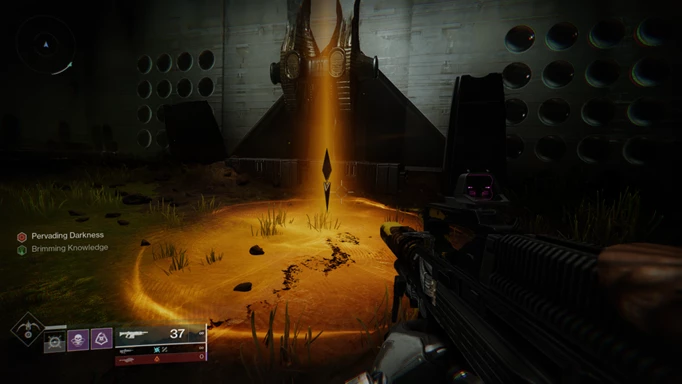
Gathering the Knowledge stacks and depositing them will power the boat up and cause it to begin moving again, so continue to seek these out until you’ve cleared the area of them. This works best if some of your team stay with the boat to clear out the Scorn, as if you die when holding Knowledge you’ll need to repeat the process and collect it again.
However, throughout the Disciple’s Bog area you have unlimited revives as this doesn’t count as a ‘proper’ encounter, so it isn’t the end of the world if you do. The boat will stop a few more times, so repeat the process of obtaining Knowledge to continue its journey to the entrance to the Pyramid.
 Click to enlarge
- Defeat Projection of Savathun
- Ride the Boat until each stop
- Defeat Knowledge Bearers
- Collect Knowledge
- Deposit on the Boat
- Repeat steps 3-5 until the Boat comes to a stop inside The Pyramid
- Our guide on Destiny 2 Hawkmoon explains how to get the gun in the current game after it was removed.
Destiny 2 Vow Of The Disciple Raid Guide: The Pyramid
 Click to enlarge
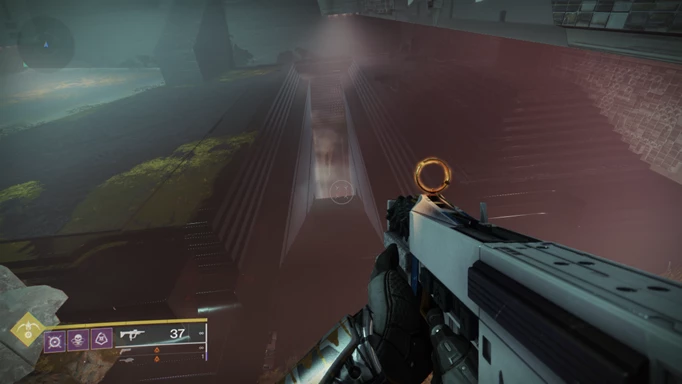
Follow the corridor through the Pyramid until you reach a big room with many coloured symbols adorning the walls. All the way to the right-hand side of the room is a walkway that looks like it leads to an almost certain death. Drop down it (no, really), but be ready to jump at the bottom - it’s a very long fall.
 Click to enlarge
There are some really interesting items and a lot of side-rooms and secrets to be discovered here. There are no enemies that will spawn, and no time limit so feel free to jump around and explore. The Destiny team really did a fantastic job of the raid design here, so soak it all in.
 Click to enlarge
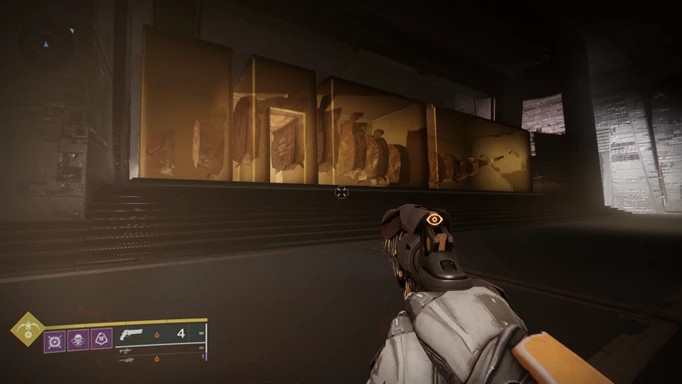
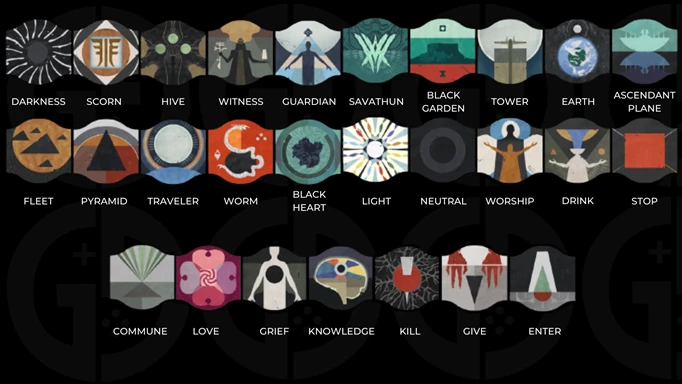
Once you’ve explored far enough, you’ll come across a large gallery-style room with various symbols on plinths equally spread throughout. If you approach the symbol you’ll see its name on the top left-hand side of your screen.
These are going to be vital throughout the raid, so take some time to familiarise yourself with them, and ensure the rest of your fireteam are on the same page in terms of the names you’ll be referring to them throughout.
 Click to enlarge
This gallery of symbols is also key to unlocking some really interesting lore regarding the Vow of the Disciple raid and its boss, Rhulk, who we’ll meet later on.
Once you’ve spent the time gathering the lore and soaked in the various sights and sounds, you’ll discover a doorway which leads to a small ledge in the open. Gazing over towards the horizon you’ll get your first glimpse of the unusual Upender, being powered by a giant worm mother we call Xita.
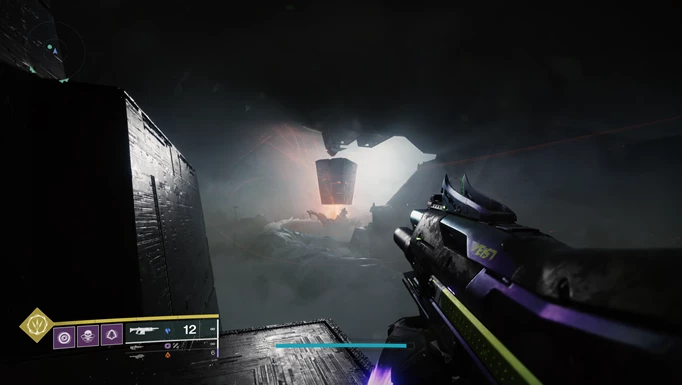 Click to enlarge
Following a second doorway to the left will allow us to enter the first real encounter of the raid, Acquisition.
- Want to know how all of the Destiny 2 Lost Sectors work? Check out our guide.
Destiny 2 Vow Of The Disciple Raid Guide: Acquisition
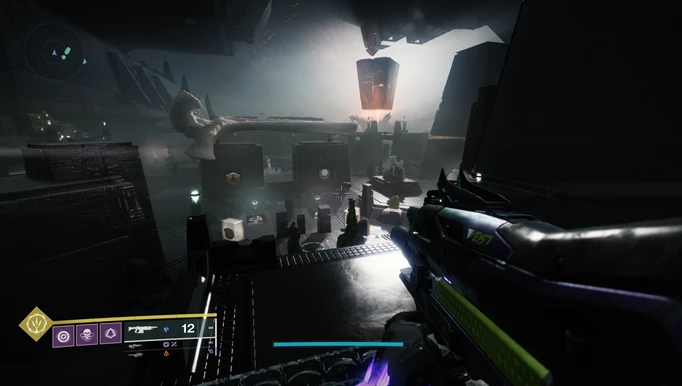 Click to enlarge
Entering the Acquisition encounter can seem a little bit overwhelming. You’ll be faced with a large arena with a giant bone in the centre, which is actually a rib of the Leviathan(!!) You can take your time again to explore this room, as the encounter won’t start until the crux in the centre of the room is shot.
There’s no boss in this encounter, but it does require patience, teamwork, clear communication and a solid understanding of what each symbol means. In the centre of the room there is a large wall with a Pyramid and Traveler symbol on. This marks a division of the room into two sides - Dark (Pyramid) and Light (Traveler).
 Click to enlarge
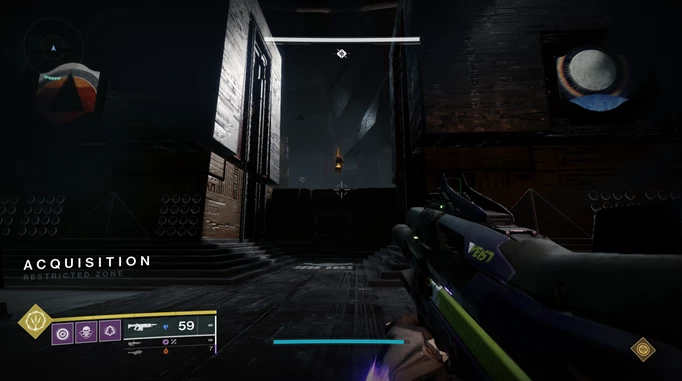
Nine of the symbols will be shown above doorways around the outside of the room, and you’ll find this encounter much easier if you have an idea of where they are. The Dark (or Pyramid) side contains Gift, Grief, Stop and Knowledge and the Light (or Traveler) side contains Worship, Kill, commune and Drink.
Enter can be found below the area you spawn into the raid. You’ll also notice three obelisks with corresponding pillars next to them situated at the front in the middle and towards the back on the right and left.
 Click to enlarge
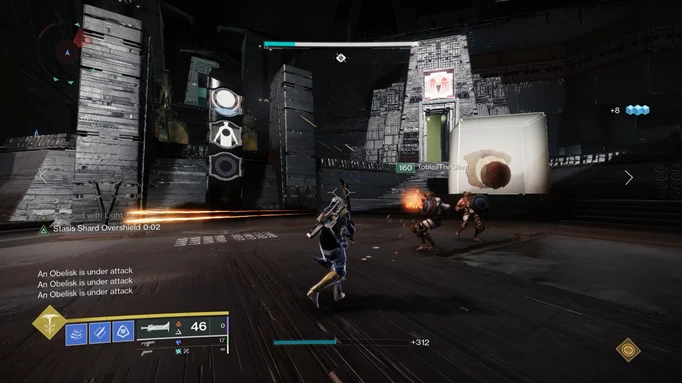
You’ll want to split your fireteam of six into three teams of two, with each team assigned to a specific obelisk. One person is going to stay on the obelisk to protect it from incoming waves of enemies. Also spawning at this point will be several Abated Adherents; orange bar Scorn enemies with metal shields. They will always spawn in pairs in each section of the arena, aiming straight for the obelisks. Eliminate these as a priority.
The obelisk will slowly fill with orange light. If the orange light reaches the top of the obelisk, your entire team will wipe and you’ll need to begin the encounter again. Any gunfire, both friendly and from enemies, will accelerate the rate at which the light fills the obelisk, so ad clearing is essential here.
 Click to enlarge
After the first wave of enemies spawns, one of the pillars next to an obelisk will show a symbol in its top position. The pillar which shows the symbol is random, so everyone should be keeping an eye out on their pillar. The symbol will either show Traveler or Pyramid.
This means that a Taken Knight called Disciple’s Compass has spawned either on the Light (Traveler) or Dark (Pyramid) side of the room. They usually spawn around the room in well-covered spots, so send the second member of your team out to look for it and keep an eye on your radar.
 Click to enlarge
Upon killing the Disciple’s Compass, a second glyph will appear on the same pillar as before. An Unstoppable Ogre will also spawn somewhere in the arena, so be ready to eliminate that as a priority. The second symbol dictates which of the nine rooms on the arena’s perimeter you need to enter for the second stage of this encounter. Half of the arena’s doors will be open at a time, either light or dark, and you can toggle this by shooting the crux in the middle which you used to begin the encounter.
Once you’ve deciphered and entered the relevant room, Screens will spawn near the entrance so watch your step. You’ll also find two Scorn Chieftains called Glyph Keepers, and two more symbols on the walls - Light on the left and Darkness on the right. After the enemies spawn in this room, a third symbol will appear on the same pillar as before which will show either Light or Darkness. Communicate this clearly to your teammate, they’ll kill the corresponding Glyph Keeper and a final symbol will spawn on that side of the room. Announce this symbol to your team, as you’ll need to remember it very soon.
 Click to enlarge
This process will repeat three times; once for each obelisk, with the first symbol on the second pillar showing shortly after the first Disciple’s Compass is defeated, and so on. Once you have collected all three symbols in the corresponding rooms via this process, each obelisk will show a random selection of symbols.
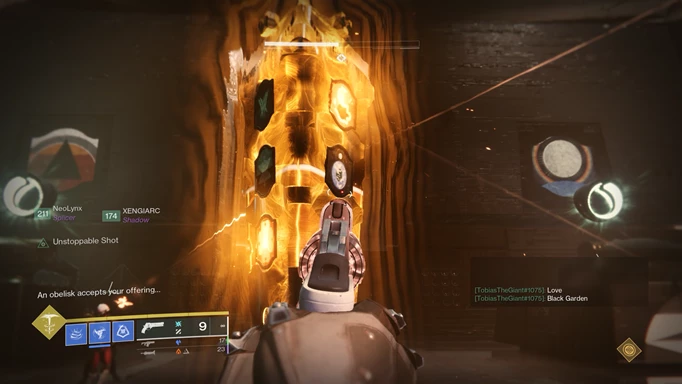
Only one of the obelisks will show all three of the ones you noted down from each room, so communicate efficiently to work out which obelisk is the correct one. You need to shoot each symbol quickly, not in any particular order, and once this is done the obelisk will accept your offering as shown in the lower left corner. If it rejects your offering, you have a limited time to try again but after a few incorrect attempts, the entire team is wiped and you’ll have to start from the beginning.
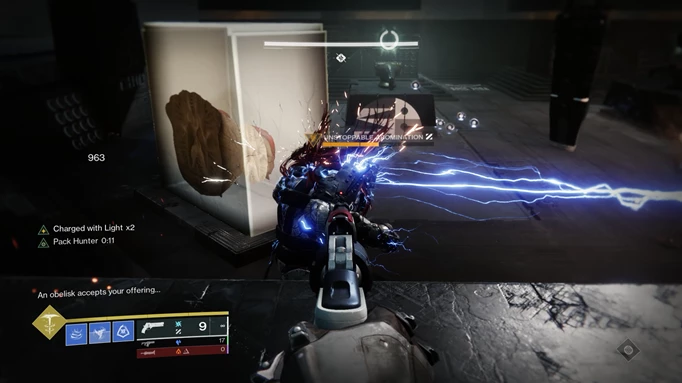 Click to enlarge
If the obelisk accepts your first offering, you have a few seconds to readjust, return to the correct positions and the process will begin again. Luckily, each obelisk is only the correct one once, so once you’ve successfully provided an offering you can safely disregard that obelisk.
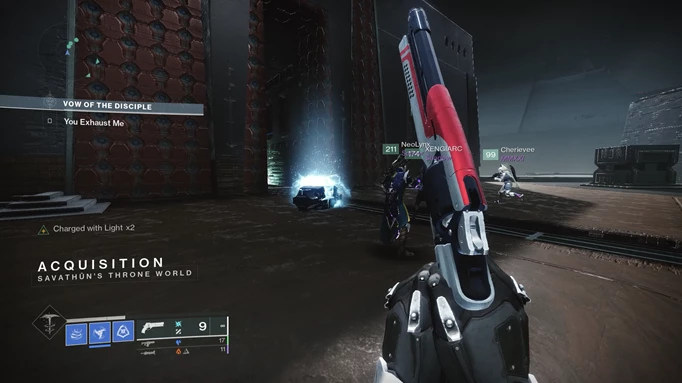
As is often the case in Destiny, you need to repeat this process three times. Once this is done, collect your loot and continue throughout the Pyramid via the door at the back of the arena until you reach the next encounter.
 Click to enlarge
- Split into three teams of two - a runner and protector.
- The protector stays by the obelisk and eliminates enemies including Abated Adherents and Unstoppable Ogres.
- The top symbol will spawn on the pillar to show which side of the room the Disciple’s Compass spawns.
- Upon killing the Disciple’s Compass, a second symbol will spawn to show which room to enter.
- When the runner enters the correct room a wave of Screebs and two Glyph Keepers will spawn. A third symbol will appear on the pillar to determine which side of the room the runner must record the symbol from. Repeat three times.
- Find the obelisk with each of the three symbols on and shoot them in quick succession.
- Repeat all of the above three times.
- The Destiny 2 Duty Bound is back, and our guide explains how to get the overpowered gun.
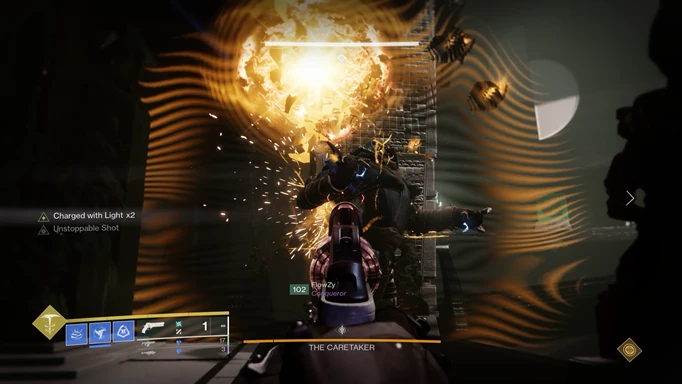
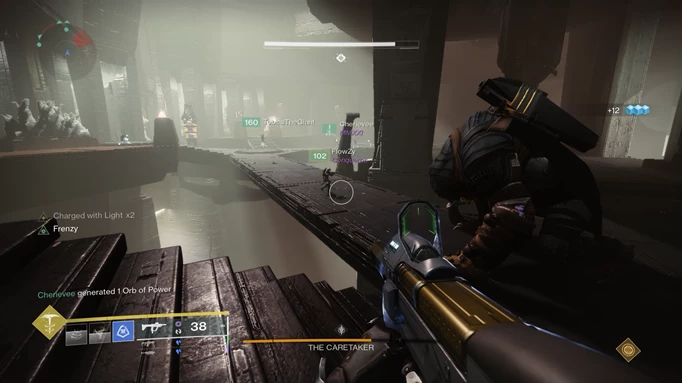
Destiny 2 Vow Of The Disciple Raid Guide: The Caretaker
 Click to enlarge
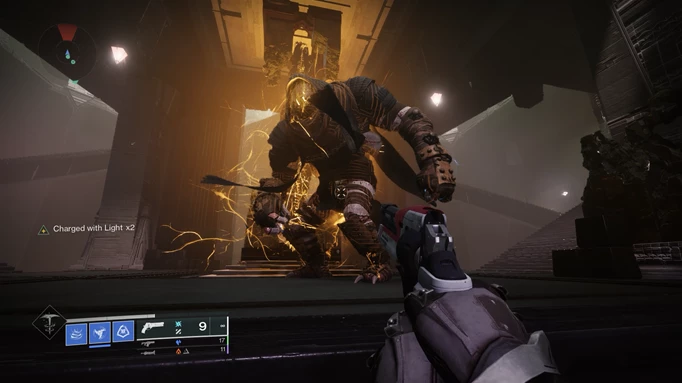
The Caretaker encounter features the first boss of the raid, and in turn your first real damage check. You’ll want to have watertight communication and weapons that can dish out a huge amount of damage in a relatively short window of time. Your team will find a Ward of Dawn useful here. Entering the room you’ll notice the Caretaker; an oversized Scorn Abomination with a really very fancy scarf.
Fashion is the most important feature in Destiny, after all. There are several levels or floors here, and you’re going to want to split your team into two lots of three this time. The ultimate goal here is to shoot nine symbols on an obelisk per floor and deal a set amount of damage to the Caretaker until you reach the top floor or the final stand, whereupon you finish him off.
 Click to enlarge
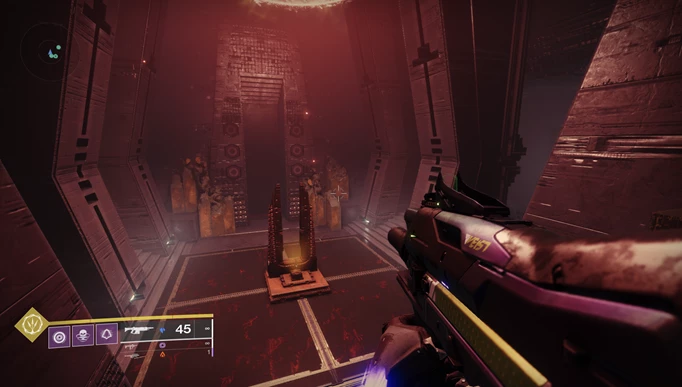
Following the stairs up beyond whatever it is the Caretaker is doing, you’ll find an obelisk near a door with two black cruxes next to it, similar to the one you shot to begin the Acquisition encounter previously. Shooting one of these will begin the encounter and open the door.
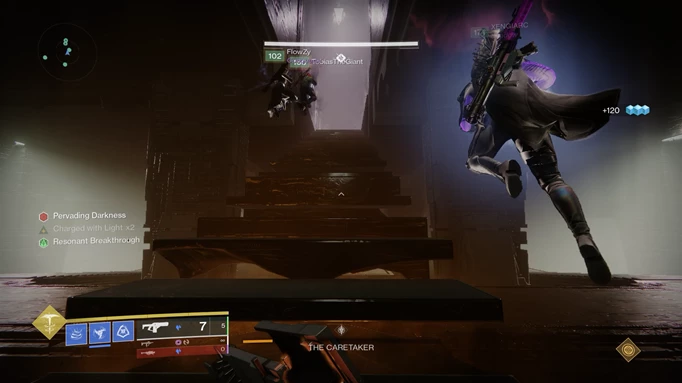
Inside this door there are a series of Wizards amongst other enemies and nine glyphs scattered around. One of the team should go inside and collect three symbols, which will be glowing orange like the Knowledge used in Disciple’s Bog to power the boat. Don’t attempt to kill the Wizards, they have too much health and you’ll lose valuable time.
 Click to enlarge
Remember which symbols you have collected and exit the room as quickly as possible to avoid the increasing Pervading Darkness de-buff and enemy fire. Someone outside might need to shoot the crux again to open the door, before heading in themselves to collect a further three symbols.
The Guardian who just left the room should shoot the corresponding symbols on the obelisk, with help from the third team member if needed. Repeat this, in true Destiny fashion, three times.
 Click to enlarge
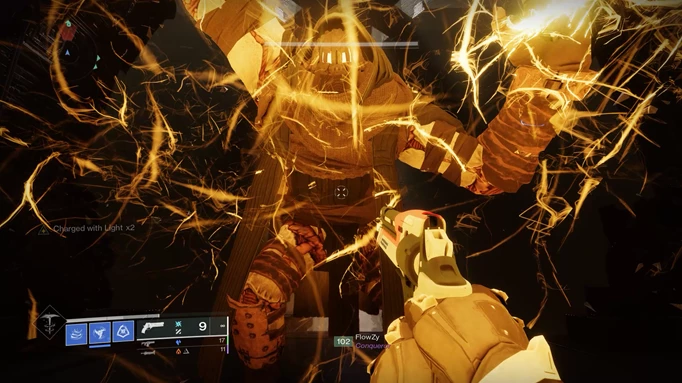
Whilst all of this is going on, the other team will be keeping themselves busy by stunning and therefore delaying the Caretaker, who is making his way rather aggressively up the staircases. He will be shooting out giant orange projectiles from his back, which will need to be shot to prevent damage. One person should stay close to the Caretaker, to give them the Caretaker’s Gaze status.
This means that the Caretaker will focus on them and attempt to slam the ground near them. At this point he will get two yellow glowing points, one on his head and one on his back. One Guardian should quickly shoot his head followed by someone else shooting his back. This stuns the Caretaker, slowing his progress as he heads towards the obelisk. Once he stands back up, this process should be repeated to get as many stuns in as possible to give the symbol collecting team as much time as possible to make their offering to the obelisk.
 Click to enlarge
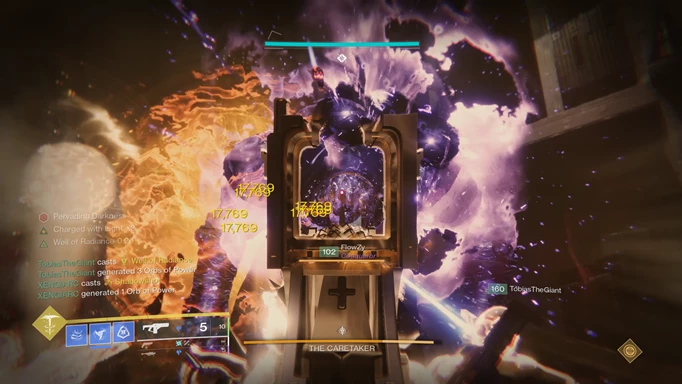
Once all nine symbols have been successfully gathered and shot on the obelisk, the first damage phase will be triggered. You will also notice three circular plates on the ground. One of these will glow yellow at a time, when it is glowing yellow the entire team must stand on the plate in order to be able to deal damage to the Caretaker.
You will be faced with ‘immune’ status if you are not within the plate boundaries. The first plate to glow will always be the one closest to the direction the Caretaker approached the obelisk from.
 Click to enlarge
Once the first plate is no longer glowing, move to the next, and so on, to continue the damage phase. The damage at this stage is capped as indicated by the separation bars on The Caretaker’s health bar at the bottom of the screen. When the damage phase is complete a new golden staircase will appear. Traverse this to the next floor where you’ll face the same process again, only with pits added to the symbols room for extra hazardous gathering.
There is also an extra door, to give more opportunities to escape the Pervading Darkness if things are getting a bit hairy. The goal is the same - to correctly identify nine symbols and shoot them correctly on the obelisk before the Caretaker reaches it. Again, the damage is capped here so do as much as you can before ascending another staircase to the third floor.
 Click to enlarge
On the third floor, the darkness room is much larger and there are now three separate entrances. There are some very precise jumps to be made, and knowing the layout of these rooms the more you practice this encounter will make it much easier to successfully complete.
When the nine symbols are collected and the corresponding obelisk symbols have been shot a third damage phase will begin. Once the last marker on The Caretaker’s health bar has been reached, you can head upstairs once more to the final phase area.
 Click to enlarge
There are three circular plates as before, but one in front of the other, getting closer and closer to The Caretaker. This is the last chance to put as much damage as possible on him. If you don’t finish him off before the final plate stops glowing then it’s a wipe and you’ll have to start the entire encounter again.
The Caretaker will still be releasing the glowing orange projectiles so be careful to avoid or obliterate them. After successfully finishing him off, it’s another chance to grab some raid loot and get ready to head to the next area of the raid.
 Click to enlarge
- One team should stun The Caretaker by shooting his head and back.
- The other team should collect symbols from the darkness rooms and shoot them on the obelisk.
- Use the three plates in turn as they glow to cause damage to The Caretaker.
- Repeat this for three floors before ascending to the final stand area.
Destiny 2 Vow Of The Disciple Raid Guide: Jumping Puzzle
 Click to enlarge
The key here is to head upwards and head right as much as possible to begin with. There’s some light platforming which will eventually lead you to an area with some enemies and another of those cruxes on a platform to the right. Shooting this crux will trigger the extension of some more platforms on the side of the Pyramid temporarily. You’ll need to work together to have someone shooting the crux while everyone else traverses the Pyramid’s outer walls.
Continue the platforming until you reach another room with enemies and a second crux. Shooting this crux again triggers new platforms ahead of you so you’ll need to leave someone behind to routinely shoot it to ensure the platforms are always extended so the rest of the group can push forward. Once one person has completed each section you’ll get a message in the lower left corner reading ‘Path Stabilized’ which means that the platforms will now remain in place.
 Click to enlarge
At one point it may seem like you don’t have a path ahead - this is a blind corner, jump around it and land on the platform below you. Eventually you’ll come to some large windows, one of which doesn’t have a gate over it. Jumping through this window brings you to a room filled with enemies.
There’s another switch in this room which activates several hexagonal platforms to move across the opening, however these will continue to spin and change sides. Send one person across with another waiting by the switch. Continually shooting the switch will ensure the platforms keep moving and make the jumping easier.
 Click to enlarge
When one person has successfully traversed this section, the hexagons will stabilise, making it simple for everyone else to follow across. Above the final hexagon there’s an area with more Scorn, so clear these out. Everyone needs to be gathered together in front of the final door in order to open it, and this is the entrance to the third encounter.
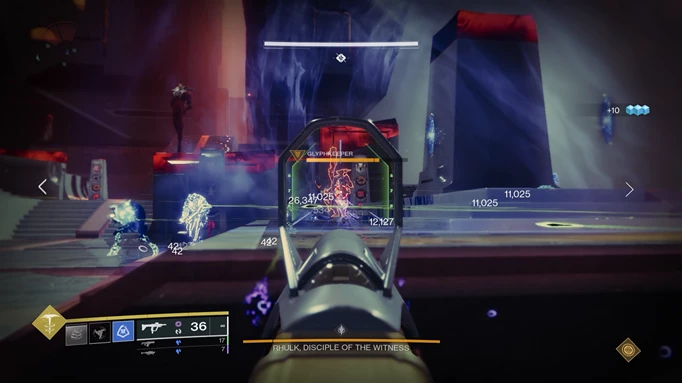
Destiny 2 Vow Of The Disciple Raid Guide: Exhibition
 Click to enlarge
This is another encounter with no boss, but there are a few enemies and some Overload champions, so be sure to equip a mod to deal with those. The entire encounter is timed, referred to as Terminal Resonance countdown, so speed, communication and efficiently clearing waves of ads are all going to be important factors to focus on here.
There are four rooms which increase in size as you progress through them. Survivability is also key, because deviating from the process to revive a teammate will take up valuable time and almost always causes an entire team wipe.
 Click to enlarge
This encounter is a very cool throwback to a lot of the other Destiny raids; specifically Leviathan, Last Wish and Vault of Glass. There will be items from each of these raids that play a very specific role in clearing the rooms, and it adds an extra fun dynamic of each Guardian taking on a different role each time.
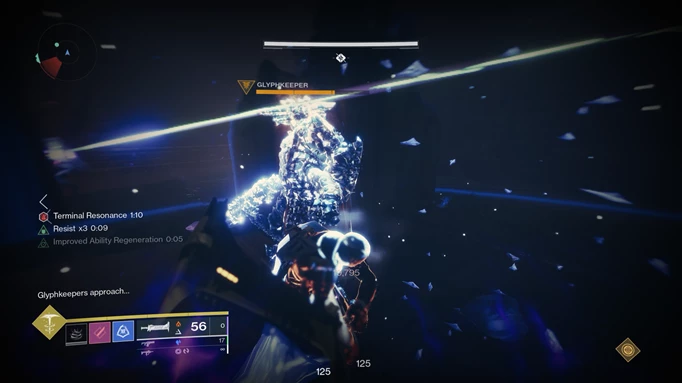
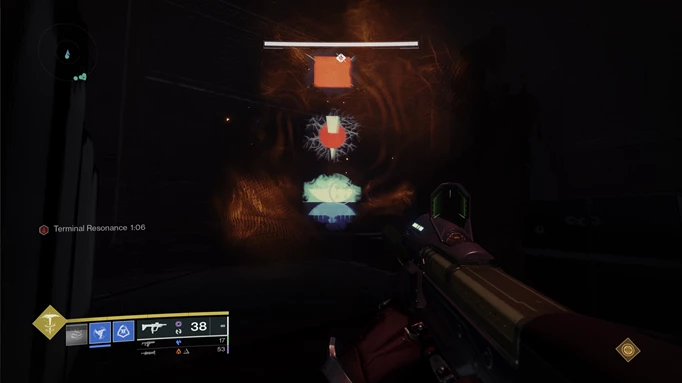
As you move through the Exhibition, two Glyph Keepers will spawn, one Taken Phalanx (the Resonant Glyphkeeper) and one Scorn Chieftain. Killing these will reveal two sets of three symbols. You will only be able to see the Scorn Glyph Keeper’s symbols if you aren’t holding a relic of any kind, and you will only be able to see the Resonant Glyphkeeper’s symbols if you are.
One Guardian holding a relic should read out the Resonant Glyphkeeper’s symbols and one Guardian not holding a relic should read out the Scorn Chieftain’s symbols. From these two lists there will be one symbol in common, which you should remember in order to open the door to the next room.
 Click to enlarge
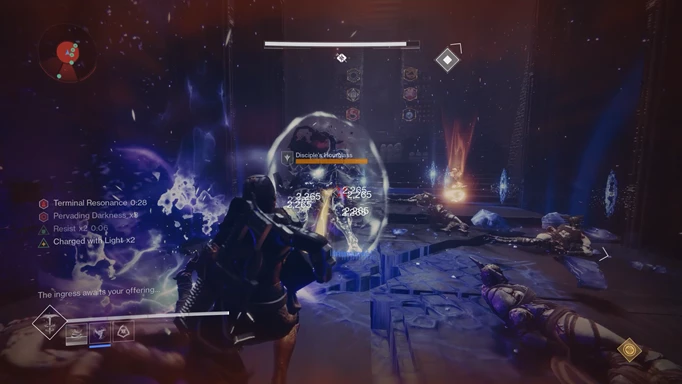
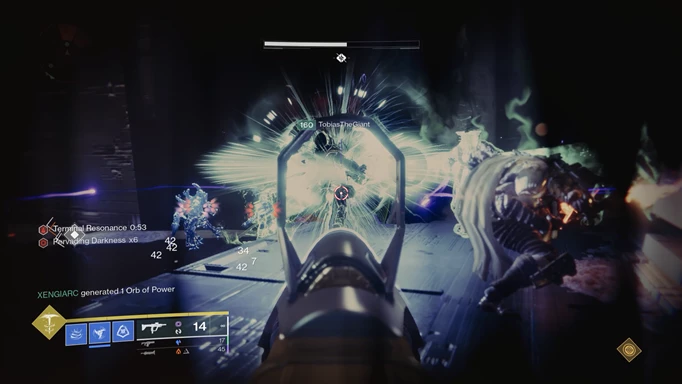
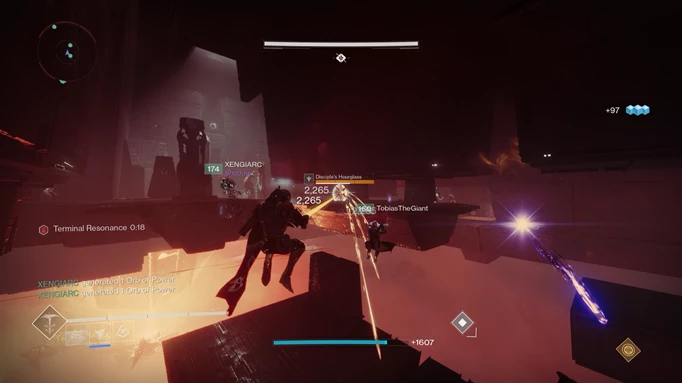
Killing these Glyph Keepers will spawn a Taken Knight with a shield near the centre of the room, called the Disciple’s Hourglass. Removing his shield and killing him will extend the Terminal Resonance countdown timer by 40 seconds, giving the team more time to continue clearing the rooms and gathering the symbols.
Once the crux relic is picked up in the first room the encounter will start and the two Glyph Keepers will spawn in, one on the left and one on the right-hand side of the room. Following the above process, identify the one symbol in common in both sets of symbols and shoot the corresponding one above the doorway to open it and progress forwards.
 Click to enlarge
The person holding the Crux relic should deposit this into one of the altars at the side of the room to reset the Terminal Resonance timer. A second relic will be available here, the Aegis relic, which was previously seen in Vault of Glass.
The Aegis relic allows the holder to cleanse the team of the Pervading Darkness debuff which will slowly stack in the next rooms. Two new Guardians should collect these relics, as the person who held the Crux in the previous room will now be encumbered by a buff called Curbed Resonance, which anyone will get if they drop a relic for any reason.
 Click to enlarge
In the next room, the Glyph Keepers won’t spawn until you’ve found and killed Ravenous Taken Hobgoblins, so these should be your priority in the interests of saving as much time as possible. After that, the process is the same. Find and kill the Glyph Keepers, find the symbol in common, and shoot the symbol above the door at the end of the room to open it, whilst killing the Disciple’s Hourglass whenever it spawns to extend the Terminal Resonance timer.
Again drop the relics into the altars in the next room, which also introduces another new relic, the Eye of Riven; a glowing black orb which is used to remove Taken Blights that are rendering the enemies surrounding them immune to damage. The person with the Eye of Riven should focus each orb as priority otherwise the rest of the team can’t clear enemies and the process cannot continue.
You can destroy these Blights by pressing the grenade button. The third room is much larger but you can divide it into two halves with three separate jumping platforms in the centre to enable the Eye of Riven holder to swap from side to side easily. The Taken Blights have two possible starting locations and follow a set path from there, and there are four to be removed in this room and the next.
 Click to enlarge
Try to ensure you have one person holding a relic on each side of the room at a time to be able to read the symbols from the Resonant Glyphkeepers.
After the first set of Glyph Keepers are eliminated, the Disciple’s Hourglass will again spawn in the centre of the room; kill it with the Crux to extend the Terminal Resonance timer. Complete the process by collecting the two common symbols and shooting them above the door, mind the Screebs and deposit the relics once more.
 Click to enlarge
The final room utilises the same three relics but three new Guardians will need to collect them due to the Curbed Resonance debuff the previous three will now have. The first Glyph Keepers are in alcoves to the left and right of this room, and the second set will be in the back corners.
The Disciple’s Hourglass Knights will spawn twice in this room to extend the Terminal Resonance timer but the rest of the process doesn’t differ from the previous room. Once you’ve identified the symbols, head to the door, be wary of the Screebs one last time and deposit your relics before the timer runs out to finish the encounter successfully.
 Click to enlarge
Follow some stairs upwards and complete some final light platforming to make your way to a seemingly dead end. Gathering the entire fireteam in this spot will open one last door. Follow this to the end of the hallway and you can drop down to the boss arena to finally meet Rhulk.
 Click to enlarge
- Designate artefact/s to your fireteam
- Clear out the Ravenous Taken Hobgoblins, Glyph Keepers and Disciple’s Hourglass Knights
- Call out the symbols, working out which one the two sets have in common.
- Shoot them on the doorframe
- Deposit the artefact/s in the altars for new Guardians to collect
- Repeat this process for each room in the encounter
Destiny 2 Vow Of The Disciple Raid Guide: Dominion - Rhulk, Disciple Of The Witness
 Click to enlarge
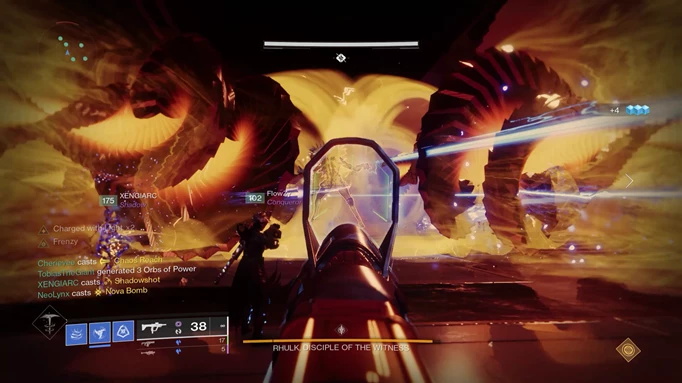
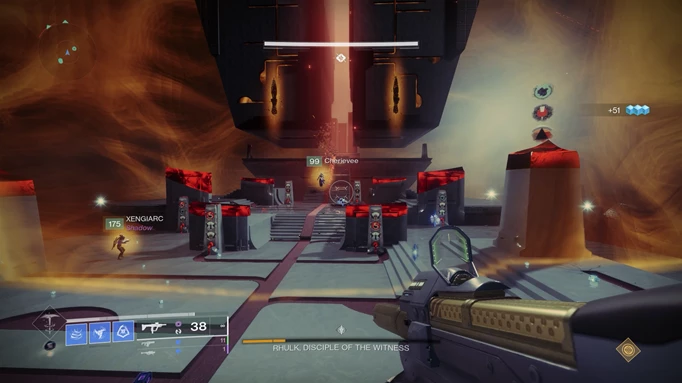
The final encounter is where you meet Rhulk for the first time, and the main boss of the Vow of the Disciple raid. You’re going to be tested on every mechanic you’ve learned so far, and have a very real damage check to overcome the Disciple of the Witness. The first stage of the encounter is getting up to the damage area itself. As soon as you enter the arena you’ll notice a large orange forcefield surrounding the area. If you try to enter this it will push you back, and even off the arena in some instances.
There are six obelisks scattered around the first area of the arena. You’ll want to label these something easily recognisable and quick to call out - my fireteam chose L1, L2 and L3 for the left-hand side starting from closest to the spawn point and working backwards, and R1, R2 and R3 for the right-hand side.
Approaching the forcefield and shooting the crux will begin the encounter, at which point two Glyph Keepers will spawn in. Again, there is a Scorn Chieftain and a Taken Phalanx, as in the previous Exhibition encounter. The Resonant Glyph Keeper will always be on the left. Killing these will spawn a set of symbols above a pillar on each side.
Only players with Leeching Force or Emanating Force will be able to see the left-hand side symbols, and players without either of these buffs can see the right-hand side set. You will again need to identify the symbol in common via effective communication, and this will in turn indicate which obelisks you need to be interacting with throughout the encounter.
 Click to enlarge
We split our team into three sets of two, but you can also do two sets of three. Two players will be runners, and two players will be responsible for keeping the buff alive by passing it back and forth. The final two players are responsible for clearing ads and calling out obelisks.
Once the encounter has started, one player from the runner team should shoot the giant, spinning crux above Rhulk’s head at the top of the stairs to gain the Leeching Force buff. As soon as two smaller cruxes appear to the left and right of where the main one spawned, two other players will shoot one of these each to be passed the buff.
The first player should not move from the giant ‘Give’ symbol on the floor until the buff has been passed, but those collecting the buff can be anywhere in the arena to do so. The Leeching Force buff has a countdown timer and when it expires, the player with the buff will die, this is why we introduce this passing back and forth mechanic for survivability. Continue doing this rotation of passing the buff; we found a good timing was after Rhulk shoots his beams (more on that in a second), one Guardian with Leeching Force should stand on the Give symbol and pass it to the next two Guardians.
 Click to enlarge
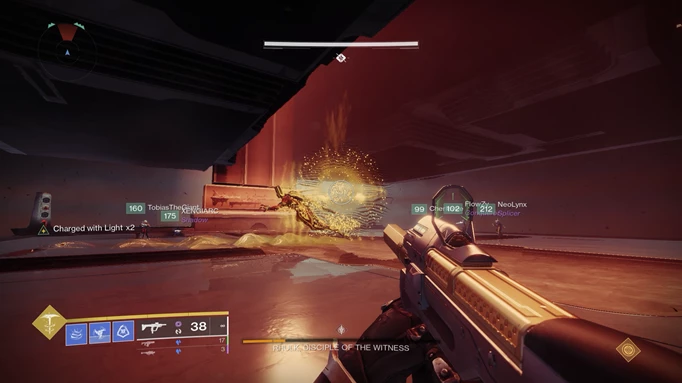
Every so often Rhulk will move to the left, centre or right of the arena and fire a bright beam of Darkness energy. Everyone on the team needs to avoid the beam; even if it doesn’t kill you, it will cause Pervading Darkness to stack and hinder your vision.
If you have the Leeching Force buff and get hit by this beam, it will change the buff to Emanating Force and reset the countdown timer. Emanating Force allows you to pass through the force field to interact with the obelisks. Be very careful that at least one Guardian always has Leeching Force and does not transform it into Emanating Force, as once it has been transformed you cannot pass it on.
When two Guardians have Leeching Force, this essentially means that one should keep it, and one should transform it into Emanating Force. Now that you’ve established the symbol in common, one of the ad clearing team should identify the obelisk in which to deposit the Emanating Force buff since Guardians with Leeching or Emanating Force cannot see the symbols on the obelisks.
After a period of time the symbols on the obelisks will shift, so it’s important to communicate clearly when this is happening and ensure the correct obelisks are identified as depositing Emanating Force into the wrong obelisk will cause that Guardian’s death.
 Click to enlarge
With every successful deposit, the forcefield reduces in size slightly. If you get your timing down perfectly, you can have two Guardians at a time depositing Emanating Force to reduce the time this takes. If it happens that you lose the Leeching Force buff between the fireteam entirely, this encounter permits one reset, where the Glyph Keepers will spawn again and a new set of symbols will appear.
You only get one of these resets though, any subsequent losses of the buff will cause a full fireteam wipe and the encounter must be restarted. You’ll need to deposit six Emanating Force buffs in order to completely reduce the forcefield and open up the steps for the whole fireteam to head to the damage area.
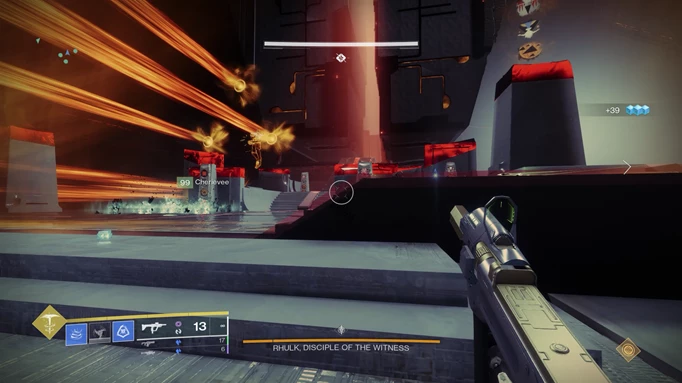
Destiny 2 Vow Of The Disciple Raid Guide: Defeating Rhulk
 Click to enlarge
After ascending the stairs you’ll face Rhulk, who will strut rather fabulously around the arena, engaging in a very brutal kick attack which can send you soaring off the side of the arena if you’re not careful, along with a dash-melee attack, and he will also intermittently project the Darkness beams.
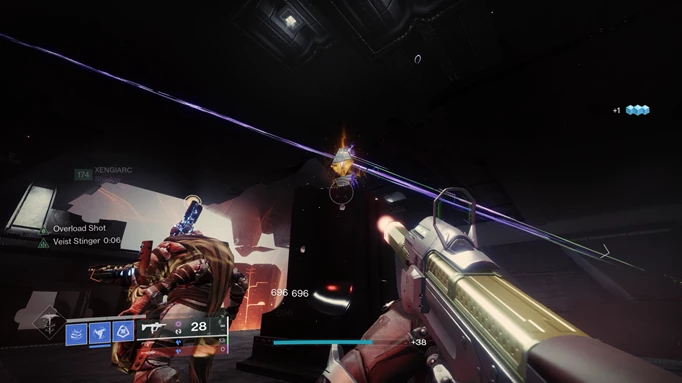
Watch the floor in front of him, as a yellow bar will appear to show you which direction he’s about to dash in to help you avoid it. You cannot immediately damage him, so avoiding his attacks and the Darkness beams is the priority to begin with.
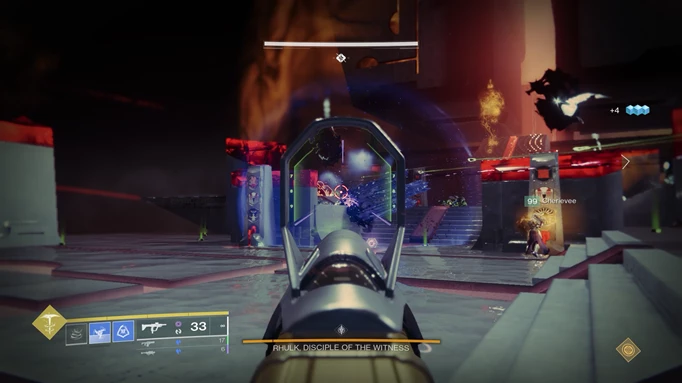
 Click to enlarge
Every so often, Rhulk will drop a large glaive and it’ll reveal a crux. One player should shoot the crux to gain the Leeching Force buff. At the same time, a symbol will appear near where the glaive was dropped. The player with Leeching Force can’t see this symbol, so someone else on the team should call it out.
Around the edges of the arena are four more obelisks with symbols on. Using the same identifying system as earlier, the Traveler is at L1, the Pyramid is at L2, Light is at R1 and Darkness is at R2. When Rhulk shoots his beams, the player with Leeching Force should upgrade this to Emanating Force and follow the fireteam’s callouts to deposit it in the obelisk corresponding to the symbol that appears. As before, a wrong deposit will cause a death, so be sure to have your communication watertight here.
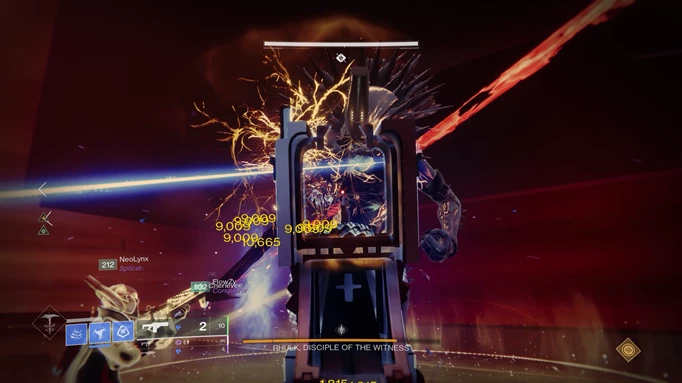
 Click to enlarge
Every time a buff is deposited, a crit spot will glow on Rhulk. In order, these are his left shoulder, right shoulder, left hip and right hip. When these crit spots appear, the rest of the fireteam should shoot until they explode whilst also avoiding the Glaive so as not to accidentally get the Leeching Force.
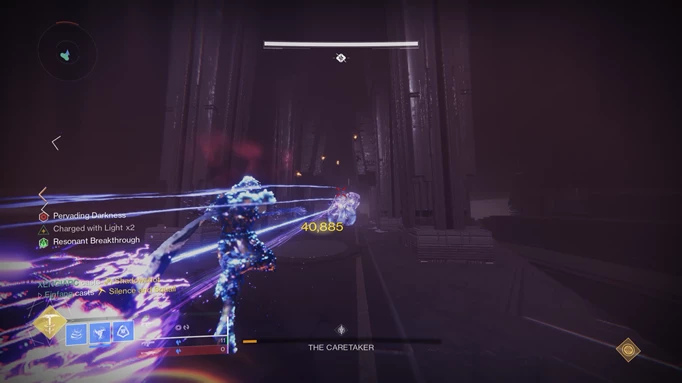
After all four of his crit spots have been shot, he will move around the arena quicker but at this point he can take damage. This is when you hit as hard as you can with high-damage weapons and Supers whilst avoiding his dash attacks, beams and kicks. After a short window, he will fall to his knees and become immune once more.
 Click to enlarge
Once Rhulk has immune status you should quickly return down the stairs to the entrance to the arena. After a short while the forcefield will return and can throw you from the arena if you haven’t been quick enough to leave. From the opening to the encounter you will then repeat the process of identifying the symbols and dunking Emanating Force to make your way back to the damage area. You can repeat this up to three times - you’ll know you’re on your last chance when a red ‘ENRAGE IS NEAR’ message appears on screen. If you don’t finish off Rhulk’s health at this stage, it’s a wipe and the encounter must be repeated.
Destiny 2 Vow Of The Disciple Raid Guide: Rhulk's Final Stand
 Click to enlarge
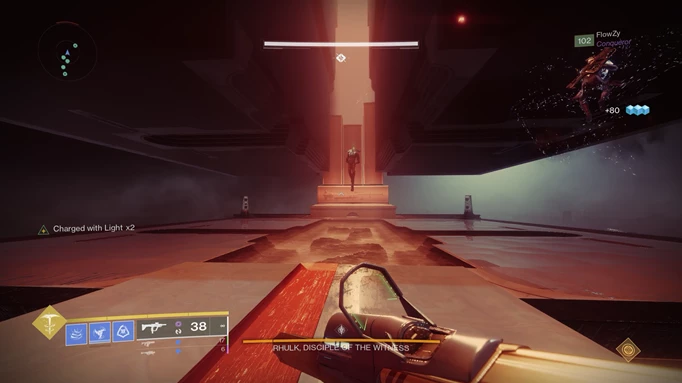
Once you’ve done enough damage, Rhulk will enter a final stand phase where Pervading Darkness will begin to stack, up to a maximum of 10 before the entire team wipes. Save your Supers and Heavy ammo for this final stand moment, as doing a lot of damage very quickly is key to a successful raid clear.
Our fireteam approached this dilemma by deliberately not entering final stand on the second damage phase. Instead, we returned to the lower arena area and completed another phase of the Emanating Force depositing in order to maximise ammo and give Supers a chance to recharge. Just keep an eye on his health bar and don’t take it too close to the final stand divider to make the most of this.
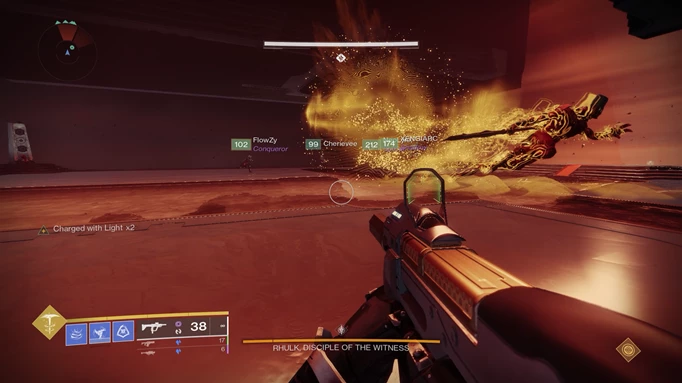
 Click to enlarge
Once you’ve hit him hard enough and killed him, that’s the Vow of the Disciple raid complete. If you’ve chosen to complete the secret code you’ll get a second chest here with a guaranteed red border weapon, but you can only get one of these per week per account.
Interacting with Rhulk’s glaive will also open a menu to purchase weapons and armour you’ve already unlocked, and the first weapon purchase you make each week will again be a guaranteed red border weapon which is invaluable if you’re planning to craft any of these weapons down the line. You’ll need five red border weapons to unlock each crafting pattern.
 Click to enlarge
The Master version of Vow of the Disciple adds Adept versions of the raid weapons to incentivise you to complete it at this much higher difficulty. For those of us missing Contest Mode (no, really…) this is a really exciting addition to the Destiny universe. If you love to put yourselves through immense amount of pain, there are also the Challenges for the Vow of the Disciple raid which rotate weekly, such as the Destiny 2 Caretaker Challenge and Destiny 2 Defenses Down challenges.
 Click to enlarge
- Approach the forcefield and shoot the crystal to start the encounter
- Designate players to collect Leeching Force and in turn Emanating Force
- Defeat the Glyph Keepers and find the symbol in common between the two sets
- Find and call out the obelisks with the matching symbol
- Guardians with Emanating Force deposit the de-buff at the obstacles
- Repeat this six times to reduce the force field and enter the damage area
- Shoot Rhulk’s glaive to get Leeching Force
- Call out the symbol, have one Guardian get Emanating Force and deposit it at the correct obelisk
- Attack Rhulk’s glowing crit spot each time this is done to enter damage phase
- Deal damage to Rhulk until he becomes immune, and then go back downstairs to repeat the process
- Defeat Rhulk during the final stand
- Brag heavily about making it through Destiny’s most complex raid yet - congratulations