Valheim Beginner's Guide - How To Start From Workbench To Eikthyr

Perhaps you found yourself disappointed at the releases of games from major game developers in 2021 and you wouldn’t be alone in that feeling. Once again, indie developers are coming to the rescue with the Swedish team from Iron Gate Studios putting out the charming survival and exploration game Valheim. Overnight, the game became a Steam smash-hit of arguably last-power due to its deep tech tree, procedurally generated worlds, and the ability to go on vast adventures with friends.
Due to its complexity, there is a lot to learn, and you’re definitely not alone in finding the initial accessibility of its game systems unintuitive and slightly overwhelming. Much like the raven which you will frequently encounter upon unlocking new technology, we are here to lend a helping hand in guiding you through Valheim’s systems to smoothly guide you into the mid and late-game during which the real fun begins.
Valheim seeds - Why you might want to choose your world before you even begin
Being airdropped into the 10th World after Odin’s Valkyries have deemed you one of the finest Viking warriors to add to his collection in Midgard, you are dropped into a randomly generated world. Much like Minecraft, which it generally shares some similarities with, the game allows you to use a seed to play specific maps that other people might have deemed interesting. In Valheim, this is arguably more important than in Minecraft, as the initial stone circle become a centre point of your map, from which the strength of your opponents is calculated. The further away you are from it, the harder opponents become and the better equipment you will need. Naturally, different biomes have different shares of basic resources, making each individual starting location’s challenges unique.
Valheim seeds like “wVJCZahxX8” will start you next to a spawn which brings its challenges and will likely require you to quickly build moat-like structures around your camp in order to be left alone from swamp creatures.
If you’re looking for an easier time to start off with, “JXGZpTsizn” puts you in the meadows with a large chunk of rather easily accessible meat and leather to gather quickly.
All seeds have their advantages and disadvantages, and in the grand scheme of things, the differences between them will eventually be minuscule as your gear improves and you learn your way in the world.
Next steps - Valheim workbench and shelter
Once you’ve spawned into your new world, you want to start picking up resources as you find them. In general, the soundest advice we found is to reactivate that gather-hunter part of your brain and simply collect resources as you encounter them. Sure, some of the goods can be actively sought after, but especially in the beginning, it’s much easier to pick up stones, wood, and food the likes of berries while running past them indiscriminately. At least initially, the inventory system of Valheim is fairly forgiving, and you won’t have to care for the weight of your Valheim items likely for the first hour of play.
Upon having gathered sufficient amounts of wood and stone, we advise to start crafting tools starting off with the stone axe and the hammer (8 x Wood and 6 x Stone total). The axe will allow you to cut down larger trees, though not all. Birches, for instance, remain diamond pressed pillars your initial tools won’t be able to fell for some obnoxious reason.
 Click to enlarge
Upon gathering further wood, let us say 20 or so, you are ready to start building your first sheltered base. If you’ve found an abandoned house while you were gathering goods, you may also decide to save a couple of wood and take it over.
In Valheim, workbenches are required for your to base build, drawing a circle around their location in which you are able to place items. Once the workbench is placed, the game will require you to build a roof over it to interact with it further. To start out the best building tip is not to overextend yourself in the size of your initial setup as a three by three or even a three by two ground floor tiled house is entirely sufficient for now.
To build in Valheim, take your Hammer into your hand and right-click. Scroll through the menu for the desired item and select it. If the direction it is pointing it needs adjustment, moving the scroll wheel will turn it for you.
If you haven’t merely moved into an abandoned house, you will need to erect one yourself. The game comes out of the box with handy tile snapping helping you to not leave ugly gaps in your buildings. Once the workbench has a rough over its head, you may access it to craft more advanced items, and you can progress through the tech tree in the early stages of the game by upgrading your workbench.
Can Valheim Be Played Solo?
Valheim is fully playable solo and provides a decent experience when doing so. All enemies and bosses are beatable with the right strategy, and there are no mechanics or tools that require more than one person to operate. That said, not only is everything more fun when playing with friends, it can’t be understated just how much slower the process of gathering materials and moving forward in the tech tree is. Unfortunately, there is no discount for singles in Valheim. For instance, one furnace of one kiln is enough to sustain a small group of players; you will still need to get the same resources for these building as a solo player, which takes a considerable amount of time. Fortunately, you are able to transfer your character and everything they are carrying onto different worlds, so you aren’t losing all progression if you were to decide to switch from solo play to team play.
How do you upgrade a workbench?
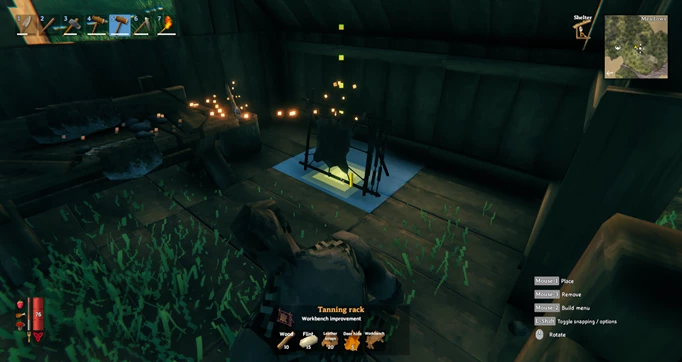
Upgrading a workbench in Valheim is another unfortunately counter-intuitive task that is luckily quickly explained. The initial two upgrades for the workbench unlock by placing a tanning rack or a chopping block in close proximity to the workbench which needs to be located still inside your house.
In order to see if you are doing it right, once again select the hammer, choose one of the aforementioned stations and hover their placement. For a successful built, you will need to see two things. A yellow beam firing straight up into what needs to be another roof above it and a more orange wiggling duts trail which connects to the workbench. Here is what it should look like for the tanning rack.
 Click to enlarge
Valheim Repair - If It’s Broke, Go Fix It
Another major benefit to the workbench is the ability to repair items which, unfortunately, is placed in an easily overlooked position on the UI. Once you have set up your workbench under a roof, go interact with it pressing E on your keyboard. On top of the items you are able to craft with the resources in your inventory, you will also get a list of upgrades to existing items.
Currently, there are two ways to fix an item in the game. The first one is to upgrade the items which will restore their full durability. The other one is located on the left-hand side of the crafting and upgrade window in the form of a hammer which one simply has to click in order for the workbench to cycle through the items in need of repairing. Most importantly, repairing does not consume any resources, making crafting more tools than one only useful in rare cases.
 Click to enlarge
Finding rarer resources in Valheim like flint, leather, and deer hide
As you might have noticed, Valheim’s items need increasingly more advanced resources like flint, leather, and deer hide to build, likely requiring you to go on your first adventure.
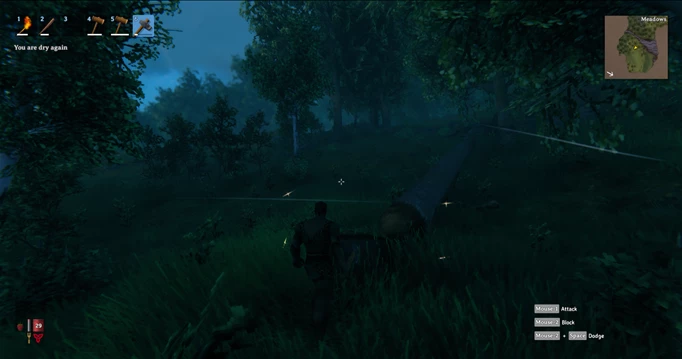
The first type of rarer resource you might have encountered while you were gathering the items for the initial base built are animal products. Valheim’s boars are easier to catch as they sometimes attack don’t run away as quickly, making them an excellent source of your first meal (which we will come to later). The stone axe is a sufficient tool to dispose of them, but a club might help as well as will run up your maintenance cost for new tools at a lower price point of resources.
Deer are more tricky as they beeline away for you and will generally outrun you on open territory. While you might want to try your luck with them, you will likely need to at least have a full stomach for your stamina to allow you to chase them. Moreover, a flint knife does wonders when chasing them, killing them most of the time with two quick blows. However, in order to craft your flint knife, you will first have to find the primary resource to do so.
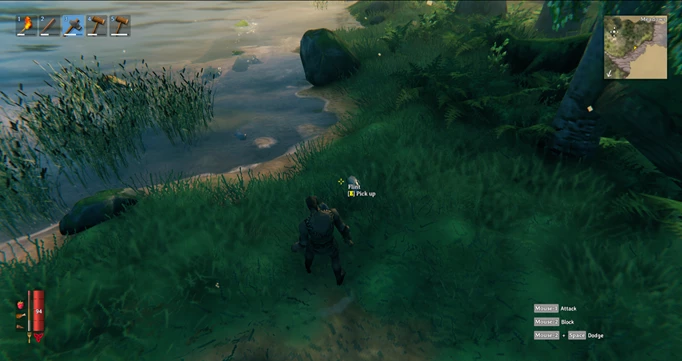
In Valheim, flint is found mainly next to bodies of water either in the form of lakes, rivers, or the shore. They’re easily mistaken for stones but are shaped slightly differently and flash in a brighter tone. Often, they will even be submerged in water or are hidden in thick reed at the shoreline. Generally speaking, once you’ve found a body of water, you will be able to quench your initial thirst for flint with only two or three minutes of dedicated farming, likely also putting you in contact with yummy creatures like the Necks whose parts may also be cooked up.
 Click to enlarge
The importance of a good meal - Valheim cooking
Once again, Valheim is a little extra with the way its systems work, introducing mechanics to food which are paramount to master in order to progress.
As such, in Valheim, cooking is tied directly to your characters health points, stamina, and its healing rate which stack up to three different foods of different strength. While you will be able to create more advanced dishes later on, the food available to you initially is likely to be Valheim’s mushrooms, berries, various types of meats, and honey.
Some foods, like berries and mushrooms, can be eaten raw and immediately upon pickup but their upside is limited, giving you only limited amounts of HP, stamina, and healing. Much better payoff are cooked meats, requiring to first hunt an animal and then roast it over a campfire.
Placing Valheim’s workable kitchen is easy enough by placing a cooking station preferably close to your house first. Once set, build a campfire directly under the structure and light it on fire using the wood you’ve gathered to maintain the flame.
The cooking station comes with two slots to hang meat on which will sizzle above the fire for a couple of seconds. Once you hear a crackling hissing sound, the meat is done and ready for consumption. While Valheim’s boards and deer share the same meat type, Neck’s offer their unique tails to be gnawed on, and take up a different slot.
This is especially important because the game’s food system is based around a system of a maximum of three food buffs to your health points, stamina, and regeneration, and especially in the early game, Neck’s sit second in line for the best food available to you while cooked meat sits at a solid first, giving more stats points than the lizard tails. The meat foot buffs have a duration of ten minutes, so bringing a couple along on your journeys is recommended.
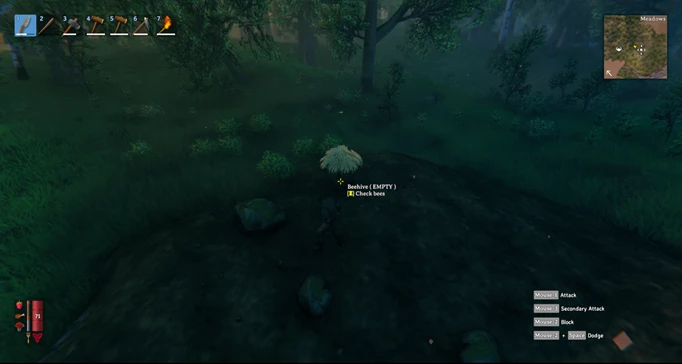
Surprisingly, the third-best available food option at the start of the game is honey, a slightly more challenging source to find as it can only be found attached to old ruins often above ground which will require you to jump and hit the hive. Upon destroying it, you will receive honey as well as the queen bee, allowing you to re-erect the hive wherever you wish with the most advantageous location, of course, being in your main camp. While the bees will poison you, the damage is moderate and staked with both a tail and meat food buff; you shouldn’t ever run into real trouble.
 Click to enlarge
Valheim and the art of archery
The likely best next step to proceed towards advanced tech is to gear up with a crude bow and arrows. By now, you should be getting close to the required eight leather scraps. Using your first scraps on the bow should pay for itself, allowing you to much more easily hunt deer with higher success rate and less time required. Because you have likely been fighting a plethora of Greylings who all drop Resin, crafting burning arrows shouldn’t put as much of a dent in your resources in comparison to flint arrows.
With newfound range, you may venture out further taking more risks and bringing on more valuable treasure.
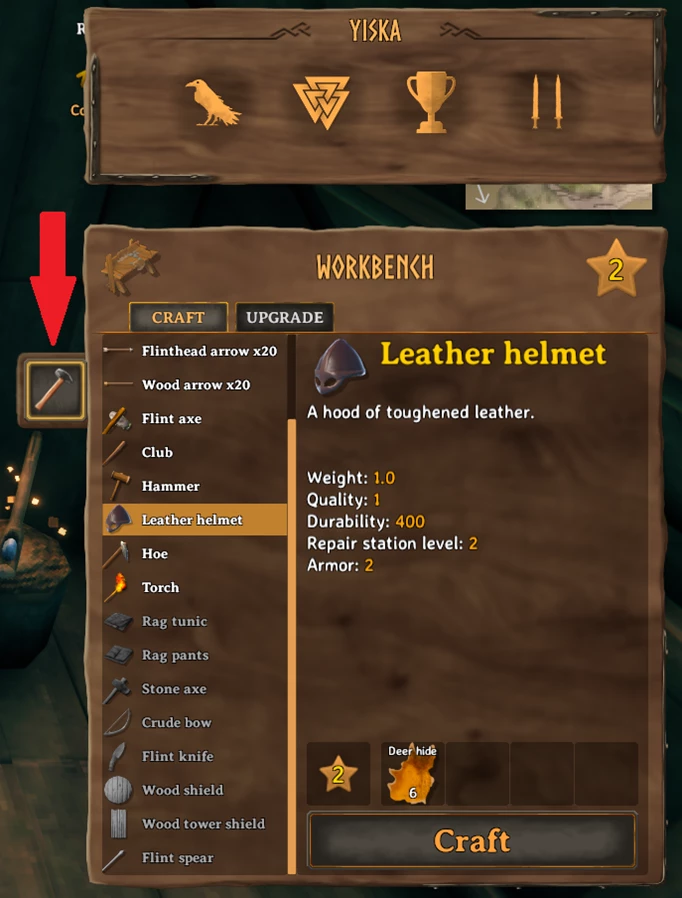
Valheim Armor - Leather Helmet, pants and Tunic
The last set of items on the checklist before you can feasibly challenge the first boss in Valheim are the leather armour pieces which will be available for crafting. Unfortunately, there is no way around attaining those than going on the prowl for a lot of deer, but due to your bow and arrows, it should now be a much quicker procedure than it was previously. It’s not absolutely required to craft all of these items in order to challenge the first boss as he’s definitely beatable before then. The process of grinding for leather will make sure that you will have the two deer trophies required to summon the boss at the altar that you likely have found by then.
Fighting Valheim’s First Boss Eikthyr
As the last step in our beginner’s guide, we challenge Eikthyr, the first boss of many in Valheim. Defeating bosses are required for you progress down the tech tree as they unlock new recipes to craft. For Eikthyr, the most important drop are the hard antlers, which allow you to craft your first pickaxe and progress into the metal stage of the game.
The fight itself is fairly straight forward and is best fought with a bow and plenty of arrows. Honey, due to its quick healing as well as meat and neck tails are advised to be running to make the fight run as smooth as possible. Try to dodge and avoid him as much as possible while keeping track of your stamina. Unfortunately, outranging him entirely will significantly drop the amount of damage you deal with your arrows, so staying in a medium and effective range is advised.
Once defeated, make sure that you bring his trophy too, as it will be important to progress through the next stages of the game. With your first boss now slain, you’ve learned the basics of the game and are ready to explore the rich depth Valheim offers to its players. Maybe bring a friend along?
Images via Iron Gate Studios